Sony RDR-GX7 Operating Instructions - Page 91
Using the Setup Displays, Settings and Adjustments, To turn off the display
 |
View all Sony RDR-GX7 manuals
Add to My Manuals
Save this manual to your list of manuals |
Page 91 highlights
Settings and Adjustments Using the Setup Displays The Setup Displays are used in the following way. Note Playback settings stored in the disc take priority over the Setup Display settings, and not all the functions described may work. c Press M/m to select "Settings," "Video," "Audio," "Features," "Options," or "Easy Setup," then press ENTER. The selected Setup Display appears. Example: "Video" SETUP Settings Video Audio Features Options Easy Setup TV Type : 4 : 3 Letter Box Pause Mode : Auto Component Black Level : On Progressive Mode : Auto Line1 Input : Video Line3 Input : Video SYSTEM MENU RETURN
-
 1
1 -
2
-
3
-
4
-
5
-
6
-
7
-
8
-
9
-
10
-
11
-
12
-
13
-
14
-
15
-
16
-
17
-
18
-
19
-
20
-
21
-
22
-
23
-
24
-
25
-
26
-
27
-
28
-
29
-
30
-
31
-
32
-
33
-
34
-
35
-
36
-
37
-
38
-
39
-
40
-
41
-
42
-
43
-
44
-
45
-
46
-
47
-
48
-
49
-
50
-
51
-
52
-
53
-
54
-
55
-
56
-
57
-
58
-
59
-
60
-
61
-
62
-
63
-
64
-
65
-
66
-
67
-
68
-
69
-
70
-
71
-
72
-
73
-
74
-
75
-
76
-
77
-
78
-
79
-
80
-
81
-
82
-
83
-
84
-
85
-
 86
86 -
 87
87 -
 88
88 -
 89
89 -
 90
90 -
 91
91 -
 92
92 -
 93
93 -
 94
94 -
 95
95 -
 96
96 -
97
-
98
-
99
-
100
-
101
-
102
-
103
-
104
-
105
-
106
-
107
-
108
-
109
-
110
-
111
-
112
 |
 |

91
Using the Setup Displays
Settings and Adjustments
Using the Setup Displays
The Setup Displays are used in the following way.
Note
Playback settings stored in the disc take priority over the Setup Display
settings, and not all the functions described may work.
a
Press SYSTEM MENU while the recorder is
stopped.
The System Menu appears.
b
Press
M
/
m
to select “SETUP,” then press
ENTER.
The Setup Display appears.
c
Press
M
/
m
to select “Settings,” “Video,”
“Audio,” “Features,” “Options,” or “Easy
Setup,” then press ENTER.
The selected Setup Display appears.
Example: “Video”
d
Press
M
/
m
to select the item you want to set
up, then press ENTER.
Available options for the item appear.
Example: “TV Type”
Some items display a dialogue box that provides
further detailed settings.
Example: The following dialogue box appears when
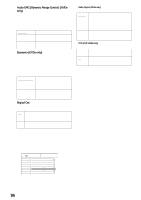
“Parental Control” in Features Setup is selected.
In this case, see “Parental Control” in “
Features
Settings
”
(page 97)
.
e
Press
M
/
m
to select an option, then press
ENTER.
The set option is displayed next to the setup item.
Example: when “16:9” is set.
To turn off the display
Press SYSTEM MENU repeatedly.
<
/
M
/
m
/
,
,
ENTER
RETURN
SYSTEM MENU
TITLE LIST
TIMER
TIMER LIST
DV/D8 EDIT
SETUP
Plays/erases/edits recorded titles.
SYSTEM
MENU
DVD Recorder
Dual RW
Compatible
SETUP
Settings
Video
Audio
Features
Options
Easy Setup
Tuner Preset
Set VCR Plus+ Channels
Clock
Language
Settings
Video
Audio
Features
Options
Easy Setup
TV Type :
Pause Mode :
Component Black Level :
Progressive Mode :
Line1 Input :
Line3 Input :
4 : 3 Letter Box
Auto
On
Auto
Video
Video
SETUP
Settings
Video
Audio
Features
Options
Easy Setup
SETUP
TV Type :
Pause Mode :
Component Black Level :
Progressive Mode :
Line1 Input :
Line3 Input :
4 : 3 Letter Box
On
Auto
Video
Video
16 :
9
4 : 3
Letter Box
4 : 3
Pan Scan
Features - Parental Control
Enter your password.
OK
Cancel
Settings
Video
Audio
Features
Options
Easy Setup
SETUP
TV Type :
Pause Mode :
Component Black Level :
Progressive Mode :
Line1 Input :
Line3 Input :
16 : 9
Auto
On
Auto
Video
Video