Sony TA-E2000ESD Primary User Manual - Page 28
Listening, to/WatChing, Program, Sources
 |
View all Sony TA-E2000ESD manuals
Add to My Manuals
Save this manual to your list of manuals |
Page 28 highlights
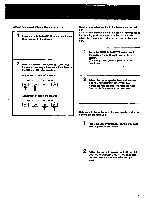
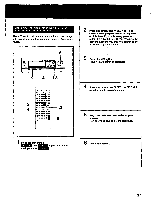
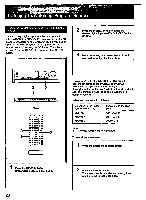
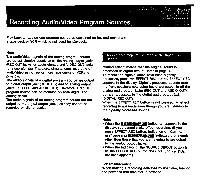
• a • - 14,Tflt.f.f • ,n'A,4. wAJrif 7, to, 921,ii" .3r; Ago • Listening to/WatChing Program Sources Assigning Digital Audio Input to an Input Select Button You can assign digital input to either analog input button (VIDEO 1 to PHONO). For example, when the CD player is connected to the OPTICAL1 jack, if you assign OPTICAL1 to the CD button, the CD player will be selected only by pressing the CD button. Thus there is no need to select OPTICAL1 by pressing the DIGITAL button. 2 Press the DIGITAL button to select the desired digital Input-OPTICAL1, OPTICAL2 or COAXIAL 3 Press the analog input select button to which you want to assign the digital input. 0 0 0 =I O •O om OO CI ®® CLEAR . - _GZIGt U -ci CIO GB CO CO CO CEI CO O03 Oa MI CO 00 CEI CII CI O ===== OO 3 O O O O 2 O O O O O O OO O O O O GO CO CO CO O O Or O O O =CO CO a 0 O IZI CO a • Analog input indication (VIDEO 1 to PHONO) still appears but either of the DIGITAL1 to DIGITAL3 indication also appears in the upper right. Specifying a title for the input select button will make it easy to distinguish what the button is assigned to. (Refer to page 45.) Indications correspond as follows. Indication in the upper right of the display DIGITAL1 DIGITAL2 DIGITAL3 Indication on the rear panel OPTICAL1 IN OPTICAL2 IN COAXIAL IN Note In MIX mode, assignment is impossible. To cancel the assignment 1 Press the analog input select button. 1 Press the MEMORY button. MEMORY appears in the display. 28 2 Press the CLEAR button. The assignment is canceled and analog input returns to the previous condition.
-
 1
1 -
2
-
3
-
4
-
5
-
6
-
7
-
8
-
9
-
10
-
11
-
12
-
13
-
14
-
15
-
16
-
17
-
18
-
19
-
20
-
21
-
22
-
 23
23 -
 24
24 -
 25
25 -
 26
26 -
 27
27 -
 28
28 -
 29
29 -
 30
30 -
 31
31 -
 32
32 -
 33
33 -
34
-
35
-
36
-
37
-
38
-
39
-
40
-
41
-
42
-
43
-
44
-
45
-
46
-
47
-
48
-
49
-
50
-
51
-
52
-
53
-
54
-
55
 |
 |
