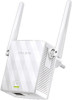
TP-Link TL-WA855RE TL-WA855RE V1 User Guide
TP-Link TL-WA855RE Manual
 |
View all TP-Link TL-WA855RE manuals
Add to My Manuals
Save this manual to your list of manuals |
TP-Link TL-WA855RE manual content summary:
- TP-Link TL-WA855RE | TL-WA855RE V1 User Guide - Page 1
1910011428 REV 1.0.0 - TP-Link TL-WA855RE | TL-WA855RE V1 User Guide - Page 2
subject to change without notice. is a registered trademark of TP-LINK TECHNOLOGIES CO., LTD. Other brands and product names are , transformation, or adaptation without permission from TP-LINK TECHNOLOGIES CO., LTD. Copyright ©2015 TP-LINK TECHNOLOGIES CO., LTD. All rights reserved. http://www - TP-Link TL-WA855RE | TL-WA855RE V1 User Guide - Page 3
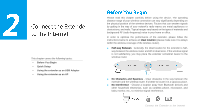
1 Button and Port Explanation 2 Positioning the Extender 2 Connect the Extender to the Internet 3 Before You Begin 3 Quick Setup 4 Option One: Using WPS (Wi-Fi Protected Setup 4 Option Two: Using Web Browser 5 Using the extender as an USB Adapter 9 Using the extender as an AP 9 Set the - TP-Link TL-WA855RE | TL-WA855RE V1 User Guide - Page 4
This chapter covers the following topics: LED Explanation Button and Port Explanation Positioning the Extender RE Button LED RESET Ethernet Port Statue On Blinking Off Color Indication Green Orange Red Green -- The extender is connected to the router, and is in a good location. The - TP-Link TL-WA855RE | TL-WA855RE V1 User Guide - Page 5
(Range Extender/WPS) Button: If your Wireless router supports WPS function, you can press the WPS button and then press the RE button of the extender to establish a secure connection between the wireless router and the extender. RESET: This button is used to restore the extender's factory - TP-Link TL-WA855RE | TL-WA855RE V1 User Guide - Page 6
of the extender, please follow the instructions below to achieve an ideal location (please make sure it is always within the wireless coverage of the wireless router). ● Half-way Between Generally, the ideal location for the extender is half- way between the wireless router and Wi-Fi dead zone - TP-Link TL-WA855RE | TL-WA855RE V1 User Guide - Page 7
router should support WPS. Otherwise, please use Option Two: Using Web Browser. Power On Plug in next to your router. Connect Press the WPS button on your router. For more information about using WPS on your router, please refer to the router manufacturer's user guide. Connect the Extender to the - TP-Link TL-WA855RE | TL-WA855RE V1 User Guide - Page 8
Web Browser. Some ISP gateways disable the WPS function by default, if the WPS method fails, please use Option Two: Using Web Browser. Relocate Plug the extender into an electrical outlet about halfway between your router (Host Network) and the Wi-Fi dead zone. Wait about 1 minute until the LED is - TP-Link TL-WA855RE | TL-WA855RE V1 User Guide - Page 9
the Wi-Fi icon on the taskbar and connect to the extender's network (e.g. TP-LINK_Extender_XXXXXX). Configure Launch a web browser on your computer and type http://tplinkrepeater.net into the URL field, and use admin (all lowercase) for both username and password to log in. Connect the Extender to - TP-Link TL-WA855RE | TL-WA855RE V1 User Guide - Page 10
Create a new username and password to log in the web management page, then click Confirm. Select your region and time zone, then click Next Per FCC regulations, all Wi-Fi products marketed in the U.S. are fixed to the U.S. region. Connect the Extender to the Internet - TP-Link TL-WA855RE | TL-WA855RE V1 User Guide - Page 11
host network and enter the password, then click Next. Either copy the host's SSID or customize it for the extended 2.4GHz network, then successful connection. Relocate Plug the extender into an electrical outlet about halfway between your router (Host Network) and the Wi-Fi dead zone. Wait about 1 - TP-Link TL-WA855RE | TL-WA855RE V1 User Guide - Page 12
network shares the same Wi-Fi password as your host network, but may have different wireless network name if you customize the name during the configuration. The extender can be used as a wireless adapter to connect any Ethernetenabled device, such as a Blu-ray player, game console, DVR, or smart - TP-Link TL-WA855RE | TL-WA855RE V1 User Guide - Page 13
Change the SSID and Password (Optional) Go to Settings > Wireless > Wireless Settings page, configure the extender as the picture shows below, and click Save. Network Name (SSID): Set a SSID is selected, Select the security version. WPA2-PSK is recommended. Connect the Extender to the Internet - TP-Link TL-WA855RE | TL-WA855RE V1 User Guide - Page 14
extender operates in 802.11n mode, because TKIP is not supported by the 802.11n specification and the WPS function. Enter a new password in the Password can connect your wireless devices to the extender (AP)'s wireless network by WPS. For detailed instructions, please refer to Connect your devices to - TP-Link TL-WA855RE | TL-WA855RE V1 User Guide - Page 15
AP. Enable the AP's PIN. The current PIN code of the AP is displayed here, you can click Generate to get a new one. Connect the Extender to the Internet - TP-Link TL-WA855RE | TL-WA855RE V1 User Guide - Page 16
On your client device, enter the AP's PIN code. When the AP (extender)'s LED is solid on, the client device has successfully connected to the AP. Connect the Extender to the Internet - TP-Link TL-WA855RE | TL-WA855RE V1 User Guide - Page 17
, then go to Settings > Status page. You can view the network connection status in this page. ● The normal status. ● The extender is failed to connect to the wireless network of your router. ● The extender is connected to your router, but no transmitting data. Please check your host network. ● The - TP-Link TL-WA855RE | TL-WA855RE V1 User Guide - Page 18
, or obtain the DNS server address. Please check your host network. Instructions The wireless is on and encrypted. The wireless is on and unencrypted. Router:The wireless is off, or the connection is failed. / Extender:The wireless is off. / The icons are selected. 1. Launch a web browser - TP-Link TL-WA855RE | TL-WA855RE V1 User Guide - Page 19
the following topics: Extend another Network Customize the Extended SSID Secure the Extended Network Change Wi-Fi Coverage Change the Extender's IP Address DHCP Server If you want to extend another network, you can refer to the following steps to finish it quickly. 1. Launch a web - TP-Link TL-WA855RE | TL-WA855RE V1 User Guide - Page 20
Network) and the Wi-Fi dead zone. Wait about 1 minute until the LED is lit with a solid green. If not, relocate the extender closer to the router to achieve a good (or better) signal quality. Enjoy! The extender shares the same wireless network name (SSID) and wireless password as your host network - TP-Link TL-WA855RE | TL-WA855RE V1 User Guide - Page 21
.net, then go to Settings > System Tools > Admin Account page. 2. Create a new username and password as shown in the figure below. 3. Select the Hide SSID broadcast checkbox if you want to hide the extender's SSID from the wireless devices. If you want to connect to the hiden SSID, please enter the - TP-Link TL-WA855RE | TL-WA855RE V1 User Guide - Page 22
not allowed to connect to the extender. 1. Launch a web browser and log into http://tplinkrepeater.net, then go to Settings > Advanced Settings > Access Control page. 2. Click the button to enable the Access Control function. 3. Select Blacklist as default access mode, then click Save. select them - TP-Link TL-WA855RE | TL-WA855RE V1 User Guide - Page 23
are allowed to connect to the extender. 1. Launch a web browser and log into http://tplinkrepeater.net, then go to Settings > Advanced Settings > Access Control page. 2. Click the button to enable the Access Control function. 3. Select Whitelist as default access mode, then click Save. (2) Enter - TP-Link TL-WA855RE | TL-WA855RE V1 User Guide - Page 24
Time. If you select Cannot access based on the time time schedule Wi-Fi Coverage Launch a web browser and log into http://tplinkrepeater.net, then go to Settings > Advanced Settings > Wi-Fi Coverage page. You can adjust the Wi-Fi coverage by three levels according to your need. Manage the Extended - TP-Link TL-WA855RE | TL-WA855RE V1 User Guide - Page 25
Settings > Network page. 2. Select Use the following IP address, then enter the IP address and gateway manually. Change the Extender's IP Address By default, the extender is set to obtain an IP address automatically from the front router. If you want to use a specific IP address appropriate to your - TP-Link TL-WA855RE | TL-WA855RE V1 User Guide - Page 26
Network page. 2. The DHCP server is set to be auto by default, and the function will automatically be turn on or off according to manually. IP Address Pool: The start address and end address must be on the same subnet with LAN IP. Your extender will assign addresses within this specified range - TP-Link TL-WA855RE | TL-WA855RE V1 User Guide - Page 27
. Lease Time: The time duration that the IP address is leased to the DHCP client. Click Refresh to refresh the DHCP Client List. Manage the Extended Network and Security Settings - TP-Link TL-WA855RE | TL-WA855RE V1 User Guide - Page 28
topics: Power Schedule Time Settings Daylight Saving Time LED Control Firmware Upgrade Backup & Restore Factory Default Restore System Log Reboot Logout For power-saving purpose, you can power off the extender according to the preset time schedule by enabling this power schedule - TP-Link TL-WA855RE | TL-WA855RE V1 User Guide - Page 29
when daylight saving time ends at your local time zone. (4) Click Save. LED Control can turn off the LED at the specific time. The extender can still work normally after the LED is off. 1. Launch a web browser and log into http://tplinkrepeater.net, then go to Settings > System Tools > LED Control - TP-Link TL-WA855RE | TL-WA855RE V1 User Guide - Page 30
settings. 1. On your computer, download the latest firmware file from our support page at http://tp-link.com. 2. Launch a web browser and log into http://tplinkrepeater.net, then go to Settings > System Tools > Firmware Upgrade page. 3. Make sure the firmware version you downloaded is same as the - TP-Link TL-WA855RE | TL-WA855RE V1 User Guide - Page 31
page. 2. Click Factory Restore to reset your extender to its factory default settings. Factory Restore will erase all settings that you have configured for the extender. To re-login to the extender's management page, use the default admin for both username and password. Please DO NOT power off the - TP-Link TL-WA855RE | TL-WA855RE V1 User Guide - Page 32
in txt file to your computer. 1. Launch a web browser and log into http://tplinkrepeater.net. 2. Click Reboot on the top right corner to reboot the extender. If you have logged into the web management page http://tplinkrepeater.net, click Logout in the top right corner to log out safely. Manage the - TP-Link TL-WA855RE | TL-WA855RE V1 User Guide - Page 33
Password IP Address Subnet Mask Domain SSID Wireless Security Access Control Status admin admin 192.168.0.254 255.255.255.0 http://tplinkrepeater.net TP-LINK_Extender_XXXXXX Disabled Disabled T1. How do I restore my extender to its factory default settings? There are two ways to reset the extender - TP-Link TL-WA855RE | TL-WA855RE V1 User Guide - Page 34
refer to previous T1. 2. Use the default username and password (admin, admin) to log in to the web management page. 3. Reconfigure your extender, including the login password, by following the instructions of this guide. T3. What can I do if I cannot access the web management page? ● Verify all - TP-Link TL-WA855RE | TL-WA855RE V1 User Guide - Page 35
access the Internet, either via TL-WA855RE or without. T6. Will the extender work if I connect the ETHERNET port of it to the router via Ethernet cable? Sorry, it won't work. The extender speed will be decreased. TP-LINK recommends that you connect to the extender when your home network connection - TP-Link TL-WA855RE | TL-WA855RE V1 User Guide - Page 36
Range Extender - A wireless LAN transceiver or "base station" that can connect a wired LAN to one or many wireless devices. Access points can also bridge to each other. ● Domain Name System - An Internet Service 802.1x support and requires a RADIUS server in order to implement. The Wi-Fi Alliance - TP-Link TL-WA855RE | TL-WA855RE V1 User Guide - Page 37
"passphrase" as with WEP. But, using TKIP, WPA-Personal automatically changes the keys at a preset time interval, making it much more difficult for hackers to find and exploit them. The Wi-Fi Alliance will call this, WPAPersonal. Appendix - TP-Link TL-WA855RE | TL-WA855RE V1 User Guide - Page 38
to provide reasonable protection against harmful interference in a residential installation. This equipment generates, uses and can radiate radio frequency energy and, if not installed and used in accordance with the instructions, may cause harmful interference to radio communications. However - TP-Link TL-WA855RE | TL-WA855RE V1 User Guide - Page 39
subject to general authorisation by the respective service provider. 1. SRD with FHSS modulation 1.1. Maximum 2.5 mW e.i.r.p. 1.2. Maximum 100 mW e.i.r.p. Permitted for use SRD for outdoor applications without restriction on installation height only for purposes of gathering telemetry information - TP-Link TL-WA855RE | TL-WA855RE V1 User Guide - Page 40
radiator & your body. Cet équipement est conforme aux limites d'exposition aux rayonnements IC établies pour un environnement non contrôlé. Cet équipement doit être installéet utiliséavec un minimum de 20 cm de distance entre la source de rayonnement et votre corps. Complies with the Canadian ICES - TP-Link TL-WA855RE | TL-WA855RE V1 User Guide - Page 41
source. ● Don't disassemble the product, or make repairs yourself. You run the risk of electric shock and voiding the limited warranty. If you need service, please contact us. ● Avoid water and wet locations. This product can be used in the following countries: AT BG BY CA CZ DE DK EE - TP-Link TL-WA855RE | TL-WA855RE V1 User Guide - Page 42
equipment: Product Description: 300Mbps Mini Wi-Fi Range Extender Model No.: TL-WA855RE Trademark: TP-LINK We declare under our own or other normative documents EN 300 328 V1.8.1 EN 301 489-1 V1.9.2 & EN 301 489-17 V2.2.1 EN 55022: 2010 + AC: 2011 EN 55024: 2010 EN 60950-1: 2006 + A11: 2009 +
-
 1
1 -
 2
2 -
 3
3 -
 4
4 -
 5
5 -
 6
6 -
 7
7 -
8
-
9
-
10
-
11
-
12
-
13
-
14
-
15
-
16
-
17
-
18
-
19
-
20
-
21
-
22
-
23
-
24
-
25
-
26
-
27
-
28
-
29
-
30
-
31
-
32
-
33
-
34
-
35
-
36
-
37
-
38
-
39
-
40
-
41
-
42
 |
 |

1910011428
REV 1.0.0