Thermador CIT367YGS Instructions for Use - Page 11
Operation
 |
View all Thermador CIT367YGS manuals
Add to My Manuals
Save this manual to your list of manuals |
Page 11 highlights
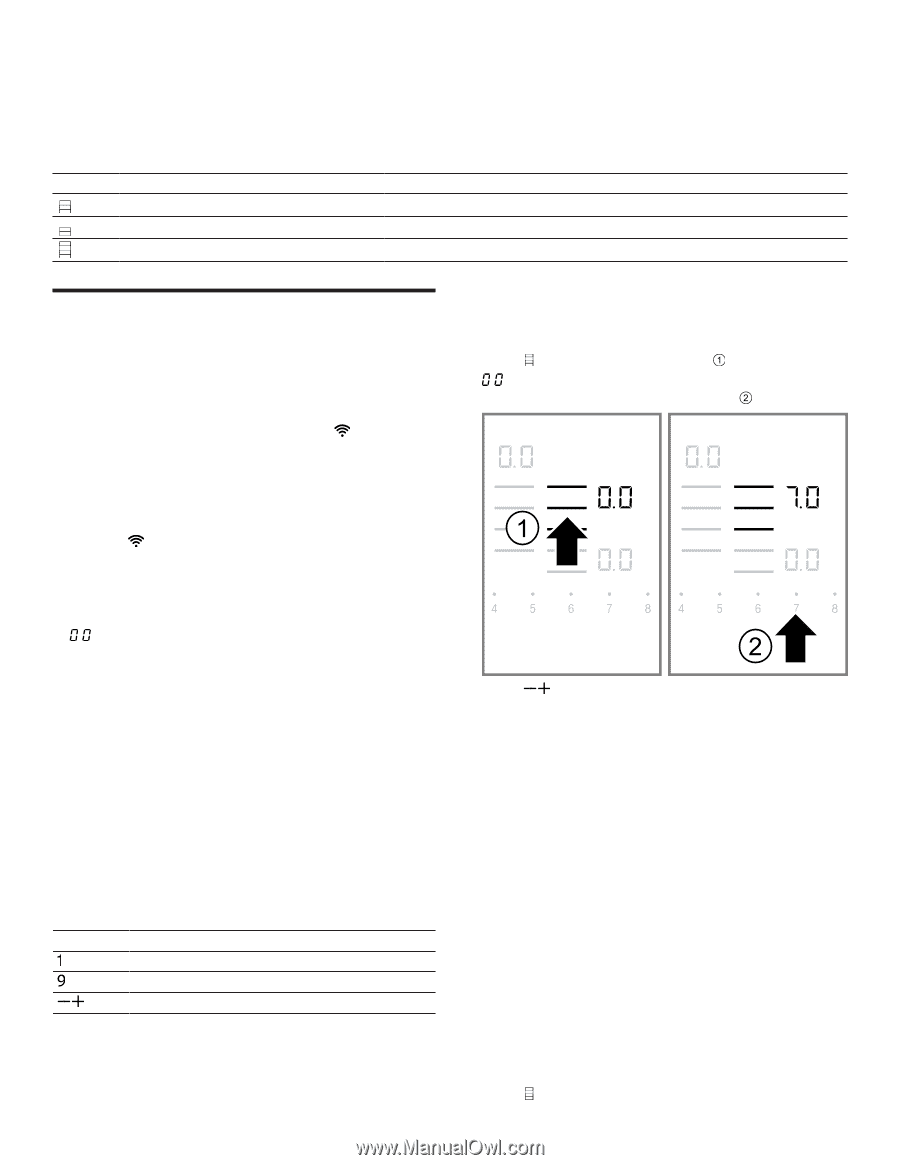
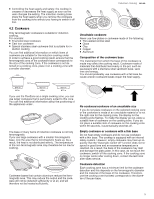
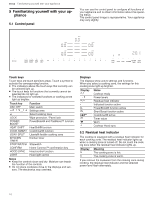
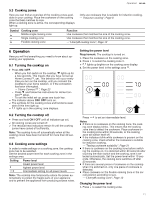
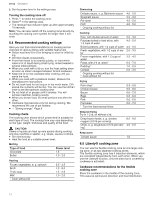
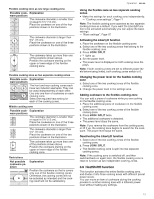
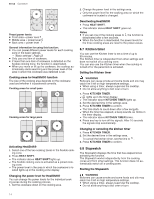
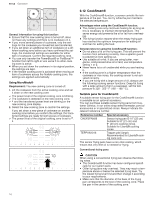
Operation en-us 5.3 Cooking zones Here you can find an overview of the cooking zones available on your cooktop. Place the cookware on the cooking zone that best matches its size. When a cooking zone is active, the corresponding displays light up. Only use cookware that is suitable for induction cooking. → "Induction cooking", Page 8 Symbol Cooking zone Middle single cooking zone Single cooking zone Flexible cooking zone Function Use cookware that matches the size of the cooking zone. Use cookware that matches the size of the cooking zone. → "Liberty® cooking zone", Page 12 Operation 6 Operation Operation Here you will find everything you need to know about operating your appliance. 6.1 Turning the cooktop on ▶ Press ON I OFF. ‒ When you first switch on the cooktop, lights up for a few seconds. This means that you have not set up Home Connect™, yet. This behavior will occur every time you turn on the cooktop, until you connect the cooktop to your home network, or if the connection has been interrupted. → "Home Connect™ ", Page 23 ‒ Press and follow the instructions for Home Connect™ setup. ‒ To exit the initial set-up, press any touch key. a The indicator above ON I OFF turns on. a The symbols for the cooking zones and functions avail- able at this time light up. a . lights up in the cooking zone displays. 6.2 Turning the cooktop off ▶ Press and hold ON I OFF until all indicators go out. a All cooking zones are turned off. a The residual heat indicators remain lit until the cooking zones have cooled off sufficiently. Note: The cooktop turns off automatically when all the cooking zones have been turned off for more than 20 seconds. 6.3 Cooking zone settings In order to make settings on a cooking zone, the cooking zone has to be selected. Set the desired power level for each cooking zone in the settings area. Setting Power level lowest power level highest power level Intermediate setting for all power levels Note: The cooktop may temporarily reduce the power automatically to protect the fragile parts of your appliance and to prevent the appliance from producing excess noise. Setting the power level Requirement: The cooktop is turned on. 1. Place the cookware on the cooking zone. 2. Press to select the cooking zone . a . lights up brighter on the cooking zone display. 3. Set the power level in the settings area . Press to set an intermediate level. Notes ¡ If there is no cookware on the cooking zone, the cook- ing zone display blinks. This means that the cooking zone tries to detect the cookware. Place cookware on the cooking zone within 30 seconds, or the cooking zone will switch itself off. ¡ If the indicators blink while cookware is present on the cooking zone, check whether the cookware is suitable for induction cooking. → "Testing cookware suitability", Page 31 ¡ If there is cookware on the cooking zone before switching the cooktop on, it is detected within 20 seconds after touching the main switch and the cooking zone is selected automatically. Set the power level within 10 seconds. Otherwise, the cooking zone switches off after 20 seconds. ¡ If there are several pieces of cookware on the cooktop when it is switched on, only one piece of cookware is detected. ¡ Place cookware on the flexible cooking zone in the correct position according to size. → "Liberty® cooking zone", Page 12 Changing the power level 1. Press to select the cooking zone. 11
-
 1
1 -
2
-
3
-
4
-
5
-
 6
6 -
 7
7 -
 8
8 -
 9
9 -
 10
10 -
 11
11 -
 12
12 -
 13
13 -
 14
14 -
 15
15 -
 16
16 -
17
-
18
-
19
-
20
-
21
-
22
-
23
-
24
-
25
-
26
-
27
-
28
-
29
-
30
-
31
-
32
-
33
-
34
-
35
-
36
-
37
-
38
-
39
-
40
-
41
-
42
-
43
-
44
-
45
-
46
-
47
-
48
-
49
-
50
-
51
-
52
-
53
-
54
-
55
-
56
-
57
-
58
-
59
-
60
-
61
-
62
-
63
-
64
-
65
-
66
-
67
-
68
-
69
-
70
-
71
-
72
-
73
-
74
-
75
-
76
 |
 |