Thermador CIT367YGS Instructions for Use - Page 14
Kitchen timer, 8 Stopwatch
 |
View all Thermador CIT367YGS manuals
Add to My Manuals
Save this manual to your list of manuals |
Page 14 highlights
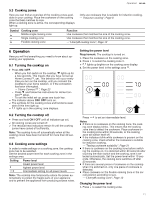
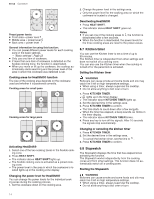
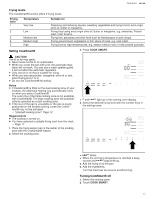
en-us Operation Preset power levels ¡ Front area = power level ¡ Middle area = power level ¡ Back area = power level . General information for using this function: ¡ You can preset different power levels for each cooking zone in the basic settings. → "Basic settings", Page 22 ¡ Only use one item of cookware. ¡ If more than one item of cookware is detected on the flexible cooking zone, the function is deactivated. ¡ When you move or lift up the cookware, the cooktop automatically starts searching and the power level of the area in which the cookware was detected is set. Cooking areas for HeatShift® function The size of the cooking area depends on the cookware used and whether it is positioned correctly. Cooking areas for small pans Cooking areas for large pans Activating HeatShift® 1. Select one of the two cooking zones in the flexible cook- ing zone. 2. Press HEAT SHIFT. a The indicator above HEAT SHIFT lights up. a The flexible cooking zone is activated as a joined cook- ing zone. a The power level in the area in which the cookware is lo- cated lights up in the cooking zone display. Changing the power level for HeatShift® You can change the power levels for the individual cooking areas during the cooking process. 1. Set the cookware down on the cooking area. 2. Change the power level in the settings area. a Only the power level for the cooking area on which the cookware is located is changed. Deactivating HeatShift® ▶ Press HEAT SHIFT. a The indicator above HEAT SHIFT goes out. Notes ¡ If you set one of the cooking areas to , the function is deactivated after a few seconds. ¡ When the function is deactivated, the power levels for the three cooking areas are reset to the preset values. 6.7 Kitchen timer You can use the Kitchen timer to set a time of up to 99 minutes. The Kitchen timer is independent from other settings and does not switch off a cooking zone. You can also use the Kitchen timer when the cooktop is turned off or the panel lock is activated. Setting the Kitchen timer WARNING Boilovers can cause smoke and some foods and oils may catch fire if left on high temperature settings. ▶ When using a timer, always supervise the cooktop. ▶ Do not allow anything to boil over or burn. 1. Press KITCHEN TIMER. a lights up in the timer display. a The indicator above KITCHEN TIMER lights up. 2. Set the desired time in the settings area. 3. Press KITCHEN TIMER to confirm. a The time starts to count down after a few seconds. a When the time has elapsed, a beep sounds. blinks in the timer display. a The indicator above KITCHEN TIMER blinks. 4. Press any key to turn off the signals. After 10 seconds the signals stop automatically. Changing or canceling the kitchen timer 1. Press KITCHEN TIMER. 2. Set the desired time in the settings area. To cancel the kitchen timer, set the time to . 3. Press KITCHEN TIMER to confirm. 6.8 Stopwatch The Stopwatch displays the time that has elapsed since activating the function. The Stopwatch works independently from the cooking zones and from other settings. This function does not automatically switch off a cooking zone. Starting the Stopwatch WARNING Boilovers can cause smoke and some foods and oils may catch fire if left on high temperature settings. ▶ When using a timer, always supervise the cooktop. ▶ Do not allow anything to boil over or burn. 14
-
 1
1 -
2
-
3
-
4
-
5
-
6
-
7
-
8
-
 9
9 -
 10
10 -
 11
11 -
 12
12 -
 13
13 -
 14
14 -
 15
15 -
 16
16 -
 17
17 -
 18
18 -
 19
19 -
20
-
21
-
22
-
23
-
24
-
25
-
26
-
27
-
28
-
29
-
30
-
31
-
32
-
33
-
34
-
35
-
36
-
37
-
38
-
39
-
40
-
41
-
42
-
43
-
44
-
45
-
46
-
47
-
48
-
49
-
50
-
51
-
52
-
53
-
54
-
55
-
56
-
57
-
58
-
59
-
60
-
61
-
62
-
63
-
64
-
65
-
66
-
67
-
68
-
69
-
70
-
71
-
72
-
73
-
74
-
75
-
76
 |
 |
