Toshiba Tecra A7 PTA71C-LL701EF Users Manual Canada; English - Page 159
HW Setup and Passwords
 |
View all Toshiba Tecra A7 PTA71C-LL701EF manuals
Add to My Manuals
Save this manual to your list of manuals |
Page 159 highlights
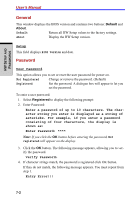
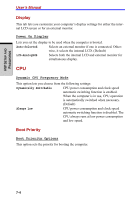
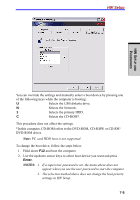
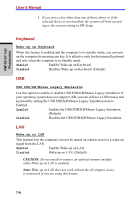
HW SETUP AND PASSWORDS Chapter 7 HW Setup and Passwords This chapter explains how to use TOSHIBA HW Setup program to configure your computer and how to set passwords. HW Setup TOSHIBA HW Setup lets you configure settings for pointing devices, display, CPU, boot priority, keyboard, USB, LAN, general, password, device config and parallel/printer. Note: If the supervisor password is set, access to the TOSHIBA HW Setup program can be prevented when the user password is used to log on to the computer. Accessing HW Setup If you are using Windows® XP, click start, click Control Panel, click Printers and Other Hardware, and select TOSHIBA HW Setup to run HW Setup. HW Setup window The HW Setup window contains the following tabs: Pointing Devices, Display, CPU, Boot Priority, Keyboard, USB, LAN, General, Password, Device Config and Parallel/Printer. There are also three buttons: OK, Cancel and Apply. OK Accepts your changes and closes the HW Setup win- dow. Cancel Closes the window without accepting your changes. Apply Accepts all your changes without closing the HW Setup window. 7-1
-
 1
1 -
2
-
3
-
4
-
5
-
6
-
7
-
8
-
9
-
10
-
11
-
12
-
13
-
14
-
15
-
16
-
17
-
18
-
19
-
20
-
21
-
22
-
23
-
24
-
25
-
26
-
27
-
28
-
29
-
30
-
31
-
32
-
33
-
34
-
35
-
36
-
37
-
38
-
39
-
40
-
41
-
42
-
43
-
44
-
45
-
46
-
47
-
48
-
49
-
50
-
51
-
52
-
53
-
54
-
55
-
56
-
57
-
58
-
59
-
60
-
61
-
62
-
63
-
64
-
65
-
66
-
67
-
68
-
69
-
70
-
71
-
72
-
73
-
74
-
75
-
76
-
77
-
78
-
79
-
80
-
81
-
82
-
83
-
84
-
85
-
86
-
87
-
88
-
89
-
90
-
91
-
92
-
93
-
94
-
95
-
96
-
97
-
98
-
99
-
100
-
101
-
102
-
103
-
104
-
105
-
106
-
107
-
108
-
109
-
110
-
111
-
112
-
113
-
114
-
115
-
116
-
117
-
118
-
119
-
120
-
121
-
122
-
123
-
124
-
125
-
126
-
127
-
128
-
129
-
130
-
131
-
132
-
133
-
134
-
135
-
136
-
137
-
138
-
139
-
140
-
141
-
142
-
143
-
144
-
145
-
146
-
147
-
148
-
149
-
150
-
151
-
152
-
153
-
 154
154 -
 155
155 -
 156
156 -
 157
157 -
 158
158 -
 159
159 -
 160
160 -
 161
161 -
 162
162 -
 163
163 -
 164
164 -
165
-
166
-
167
-
168
-
169
-
170
-
171
-
172
-
173
-
174
-
175
-
176
-
177
-
178
-
179
-
180
-
181
-
182
-
183
-
184
-
185
-
186
-
187
-
188
-
189
-
190
-
191
-
192
-
193
-
194
-
195
-
196
-
197
-
198
-
199
-
200
-
201
-
202
-
203
-
204
-
205
-
206
-
207
-
208
-
209
-
210
-
211
-
212
-
213
-
214
-
215
-
216
-
217
-
218
-
219
-
220
-
221
-
222
-
223
-
224
-
225
-
226
-
227
-
228
-
229
-
230
-
231
-
232
-
233
-
234
-
235
-
236
-
237
-
238
-
239
-
240
-
241
-
242
-
243
-
244
-
245
-
246
-
247
-
248
-
249
-
250
-
251
-
252
-
253
-
254
-
255
-
256
-
257
-
258
-
259
-
260
-
261
-
262
-
263
-
264
-
265
-
266
-
267
-
268
-
269
-
270
-
271
-
272
-
273
-
274
-
275
-
276
 |
 |