Yamaha 640 Owner's Manual - Page 73
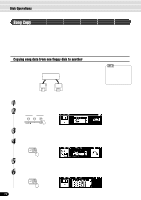
Press the [NEXT] button to display the Copy operation, Execute the Copy operation.
 |
View all Yamaha 640 manuals
Add to My Manuals
Save this manual to your list of manuals |
Page 73 highlights
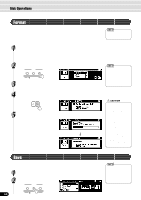
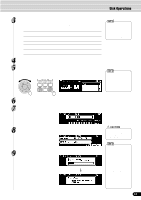
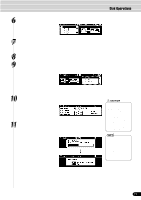
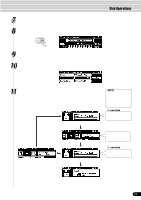
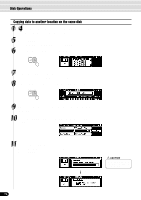
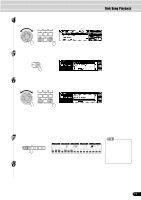
7 Select the source song file. Use the data dial, the [+/YES] button or the [-/NO] button. 8 Press the [NEXT] button to display the NAME screen. BACK NEXT Disk Operations 9 Enter the destination song file name directly from the keyboard (page 21). 10 Press the [NEXT] button to display the Copy operation screen. 11 Execute the Copy operation. Press the [+/YES] button to execute the Copy operation. Press the [-/NO] button to abort the Copy operation. • If you insert a wrong disk, different from the source or destination disk, during the Copy operation, an alert message (page 160) will appear on the display. If the quantity of data is large, it may be necessary for the data to be copied in parts. Insert the Source disk. Copying the data from the Source disk to Internal memory CAUTION • While data is being copied, never eject the floppy disk or turn the power off. If you want to cancel the Copy function in this step, press the [EXIT] button to cancel the operation. CAUTION • While data is being copied, never eject the floppy disk or turn the power off. Copying the data from Internal memory to the Destination disk The Copy operation is completed... 73 71
-
 1
1 -
2
-
3
-
4
-
5
-
6
-
7
-
8
-
9
-
10
-
11
-
12
-
13
-
14
-
15
-
16
-
17
-
18
-
19
-
20
-
21
-
22
-
23
-
24
-
25
-
26
-
27
-
28
-
29
-
30
-
31
-
32
-
33
-
34
-
35
-
36
-
37
-
38
-
39
-
40
-
41
-
42
-
43
-
44
-
45
-
46
-
47
-
48
-
49
-
50
-
51
-
52
-
53
-
54
-
55
-
56
-
57
-
58
-
59
-
60
-
61
-
62
-
63
-
64
-
65
-
66
-
67
-
 68
68 -
 69
69 -
 70
70 -
 71
71 -
 72
72 -
 73
73 -
 74
74 -
 75
75 -
 76
76 -
 77
77 -
 78
78 -
79
-
80
-
81
-
82
-
83
-
84
-
85
-
86
-
87
-
88
-
89
-
90
-
91
-
92
-
93
-
94
-
95
-
96
-
97
-
98
-
99
-
100
-
101
-
102
-
103
-
104
-
105
-
106
-
107
-
108
-
109
-
110
-
111
-
112
-
113
-
114
-
115
-
116
-
117
-
118
-
119
-
120
-
121
-
122
-
123
-
124
-
125
-
126
-
127
-
128
-
129
-
130
-
131
-
132
-
133
-
134
-
135
-
136
-
137
-
138
-
139
-
140
-
141
-
142
-
143
-
144
-
145
-
146
-
147
-
148
-
149
-
150
-
151
-
152
-
153
-
154
-
155
-
156
-
157
-
158
-
159
-
160
-
161
-
162
-
163
-
164
-
165
-
166
-
167
-
168
-
169
-
170
-
171
-
172
-
173
-
174
-
175
-
176
-
177
-
178
-
179
-
180
-
181
-
182
-
183
-
184
-
185
-
186
-
187
-
188
 |
 |
