Yamaha EAD10 EAD10 Reference Manual - Page 46
Job/Recorder, Recorder Settings, Settings Screen Structure, Entering the File Name
 |
View all Yamaha EAD10 manuals
Add to My Manuals
Save this manual to your list of manuals |
Page 46 highlights
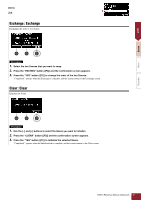
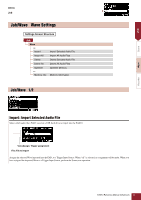
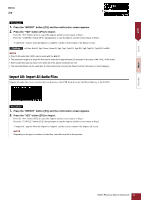
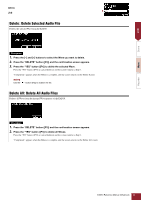
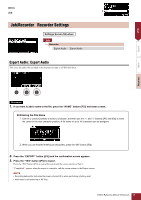
Job MENU Job Recorder Job/Recorder Recorder Settings Settings Screen Structure Job Recorder Export Audio Export Audio Export Audio : Export Audio This saves the audio file recorded in the internal recorder to a USB flash drive. Scene Wave Recorder Procedure 1. If you want to add a name to the file, press the "NAME" button ([F2]) and enter a name. Entering the File Name 1. Use the [-] and [+] buttons to select a character, and then use the "" buttons ([F1] and [F3]) to move the cursor to the next character position. A file name of up to 16 characters can be assigned. 2. When you are finished entering all characters, press the "OK" button ([F2]). 2. Press the "EXPORT" button ([F3]) and the confirmation screen appears. 3. Press the "YES" button ([F1]) to export. Press the "NO" button ([F3]) to cancel the export and the screen returns to Step 1. "Completed." appears when the export is complete, and the screen returns to the Export screen. NOTE • Recording data will be lost when the power is turned off or when performing a factory reset. • Audio data is not backed up in "All" files. EAD10 Reference Manual (Advanced) 46
-
 1
1 -
2
-
3
-
4
-
5
-
6
-
7
-
8
-
9
-
10
-
11
-
12
-
13
-
14
-
15
-
16
-
17
-
18
-
19
-
20
-
21
-
22
-
23
-
24
-
25
-
26
-
27
-
28
-
29
-
30
-
31
-
32
-
33
-
34
-
35
-
36
-
37
-
38
-
39
-
40
-
 41
41 -
 42
42 -
 43
43 -
 44
44 -
 45
45 -
 46
46 -
 47
47 -
 48
48 -
 49
49 -
 50
50 -
 51
51 -
52
-
53
-
54
-
55
-
56
-
57
-
58
-
59
-
60
 |
 |
