Yamaha Tyros2 Owner's Manual - Page 81
Function Tree
 |
View all Yamaha Tyros2 manuals
Add to My Manuals
Save this manual to your list of manuals |
Page 81 highlights
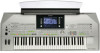
Function Tree Basic Operations-Organizing Your Data ● Button/Controller Indicates the Button/Controller that you should use at first for entering the corresponding function. Numbers at the left end correspond to the ones in "Top panel & connections" on page 14. ● LCD title This appears at the top of the LCD display called up by operating the Button/Controller. "---" indicates that no LCD display is called up by operating the Button/Controller. ● Function Describes the function that can be executed on the LCD display called up by operating the Button/Controller. Describes the function of the Button/Controller itself if the LCD title is "---." The numbers to the left of the chart correspond to the those in the "Panel Controls and Terminals" section on page 14. Button/Controller q POWER ON/OFF switch w MASTER VOLUME control e INPUT VOLUME control LCD title ------- Function Turning the POWER on or off Adjusting the overall volume Adjusting the microphone sound volume Page 20, 22 20 47, 175 r DEMO button DEMO Demo song selection/playback 24 t MIC/LINE IN buttons [VOCAL HARMONY] button [TALK] button [EFFECT] button [VH TYPE SELECT] button [MIC SETTING] button ------VOCAL HARMONY TYPE MICROPHONE SETTING OVERALL SETTING TALK SETTING Turning Vocal Harmony on or off Calling up the Talk Settings related to the microphone sound Turning the effect for the microphone sound on or off Selecting/producing the Vocal Harmony effect Setting microphone relataed parameters such as EQ, Noise Gate, and Compressor Setting the Talk Setting related parameters 48, 175 177 175 48, 175 177 177 y SONG CONTROL buttons [LYRICS/TEXT] button [SCORE] button [GUIDE] button [P.A.T.] button [SP1]-[SP4] buttons [LOOP] button [REC] button [STOP] button [PLAY/PAUSE] button [REW] button [FF] button u FADE IN/OUT button i SONG buttons LYRICS/TEXT SCORE ----- --- --(Pop-up window) ----(Pop-up window) (Pop-up window) --- SONG Showing the lyrics of a song or text Showing the score of a song Turning the Guide function on or off Turning the Performance Assistant Technology on or off Entering Song Position Markers to the selected song and executing jumps among the Markers. Turning looped playback (between Markers) on or off Recording a song Stopping playback or recording of the selected song Playing/pausing playback or recording of the selected song Fast reverse of the song playback position Fast forward of the song playback position 114-115 112 50 120 44, 117 45, 117 55 43 43 43, 117 43, 117 Producing smooth fade-ins and fade-outs when starting and stopping the style/song The Open/Save display for songs 154 43, 72 o STYLE buttons [POP & ROCK]-[WORLD] button [FILE ACCESS] button STYLE STYLE The Open/Save display for styles The Open/Save display of the category (path) that corresponds to the selected button Turning the File Access function on or off 31, 72 156 156 !0 STYLE CONTROL buttons [ACMP] button --- [OTS LINK] button --- [AUTO FILL IN] button --- [INTRO] buttons --- [MAIN VARIATION] buttons --- [BREAK] button --- [ENDING/rit.] button --- [SYNC STOP] button --- [SYNC START] button --- [START/STOP] button --- Turning ACMP (Auto Accompaniment ) on or off Turning the OTS Link function on or off Turning the Auto Fill in on or off Playing the Intro sections of the selected style Playing the Main sections of the selected style Playing the Break sections of the selected style Playing the Ending sections of the selected style Turning Sync Stop on or off Turning Sync Start on or off Starting/stopping style playback 31 155 35 34 34 34 34 155 31, 155 32 !1 METRONOME button !2 TAP TEMPO button !3 TEMPO buttons !4 TRANSPOSE buttons --- Starting/stopping the Metronome 193 --- Tapping out the tempo of the style playback 154 (Pop-up window) Changing the tempo of the Style/Multi Pad/Song playback 154 (Pop-up window) Transposing the pitch up or down 88 81 Tyros2 Owner's Manual
-
 1
1 -
2
-
3
-
4
-
5
-
6
-
7
-
8
-
9
-
10
-
11
-
12
-
13
-
14
-
15
-
16
-
17
-
18
-
19
-
20
-
21
-
22
-
23
-
24
-
25
-
26
-
27
-
28
-
29
-
30
-
31
-
32
-
33
-
34
-
35
-
36
-
37
-
38
-
39
-
40
-
41
-
42
-
43
-
44
-
45
-
46
-
47
-
48
-
49
-
50
-
51
-
52
-
53
-
54
-
55
-
56
-
57
-
58
-
59
-
60
-
61
-
62
-
63
-
64
-
65
-
66
-
67
-
68
-
69
-
70
-
71
-
72
-
73
-
74
-
75
-
 76
76 -
 77
77 -
 78
78 -
 79
79 -
 80
80 -
 81
81 -
 82
82 -
 83
83 -
 84
84 -
 85
85 -
 86
86 -
87
-
88
-
89
-
90
-
91
-
92
-
93
-
94
-
95
-
96
-
97
-
98
-
99
-
100
-
101
-
102
-
103
-
104
-
105
-
106
-
107
-
108
-
109
-
110
-
111
-
112
-
113
-
114
-
115
-
116
-
117
-
118
-
119
-
120
-
121
-
122
-
123
-
124
-
125
-
126
-
127
-
128
-
129
-
130
-
131
-
132
-
133
-
134
-
135
-
136
-
137
-
138
-
139
-
140
-
141
-
142
-
143
-
144
-
145
-
146
-
147
-
148
-
149
-
150
-
151
-
152
-
153
-
154
-
155
-
156
-
157
-
158
-
159
-
160
-
161
-
162
-
163
-
164
-
165
-
166
-
167
-
168
-
169
-
170
-
171
-
172
-
173
-
174
-
175
-
176
-
177
-
178
-
179
-
180
-
181
-
182
-
183
-
184
-
185
-
186
-
187
-
188
-
189
-
190
-
191
-
192
-
193
-
194
-
195
-
196
-
197
-
198
-
199
-
200
-
201
-
202
-
203
-
204
-
205
-
206
-
207
-
208
-
209
-
210
-
211
-
212
-
213
-
214
-
215
-
216
-
217
-
218
-
219
-
220
-
221
-
222
-
223
-
224
-
225
-
226
-
227
-
228
-
229
-
230
-
231
-
232
-
233
-
234
-
235
-
236
-
237
-
238
-
239
-
240
 |
 |
