Apple Macbook Pro Aluminum 13-Inch Black Laptop Keyb Technical Guide
Apple Macbook Pro Aluminum 13-Inch Black Laptop Keyb - Macbook Pro Aluminum Manual
 |
UPC - 005215163007
View all Apple Macbook Pro Aluminum 13-Inch Black Laptop Keyb manuals
Add to My Manuals
Save this manual to your list of manuals |
Apple Macbook Pro Aluminum 13-Inch Black Laptop Keyb manual content summary:
- Apple Macbook Pro Aluminum 13-Inch Black Laptop Keyb | Technical Guide - Page 1
Apple Technician Guide MacBook (13-inch, Aluminum, Late 2008) Updated 2010-06-15 - Apple Macbook Pro Aluminum 13-Inch Black Laptop Keyb | Technical Guide - Page 2
responsible for printing or clerical errors. Apple 1 Infinite Loop Cupertino, CA 95014-2084 USA + 1 408 996 1010 www.apple.com Apple, the Apple logo, Mac, MacBook, and Macintosh are trademarks of Apple Inc., registered in the U.S. and other countries. Please send feedback to [email protected]. - Apple Macbook Pro Aluminum 13-Inch Black Laptop Keyb | Technical Guide - Page 3
MacBook (13-inch, Aluminum, Late 2008) Contents Manual Updates 9 Updated 15 June 2010 9 Updated 14 May 2010 9 Updated 16 Tools 17 The Glass Panel 18 Keycap Replacement 18 Troubleshooting General Troubleshooting 20 Update System Software 20 Troubleshooting Theory 20 Hardware vs. Software 20 - Apple Macbook Pro Aluminum 13-Inch Black Laptop Keyb | Technical Guide - Page 4
Liquid Submersion Indicators 23 Common Reset Procedures 24 Apple Service Diagnostics 25 Clamshell Service Diagnostic Read Me 26 Display Issue: Pixel Anomalies 26 Symptom Charts 28 Startup and Power Issues 28 No Power 28 Won't Start Up 31 Intermittent - Apple Macbook Pro Aluminum 13-Inch Black Laptop Keyb | Technical Guide - Page 5
107 Take Apart General Information 109 Connector Types on Logic Board 109 Icon Legend 112 Temperature Concerns 112 Replacement Steps 112 Access Door 113 Removal 114 Replacement 115 Battery 116 Removal 117 Replacement 117 Hard Drive Bracket 119 Hard Drive 121 Removal 122 Replacement - Apple Macbook Pro Aluminum 13-Inch Black Laptop Keyb | Technical Guide - Page 6
137 Battery Power Cable 139 Removal 140 Replacement 140 Battery Indicator Light (BIL) Cable 141 Removal 142 Replacement 144 Camera Cable Guide 145 Removal 146 Replacement 146 LVDS Cable Guide 147 Display Assembly 149 Removal 150 Replacement 151 Display Clutch Cover 153 Removal 154 - Apple Macbook Pro Aluminum 13-Inch Black Laptop Keyb | Technical Guide - Page 7
204 Center Bracket 205 Kensington Lock 206 Hard Drive Front Bracket with IR/Sleep Cable 208 Top Case 210 Additional Procedures Hinge Replacement and Alignment 213 Views Exploded Views 216 Main Assembly, 1 of 2 216 Main Assembly, 2 of 2 217 Display Assembly 218 External Views 219 Port - Apple Macbook Pro Aluminum 13-Inch Black Laptop Keyb | Technical Guide - Page 8
Bottom Case 222 Display Assembly 223 Top Case 224 - Apple Macbook Pro Aluminum 13-Inch Black Laptop Keyb | Technical Guide - Page 9
2009 Troubleshooting: • General Troubleshooting: Troubleshooting Theory: Updated link information Take Apart: • Display Assembly: Added reminder about correct position of AirPort cable when reconnecting to AirPort Card 2010-06-15 MacBook (13-inch, Aluminum, Late 2008) Basics - Manual Updates - Apple Macbook Pro Aluminum 13-Inch Black Laptop Keyb | Technical Guide - Page 10
caution • AirPort Card: Reworded step 2 under "Replacement" • Logic Board: Added step for bottom case clip and 2 screws; added step to show MagSafe cable routing • MagSafe Board: Added port test using unplugged power adapter cable MacBook (13-inch, Aluminum, Late 2008) Basics - Manual Updates 10 - Apple Macbook Pro Aluminum 13-Inch Black Laptop Keyb | Technical Guide - Page 11
connector. If the cable is inserted backwards, it will damage the logic board. • Troubleshooting: Updated steps in the Burnt Smell/Odor symptom. Added step 3 to the Quick Check table as a reminder to verify AirPort cable connection. MacBook (13-inch, Aluminum, Late 2008) Basics - Manual Updates 11 - Apple Macbook Pro Aluminum 13-Inch Black Laptop Keyb | Technical Guide - Page 12
• Corrected internal links. • Take Apart: Reorganized topic sequence following Display Assembly. • Exploded View: Display Assembly: Corrected display assembly part number to 661-4820. Manual introduced 14 October 2008 2010-06-15 MacBook (13-inch, Aluminum, Late 2008) Basics - Manual Updates 12 - Apple Macbook Pro Aluminum 13-Inch Black Laptop Keyb | Technical Guide - Page 13
Apple Technician Guide Basics MacBook (13-inch, Aluminum, Late 2008) © 2008 Apple Inc. All rights reserved. - Apple Macbook Pro Aluminum 13-Inch Black Laptop Keyb | Technical Guide - Page 14
Overview The MacBook (13-inch, Aluminum, Late 2008) computer features a powerful new NVIDIA GeForce 9400M graphics processor, Multi-Touch trackpad, and aluminum body. Refer to more features below. Identifying Features The main features and service differences include: • Aluminum case • Glass - Apple Macbook Pro Aluminum 13-Inch Black Laptop Keyb | Technical Guide - Page 15
and the computer you are servicing. However, although the appearance may differ, the steps and sequence are the same unless noted. Screw sizes shown are approximate and indicate the total length including the screw head. 2010-06-15 MacBook (13-inch, Aluminum, Late 2008) Basics - Overview 15 - Apple Macbook Pro Aluminum 13-Inch Black Laptop Keyb | Technical Guide - Page 16
a top case, retain the customer's top case until the repair is complete. Before installing the replacement top case, peel up the serial number label from the original top case and transfer it to the replacement. 2010-06-15 MacBook (13-inch, Aluminum, Late 2008) Basics - Serial Number Location 16 - Apple Macbook Pro Aluminum 13-Inch Black Laptop Keyb | Technical Guide - Page 17
.com/article.html?artnum=500200 In addition, the following software programs are required for troubleshooting: • Apple Service Diagnostic (ASD), version 3S125 or later • Apple Hardware Test, version 3A148 or later 2010-06-15 MacBook (13-inch, Aluminum, Late 2008) Basics - General Information 17 - Apple Macbook Pro Aluminum 13-Inch Black Laptop Keyb | Technical Guide - Page 18
the relevant support article: "MacBook/MacBook Pro: Black Keycap Replacement" (HT4002) or "MacBook: White Keycap Replacement" (HT4003). For an overview of the differences among keycap procedures, refer to "MacBook/MacBook Pro: Keycap Replacement Matrix" (HT4001). MacBook (13-inch, Aluminum, Late - Apple Macbook Pro Aluminum 13-Inch Black Laptop Keyb | Technical Guide - Page 19
Apple Technician Guide Troubleshooting MacBook (13-inch, Aluminum, Late 2008) © 2008 Apple Inc. All rights reserved. - Apple Macbook Pro Aluminum 13-Inch Black Laptop Keyb | Technical Guide - Page 20
CD or DVD For information on how to troubleshoot a software issue, refer to: HT1199-Mac OS X: How to troubleshoot a software issue 2010-06-15 MacBook (13-inch, Aluminum, Late 2008) General Troubleshooting - Update System - Apple Macbook Pro Aluminum 13-Inch Black Laptop Keyb | Technical Guide - Page 21
MacBook (13-inch, Aluminum, Late 2008) General Troubleshooting - Functional Overview 21 Camera (includes AirPort, Bluetooth, camera, and ambient light sensor): • failure of any parts listed above • no keyboard backlight • no startup if AirPort - Apple Macbook Pro Aluminum 13-Inch Black Laptop Keyb | Technical Guide - Page 22
Block Diagram Refer to this diagram to see how modules are interrelated. 2010-06-15 MacBook (13-inch, Aluminum, Late 2008) General Troubleshooting - Block Diagram 22 - Apple Macbook Pro Aluminum 13-Inch Black Laptop Keyb | Technical Guide - Page 23
accidental spill. For more information, refer to the Knowledge Base article HT3425:"About liquid submersion indicators (LSI) on portable and desktop computers." 2010-06-15 MacBook (13-inch, Aluminum, Late 2008) General Troubleshooting - Liquid Submersion Indicators 23 - Apple Macbook Pro Aluminum 13-Inch Black Laptop Keyb | Technical Guide - Page 24
and you hear the startup sound for the second time. 6. Release the keys. For more information: http://www.apple.com/support HT1379-Apple Portables: Resetting the PRAM MacBook (13-inch, Aluminum, Late 2008) General Troubleshooting - Common Reset Procedures 24 - Apple Macbook Pro Aluminum 13-Inch Black Laptop Keyb | Technical Guide - Page 25
Apple Service Diagnostics Run Apple Service Diagnostics to determine if any of the thermal sensors are malfunctioning. Replace any Battery Battery 2010-06-15 MacBook (13-inch, Aluminum, Late 2008) General Troubleshooting - Apple Service Diagnostics 25 - Apple Macbook Pro Aluminum 13-Inch Black Laptop Keyb | Technical Guide - Page 26
logic board, to avoid unnecessary replacements of these components. CSD checks software-related problems such as application or all-black display. Knowledge Base article 112125: Service Diagnostics Matrix MacBook(13-inch,Aluminum,Late2008)GeneralTroubleshooting-ClamshellServiceDiagnosticReadMe 26 - Apple Macbook Pro Aluminum 13-Inch Black Laptop Keyb | Technical Guide - Page 27
If the number of subpixel anomalies exceeds the acceptable number shown above, replace the LCD panel display assembly. Numbers outside the acceptable range would -not just Apple products. 2010-06-15 MacBook (13-inch, Aluminum, Late 2008) General Troubleshooting - Display Issue: Pixel Anomalies 27 - Apple Macbook Pro Aluminum 13-Inch Black Laptop Keyb | Technical Guide - Page 28
system to verify. Note: A compilation of Quick Check tables is available at http://service.info.apple.com/QRS/ en/quickreference.pdf Startup and Power Issues No Power Unlikely device is reinstalled. Go to step 2 MacBook (13-inch, Aluminum, Late 2008) Symptom Charts - Startup and Power Issues 28 - Apple Macbook Pro Aluminum 13-Inch Black Laptop Keyb | Technical Guide - Page 29
battery cable Yes connection at logic board and reseat if necessary. Replace cable if found damage or burned. Can the system power Release stuck pin or replace P14 adapter due to wire damage, not working or burned pins MacBook (13-inch, Aluminum, Late 2008) Symptom Charts - Startup and - Apple Macbook Pro Aluminum 13-Inch Black Laptop Keyb | Technical Guide - Page 30
confirm bad or intermittent connections.) Go to step 8 Clean port assembly. Replace X03 MagSafe board if necessary. System starts and has on. Replace top case for stuck power on key No logic board power on M01 when shorting R5015 pads. Replace logic board. MacBook (13-inch, Aluminum, Late - Apple Macbook Pro Aluminum 13-Inch Black Laptop Keyb | Technical Guide - Page 31
User hard drive bootable, issue resolved default settings. Customer system not starting up, go to step 2 Troubleshoot memory issues, go to step 3 Continue with startup sequence verification go to step 4 Code MacBook (13-inch, Aluminum, Late 2008) Symptom Charts - Startup and Power Issues 31 - Apple Macbook Pro Aluminum 13-Inch Black Laptop Keyb | Technical Guide - Page 32
No Profiler and Disk Utility. 7. Troubleshoot optical drive Yes and optical drive replaced. Continue to verify hard drive issues, go to step 8 Defective optical drive found J03 and replaced. Continue to verify hard drive issues, go to step 8 Replace logic board M19 MacBook (13-inch, Aluminum - Apple Macbook Pro Aluminum 13-Inch Black Laptop Keyb | Technical Guide - Page 33
GUID troubleshooting article Go to step 11 OS on customer hard drive repaired, issue resolved. Hard drive not bootable, perhaps missing OS, go to step 12 Customer hard drive now starts up from new OS image, issue resolved Replace hard drive. H02 2010-06-15 MacBook (13-inch, Aluminum - Apple Macbook Pro Aluminum 13-Inch Black Laptop Keyb | Technical Guide - Page 34
or the magnetic sleep sensors are found to be defective. Suggested steps for troubleshooting: • Reset SMC. • Check Energy Saver preferences settings. • Test top case . • Battery went empty while computer was asleep. MacBook (13-inch, Aluminum, Late 2008) Symptom Charts - Startup and Power Issues 34 - Apple Macbook Pro Aluminum 13-Inch Black Laptop Keyb | Technical Guide - Page 35
. Suggested steps for troubleshooting: • Check all sensors connections and values using Apple Service Diagnostics and other available Apple Service utilities. • Confirm ASD for sensors + thermal tests 2010-06-15 MacBook (13-inch, Aluminum, Late 2008) Symptom Charts - Startup and Power Issues 35 - Apple Macbook Pro Aluminum 13-Inch Black Laptop Keyb | Technical Guide - Page 36
SMC or Pram settings or corruption, and was resolved by reverting them to default settings. Shutdown event still occurs. Go to step 5. 2010-06-15 MacBook (13-inch, Aluminum, Late 2008) Symptom Charts - Startup and Power Issues 36 - Apple Macbook Pro Aluminum 13-Inch Black Laptop Keyb | Technical Guide - Page 37
good AC M23 adapter and batteries, replace logic board. No Setup ASD to loop test suite for burn in tests and go to step 7. if no failure is found after burn in tests, return unit to customer for no failure found. 2010-06-15 MacBook (13-inch, Aluminum, Late 2008) Symptom Charts - Startup and - Apple Macbook Pro Aluminum 13-Inch Black Laptop Keyb | Technical Guide - Page 38
in ASD or check for fan cable seating other available service utility. and retest. If same failure after retest replace fan with X22 known-good fan and retest. If monitor. 5. Press Alt key on startup.. MacBook (13-inch, Aluminum, Late 2008) Symptom Charts - Startup and Power Issues 38 - Apple Macbook Pro Aluminum 13-Inch Black Laptop Keyb | Technical Guide - Page 39
no action, use external contents affecting video keyboard with same sequence. output Verify that system video is displayed. No Go to step 6 2010-06-15 MacBook (13-inch, Aluminum, Late 2008) Symptom Charts - Startup and Power Issues 39 - Apple Macbook Pro Aluminum 13-Inch Black Laptop Keyb | Technical Guide - Page 40
step 9 No Internal LCD not detected. Run Clamshell Service Diagnostic utility and check for LCD panel presence. If was stuck or had condition shorted cable. Replace IR/ X13 If display assembly sleep sleep MacBook (13-inch, Aluminum, Late 2008) Symptom Charts - Startup and Power Issues 40 - Apple Macbook Pro Aluminum 13-Inch Black Laptop Keyb | Technical Guide - Page 41
Issue was only due to or replaced display assembly damaged display assembly or Verify that unit now has video unseated cable. and backlight. No Display cable damaged the M25 logic board. Replace logic board. 2010-06-15 MacBook (13-inch, Aluminum, Late 2008) Symptom Charts - Startup and - Apple Macbook Pro Aluminum 13-Inch Black Laptop Keyb | Technical Guide - Page 42
with a single LED on that chases back and forth 5 times? No Go to step 8 and tag battery as a possible P11 candidate. Go to step 5 (P11) MacBook (13-inch, Aluminum, Late 2008) Symptom Charts - Startup and Power Issues 42 - Apple Macbook Pro Aluminum 13-Inch Black Laptop Keyb | Technical Guide - Page 43
. Check battery condition, go to step 13 Replace logic board M20 LED status now working. Go to step 3. Go to step 12. Replace customer battery X03 LED indicator assembly. Go to step 3 Replace customer logic board. M20 MacBook (13-inch, Aluminum, Late 2008) Symptom Charts - Startup and - Apple Macbook Pro Aluminum 13-Inch Black Laptop Keyb | Technical Guide - Page 44
17. Battery has premature P08 capacity loss. Replace customer battery. Customer battery is good Go to step 18 Replace customer battery for P12 will not run system on battery alone Replace logic board M20 2010-06-15 MacBook (13-inch, Aluminum, Late 2008) Symptom Charts - Startup and Power - Apple Macbook Pro Aluminum 13-Inch Black Laptop Keyb | Technical Guide - Page 45
one at a time, verifying unit operation at each stage Go to Step 2 Issue resolved with default startup settings. Go to step 3 Code 2010-06-15 MacBook (13-inch, Aluminum, Late 2008) Symptom Charts - Startup and Power Issues 45 - Apple Macbook Pro Aluminum 13-Inch Black Laptop Keyb | Technical Guide - Page 46
. If issue X03 remains, try with known-good H01 hard drive. If still issue, replace hard drive. Reseat memory or replace suspect memory with known- X01 good memory. Symptoms unchanged, go to step 5 2010-06-15 MacBook (13-inch, Aluminum, Late 2008) Symptom Charts - Startup and Power Issues 46 - Apple Macbook Pro Aluminum 13-Inch Black Laptop Keyb | Technical Guide - Page 47
(top case, display, other) : If top case sensor failed X99 If display sensor failed L14 If logic board sensor failed M18 If fan test failed, replace fan. X03 If overtemp , replace heatsink. X10 2010-06-15 MacBook (13-inch, Aluminum, Late 2008) Symptom Charts - Startup and Power Issues 47 - Apple Macbook Pro Aluminum 13-Inch Black Laptop Keyb | Technical Guide - Page 48
Portable Computer Battery Screening Process for Apple Service Providers" (Knowledge Base CP165). 2. time. If replaced for run time too short, regardless of warranty coverage, use symptom code P09 if replaced. Won't MacBook (13-inch, Aluminum, Late 2008) Symptom Charts - Startup and Power Issues 48 - Apple Macbook Pro Aluminum 13-Inch Black Laptop Keyb | Technical Guide - Page 49
Yes No Yes No Action Confirm user's AC adapter as bad and replace. Code P14 Verify MagSafe board cable seating to logic board. Go to cleaning of power adapter with MagSafe 5. Remove battery, unplug AC adapter, and reset SMC by holding the power button for 5 seconds. MacBook (13-inch, Aluminum - Apple Macbook Pro Aluminum 13-Inch Black Laptop Keyb | Technical Guide - Page 50
is displaying both green (if battery charged) and orange (when charging). No Verify adapter with knowngood unit and customer unit and troubleshoot source of error Replace power adapter. P03 2010-06-15 MacBook (13-inch, Aluminum, Late 2008) Symptom Charts - Startup and Power Issues 50 - Apple Macbook Pro Aluminum 13-Inch Black Laptop Keyb | Technical Guide - Page 51
4. Locate the source of the noise. Yes Is the noise from an optical drive? Replace AC adapter. P04 Go to step 2 Go to step 3 Go to step 4 Check up or when the heads move. Replace drive if noise is above normal levels. No Go to step 6 MacBook (13-inch, Aluminum, Late 2008) Symptom Charts - Startup - Apple Macbook Pro Aluminum 13-Inch Black Laptop Keyb | Technical Guide - Page 52
pads on logic board or some pins from LVDS connector. Follow Take Apart instructions to remove EMI foam gasket from LVDS cable and retest. No Verify if noise is inducing the noise. Replace logic board. M99 2010-06-15 MacBook (13-inch, Aluminum, Late 2008) Symptom Charts - Startup and Power - Apple Macbook Pro Aluminum 13-Inch Black Laptop Keyb | Technical Guide - Page 53
. Result Yes No Action Replace the affected part. Go to step 2 Code P08 2. Are any burn marks visible on Yes Replace the affected part. P08 article TS2274 "MacBook (Early 2008) and later: Liquid submersion indicators (LSI)." Go to step 4 2010-06-15 MacBook (13-inch, Aluminum, Late 2008) - Apple Macbook Pro Aluminum 13-Inch Black Laptop Keyb | Technical Guide - Page 54
to best related troubleshooting section. If MacBook, MacBook Pro (15-inch) or MacBook Pro (17-inch) with swollen battery article (Knowledge Base TS2358). 2. Use the "Portable Computer Battery Screening Process for Apple Service MacBook (13-inch, Aluminum, Late 2008) Symptom Charts - Startup and - Apple Macbook Pro Aluminum 13-Inch Black Laptop Keyb | Technical Guide - Page 55
contacts are good. Go to step 2. Pins are damaged or bent flat, M10 replace logic board. Ethernet interface (en0) Link Status is active, go to step 3. If connection is OK on known- M10 good system, replace logic board. MacBook (13-inch, Aluminum, Late 2008) Symptom Charts - Communications 55 - Apple Macbook Pro Aluminum 13-Inch Black Laptop Keyb | Technical Guide - Page 56
the system under test, the problem may be the network environment. No repair is necessary. If there are connection M10 dropouts or poor performance not seen on a known-good test system, replace the logic board. 2010-06-15 MacBook (13-inch, Aluminum, Late 2008) Symptom Charts - Communications - Apple Macbook Pro Aluminum 13-Inch Black Laptop Keyb | Technical Guide - Page 57
base station. (Bluetooth) Ensure target devices are set to discoverable. If card is not detected or software updates do not resolve issue, go to step 2. MacBook (13-inch, Aluminum, Late 2008) Symptom Charts - Communications 57 - Apple Macbook Pro Aluminum 13-Inch Black Laptop Keyb | Technical Guide - Page 58
2. Run Clamshell Service Yes Diagnostic utility and check for all devices presence. If not 5. Replace AirPort card. N12 Go to step 6. Replace display assembly. L16 Replace logic board. M11 Replace display assembly. L16 Replace logic board. M11 2010-06-15 MacBook (13-inch, Aluminum, - Apple Macbook Pro Aluminum 13-Inch Black Laptop Keyb | Technical Guide - Page 59
station is not using MAC address filtering or creating a hidden network. No If card is not detected, go to M11 - AirPort/Bluetooth - Defective wireless devices. MacBook (13-inch, Aluminum, Late 2008) Symptom Charts - Communications 59 - Apple Macbook Pro Aluminum 13-Inch Black Laptop Keyb | Technical Guide - Page 60
2. Run Clamshell Service Yes Diagnostic utility and check to step 5. Replace AirPort card. N12 Continue to use known-good antenna & card; go to step 6. Replace display assembly. L16 Replace logic board. . 2010-06-15 MacBook (13-inch, Aluminum, Late 2008) Symptom Charts - Communications 60 - Apple Macbook Pro Aluminum 13-Inch Black Laptop Keyb | Technical Guide - Page 61
Yes Bluetooth device? No 5. Run Clamshell Service Yes Diagnostic utility and check for all devices Replace display assembly. L16 display assembly. Is the Bluetooth radio present, on and pairing with a known- No Replace logic board. M11 good device? 2010-06-15 MacBook (13-inch, Aluminum - Apple Macbook Pro Aluminum 13-Inch Black Laptop Keyb | Technical Guide - Page 62
start up when no input device is present". Check for software update, 2.4 GHz radio interference or device low battery. Known-good device passed, test with user's Bluetooth applied. Deep Dive Check Result Action Code MacBook (13-inch, Aluminum, Late 2008) Symptom Charts - Communications 62 - Apple Macbook Pro Aluminum 13-Inch Black Laptop Keyb | Technical Guide - Page 63
. 4. Connect and test with a Yes Replace AirPort card. N13 known-good AirPort card. Is kernel panic resolved? No Replace display assembly. L16 Wireless Performance Issue / damage the AirPort card. 2010-06-15 MacBook (13-inch, Aluminum, Late 2008) Symptom Charts - Communications 63 - Apple Macbook Pro Aluminum 13-Inch Black Laptop Keyb | Technical Guide - Page 64
1. Inspect the display clutch Yes barrel for damage. AirPort radio is in display clutch barrel area. No Record damage: Proceed to possibly repair damaged parts, go to step 2 No visible damage, go to step 2 2010-06-15 MacBook (13-inch, Aluminum, Late 2008) Symptom Charts - Communications 64 - Apple Macbook Pro Aluminum 13-Inch Black Laptop Keyb | Technical Guide - Page 65
No 3. Run Clamshell Service Yes Diagnostic utility and Replace AirPort card. N12 Continue to use known-good antenna & card, go to step 7. Replace display assembly. L16 Replace logic board. M11 Replace display assembly. L16 Replace logic board. M11 2010-06-15 MacBook (13-inch, Aluminum - Apple Macbook Pro Aluminum 13-Inch Black Laptop Keyb | Technical Guide - Page 66
Mac OS X. 4. If the Bluetooth pairs with no problems, probe about potential interference issue at user's site. Code 1. System Profiler should list Yes Bluetooth radio device under system hardware. Is Bluetooth device MacBook (13-inch, Aluminum, Late 2008) Symptom Charts - Communications 66 - Apple Macbook Pro Aluminum 13-Inch Black Laptop Keyb | Technical Guide - Page 67
Bad logic board. Issue M11 resolved. All parts replaced. Try minimum configuration troubleshooting. Uncategorized Symptom Quick Check Symptom Uncategorized Symptom Unable symptom code could not be found. 2010-06-15 MacBook (13-inch, Aluminum, Late 2008) Symptom Charts - Communications 67 - Apple Macbook Pro Aluminum 13-Inch Black Laptop Keyb | Technical Guide - Page 68
of custom display profile. 3. Check brightness setting. 4. Check for Software Updates. 5. Clean glass panel while checking for dust/debris. 6. Go to Deep Dive: General Deep Dive Non-uniform Brightness Deep Dive. LCD functioning OK. MacBook (13-inch, Aluminum, Late 2008) Symptom Charts - Display 68 - Apple Macbook Pro Aluminum 13-Inch Black Laptop Keyb | Technical Guide - Page 69
of contaminants. No 4. Run Clamshell Service Yes Diagnostic utility and check for LCD and retest. Go to step 4. Clean glass panel using approved method. Retest replacement or repair of the display. Replace display assembly. L02 Replace logic board. M04 2010-06-15 MacBook (13-inch, Aluminum - Apple Macbook Pro Aluminum 13-Inch Black Laptop Keyb | Technical Guide - Page 70
. Go to step 3. Replace display assembly. L08 LCD meets dark pixel defect specifications. Go to step 4. Replace display assembly. L08 Explain to user that LCD is within specifications. Do not replace display assembly. 2010-06-15 MacBook (13-inch, Aluminum, Late 2008) Symptom Charts - Apple Macbook Pro Aluminum 13-Inch Black Laptop Keyb | Technical Guide - Page 71
memory slot on logic board. 5. Run Clamshell Service Yes Diagnostic utility and check for LCD panel presence Replace logic board. M07 Go to step 5 Issue resolved by reseating loose LVDS cable.. Go to step 6 Go to step 7. Replace logic board M04 2010-06-15 MacBook (13-inch, Aluminum - Apple Macbook Pro Aluminum 13-Inch Black Laptop Keyb | Technical Guide - Page 72
similar unit. Action Go to step 2. Display backlight can take several minutes to stabilize. Reseat LVDS cable Got to step 3 Replace display assembly. Explain to user that LCD appears to meet specifications. Code L07 2010-06-15 MacBook (13-inch, Aluminum, Late 2008) Symptom Charts - Display 72 - Apple Macbook Pro Aluminum 13-Inch Black Laptop Keyb | Technical Guide - Page 73
USB High-Speed Bus. 2. Run Clamshell Service Diagnostic utility and check for all devices presence Replace display assembly. X11 display assembly to test logic board camera connection. Is iSight camera operating properly? No Replace logic board. M13 2010-06-15 MacBook (13-inch, Aluminum - Apple Macbook Pro Aluminum 13-Inch Black Laptop Keyb | Technical Guide - Page 74
Is LCD video present? 2. Connect known-good supported external display. Verify whether image appears on external display No Yes No Yes No Yes No 5. Run Clamshell Service Yes Diagnostic utility and check for LCD panel presence. If MacBook (13-inch, Aluminum, Late 2008) Symptom Charts - Display 74 - Apple Macbook Pro Aluminum 13-Inch Black Laptop Keyb | Technical Guide - Page 75
6. Verify LCD video works with a Yes Replace display assembly. L03 known-good display assembly. No Go to No Video symptom code flow. Backlight Go to step 4. Backlight operating. Go to step 5. Go to step 4. Code 2010-06-15 MacBook (13-inch, Aluminum, Late 2008) Symptom Charts - Display 75 - Apple Macbook Pro Aluminum 13-Inch Black Laptop Keyb | Technical Guide - Page 76
is still blank, go to step 6. Replace display assembly. L09 Poor or no backlight LED M25 Driver power at logic board. Replace logic board. Noise / Unstable Flickering Unlikely 2. Audible noise issue, go to step 5. Code MacBook (13-inch, Aluminum, Late 2008) Symptom Charts - Display 76 - Apple Macbook Pro Aluminum 13-Inch Black Laptop Keyb | Technical Guide - Page 77
Apart instructions to Replace display assembly. L06 Replace logic board. M04 Noises that are not audible from the normal user position are considered acceptable. Return unit to the user. Noise from another source. Go to Noise/Hum/Vibration symptom table.. 2010-06-15 MacBook (13-inch, Aluminum - Apple Macbook Pro Aluminum 13-Inch Black Laptop Keyb | Technical Guide - Page 78
user. If not, document reported symptom and send feedback to smfeedback@apple. com stating that a suitable symptom code could not be found. 2010-06-15 MacBook (13-inch, Aluminum, Late 2008) Symptom Charts - Display 78 - Apple Macbook Pro Aluminum 13-Inch Black Laptop Keyb | Technical Guide - Page 79
step 3; otherwise, go to step 7. Reinstall user's drive, go to step 2. Continue to use knowngood bootable hard drive to determine root cause. Go to step 4. MacBook (13-inch, Aluminum, Late 2008) Symptom Charts - Mass Storage 79 - Apple Macbook Pro Aluminum 13-Inch Black Laptop Keyb | Technical Guide - Page 80
complete without error and No start up successfully? 8. Replace user's hard drive. Does Yes drive format correctly with a GUID partition map and install No Mac OS without errors? Mac OS using Installer. 2010-06-15 MacBook (13-inch, Aluminum, Late 2008) Symptom Charts - Mass Storage 80 - Apple Macbook Pro Aluminum 13-Inch Black Laptop Keyb | Technical Guide - Page 81
Issue resolved. Restore or replace user's hard drive, go to step 7. Issue resolved. Hard drive appears to be defective. Go to step 8. Issue resolved. H01 SATA cable verified or M19 replaced and new hard drive installed, replace logic board. MacBook (13-inch, Aluminum, Late 2008) Symptom - Apple Macbook Pro Aluminum 13-Inch Black Laptop Keyb | Technical Guide - Page 82
with Knowledge Base article "Apple Portables: Hard Drives and Noise " http://support.apple.com/kb/TS2354 Deep Dive Check Result Action Code 1. Boot from computer. Go to step 3. Replace hard drive. Go to step H06 5. MacBook (13-inch, Aluminum, Late 2008) Symptom Charts - Mass Storage 82 - Apple Macbook Pro Aluminum 13-Inch Black Laptop Keyb | Technical Guide - Page 83
Hard drive noise level is similar to a known-good drive and does not require replacement. Replace hard drive. Go to step H06 5. Optical Drive Won't Accept/Reject Media Unlikely cause drive slot for obstructions 2010-06-15 MacBook (13-inch, Aluminum, Late 2008) Symptom Charts - Mass Storage 83 - Apple Macbook Pro Aluminum 13-Inch Black Laptop Keyb | Technical Guide - Page 84
interferes with disc use. Replace the optical drive. (Mechanical damage to optical drive, if found) Go to step 7. Go to Eject Test step 8. Go to Optical Drive Read/Write Data Error troubleshooting page. X03 J03 (J06) J01 (J05) X13 J03 (J06) MacBook (13-inch, Aluminum, Late 2008) Symptom Charts - Apple Macbook Pro Aluminum 13-Inch Black Laptop Keyb | Technical Guide - Page 85
. (J99) Deep Dive Check 1. Is media free to spin without optical drive scraping edge or surface of media? Result Yes No Action Go to step 2. Replace optical drive. Code J03 2010-06-15 MacBook (13-inch, Aluminum, Late 2008) Symptom Charts - Mass Storage 85 - Apple Macbook Pro Aluminum 13-Inch Black Laptop Keyb | Technical Guide - Page 86
. M19 Cable change resolved issue. X03 Replace the optical drive. (Mechanical damage to optical drive, if found) Issue resolved. Replace the optical drive. (Mechanical damage to optical drive, if found) J03 (J05) J03 (J06) 2010-06-15 MacBook (13-inch, Aluminum, Late 2008) Symptom Charts - Mass - Apple Macbook Pro Aluminum 13-Inch Black Laptop Keyb | Technical Guide - Page 87
SATA port functional, reconnect user's optical drive & SATA cable. Go to step 4. Replace logic board. M19 Cable change resolved issue Replace the optical drive. (Mechanical damage to optical drive, if found) X03 J03 (J05) MacBook (13-inch, Aluminum, Late 2008) Symptom Charts - Mass Storage 87 - Apple Macbook Pro Aluminum 13-Inch Black Laptop Keyb | Technical Guide - Page 88
occurs with no disc installed. Continue and verify with media, go to step 3. Internal mechanical interference is affecting rotational spin of media, replace optical drive. Replace optical drive. Go to step 4. Code J04 J04 J04 MacBook (13-inch, Aluminum, Late 2008) Symptom Charts - Mass Storage 88 - Apple Macbook Pro Aluminum 13-Inch Black Laptop Keyb | Technical Guide - Page 89
not properly mounted in enclosure. (Possible physical damage to optical drive.) (J05) Replace optical drive. J02 Go to step 7. Replace optical drive. J04 Noise does not appear to be related to optical drive. 2010-06-15 MacBook (13-inch, Aluminum, Late 2008) Symptom Charts - Mass Storage 89 - Apple Macbook Pro Aluminum 13-Inch Black Laptop Keyb | Technical Guide - Page 90
any media reliably. Go to step 2. Reseat resolved issue. X03 Go to step 3. SATA port functional, reconnect user's optical drive & SATA cable. Go to step 4. Replace logic board. M19 MacBook (13-inch, Aluminum, Late 2008) Symptom Charts - Mass Storage 90 - Apple Macbook Pro Aluminum 13-Inch Black Laptop Keyb | Technical Guide - Page 91
reliably. Cable change resolved issue. X03 Replace optical drive. (Mechanical damage to optical drive, if found) Issue resolved. Replace optical drive. (Mechanical damage to optical drive code could not be found. 2010-06-15 MacBook (13-inch, Aluminum, Late 2008) Symptom Charts - Mass Storage 91 - Apple Macbook Pro Aluminum 13-Inch Black Laptop Keyb | Technical Guide - Page 92
to - Apple Macbook Pro Aluminum 13-Inch Black Laptop Keyb | Technical Guide - Page 93
available for this model, order kit and replace affected key(s). Go to step 4. If a keycap kit is not available for this model, replace complete top case. Go to step 4. Code K01 Go to step 2. Issue resolved. X99 Go to step 3. MacBook (13-inch, Aluminum, Late 2008) Symptom Charts - Input/Output - Apple Macbook Pro Aluminum 13-Inch Black Laptop Keyb | Technical Guide - Page 94
to "MacBook/MacBook Pro: Black Keycap Replacement" (HT4002) or "MacBook: White Keycap Replacement" (HT4003). If a keycap kit is available for this model, order kit and replace affected key(s). If a kit is not available, replace complete top case (code K01). MacBook (13-inch, Aluminum, Late 2008 - Apple Macbook Pro Aluminum 13-Inch Black Laptop Keyb | Technical Guide - Page 95
trackpad simultaneously with both hands. 2. Clean the trackpad surface (with the computer powered off) using a clean, dry, lint-free cloth. 3. . Go to step 4. Replace logic board. M24 Go to step 5. Settings issue resolved. Go to step 6 MacBook (13-inch, Aluminum, Late 2008) Symptom Charts - Apple Macbook Pro Aluminum 13-Inch Black Laptop Keyb | Technical Guide - Page 96
known-good trackpad Yes work? No All trackpad issues resolved. Go to step 7 Replace trackpad according to symptom found. - No mouse/trackpad K02 response - Trackpad cursor 2. Issue resolved. Go to step 3. Code MacBook (13-inch, Aluminum, Late 2008) Symptom Charts - Input/Output Devices 96 - Apple Macbook Pro Aluminum 13-Inch Black Laptop Keyb | Technical Guide - Page 97
step 5 The light sensor connection L14 to logic board is likely good. Replace display assembly Replace logic board. M99 Built-in Keyboard Is Not Recognized Unlikely cause: LCD, hard to step 3. Go to step 2. Code MacBook (13-inch, Aluminum, Late 2008) Symptom Charts - Input/Output Devices 97 - Apple Macbook Pro Aluminum 13-Inch Black Laptop Keyb | Technical Guide - Page 98
the computer off) using a clean, dry, lint free cloth. 3. Make sure all software and firmware updates have been applied. 4. If the issue occurs when system is running from the power adapter, use a grounded power cord with the power adapter. 2010-06-15 MacBook (13-inch, Aluminum, Late 2008) Symptom - Apple Macbook Pro Aluminum 13-Inch Black Laptop Keyb | Technical Guide - Page 99
Code K02 M24 Go to step 6. Replace trackpad according to symptom found. - No mouse/trackpad K02 response - Trackpad cursor not tracking properly K12 - Trackpad button issues. K13 Replace logic board. M16 2010-06-15 MacBook (13-inch, Aluminum, Late 2008) Symptom Charts - Input/Output - Apple Macbook Pro Aluminum 13-Inch Black Laptop Keyb | Technical Guide - Page 100
of-sight to the IR window. 4. Clean the IR window. 5. Open System Replace the remote's battery. Go to step 2. Go to step 3. Replace the Apple Remote. X04 Go to step 3. Issue resolved. Check and reseat IR/sleep LED board cable connection at logic board. Go to step 4. MacBook (13-inch, Aluminum - Apple Macbook Pro Aluminum 13-Inch Black Laptop Keyb | Technical Guide - Page 101
now Yes work? No Issue resolved. Replace the hard drive front bracket (includes IR/sleep cable). Go to step 5. Issue resolved. K99 Replace logic board. M15 Built-in Speaker Has to logic board. Go to step 3. MacBook (13-inch, Aluminum, Late 2008) Symptom Charts - Input/Output Devices 101 - Apple Macbook Pro Aluminum 13-Inch Black Laptop Keyb | Technical Guide - Page 102
get audio No through internal speakers. Issue resolved. Replace logic board. M09 Issue resolved. Replace affected speaker(s). X08 Distorted Sound from Internal Speaker speaker issue. Go to step 2. 2010-06-15 MacBook (13-inch, Aluminum, Late 2008) Symptom Charts - Input/Output Devices 102 - Apple Macbook Pro Aluminum 13-Inch Black Laptop Keyb | Technical Guide - Page 103
Reseat speaker cable or X09 replace damaged speaker. Go to step 5. Go to step 5. Clean any dust or debris. Go X09 to step 5. If membrane is damaged, replace the bad speaker(s). Speaker code could not be found. MacBook (13-inch, Aluminum, Late 2008) Symptom Charts - Input/Output Devices 103 - Apple Macbook Pro Aluminum 13-Inch Black Laptop Keyb | Technical Guide - Page 104
board will not power on with keyboard cable removed, troubleshoot no power/no boot. Deep Dive Check Result Action AC power Yes for 30 seconds to perform a manual SMC reset. Apply AC power. Does power-on MacBook(13-inch,Aluminum,Late2008)-SymptomCharts/MechanicalIssues:ThermalsandEnclosure 104 - Apple Macbook Pro Aluminum 13-Inch Black Laptop Keyb | Technical Guide - Page 105
key. Go to step 5. On board power-on switch X14 pads now starts the system. Replace top case due to stuck power-on key. Go to M01: No power/ not booting 5. Run thermal sensor test. 2008-09-18 MacBook(13-inch,Aluminum,Late2008)-SymptomCharts/MechanicalIssues:ThermalsandEnclosure 105 - Apple Macbook Pro Aluminum 13-Inch Black Laptop Keyb | Technical Guide - Page 106
Go to step 5. Go to step 7. Replace missing screws or damaged heatsink. Go to step 6. Heatsink installed incorrectly. X10 Issue resolved. Go to step 7. Replace heatsink or install X10 thermal grease. Go to step 8. 2008-09-18 MacBook(13-inch,Aluminum,Late2008)-SymptomCharts/MechanicalIssues - Apple Macbook Pro Aluminum 13-Inch Black Laptop Keyb | Technical Guide - Page 107
reseat resolved issue. Replace logic board if sensor error. Go to step 9. Bad logic board. Issue M23 resolved. Use minimum configuration troubleshooting to isolate the could not be found. 2008-09-18 MacBook(13-inch,Aluminum,Late2008)-SymptomCharts/MechanicalIssues:ThermalsandEnclosure 107 - Apple Macbook Pro Aluminum 13-Inch Black Laptop Keyb | Technical Guide - Page 108
Apple Technician Guide Take Apart MacBook (13-inch, Aluminum, Late 2008) © 2008 Apple Inc. All rights reserved. - Apple Macbook Pro Aluminum 13-Inch Black Laptop Keyb | Technical Guide - Page 109
General Information Vertical Insertion (JST) • Use black stick under cable to remove. • Keep connector level to board when lever after inserting cable. Examples: • IR/sleep cable • backlight cable 2010-06-15 MacBook (13-inch, Aluminum, Late 2008) Take Apart - General Information 109 - Apple Macbook Pro Aluminum 13-Inch Black Laptop Keyb | Technical Guide - Page 110
• keyboard flex cable Caution: Use black stick to push the keyboard flex cable all the way into connector to prevent "no power" . • Insert connector parallel to board. Examples: • hard drive connector cable 2010-06-15 MacBook (13-inch, Aluminum, Late 2008) Take Apart - General Information 110 - Apple Macbook Pro Aluminum 13-Inch Black Laptop Keyb | Technical Guide - Page 111
the direction shown. Replacement Caution: To prevent video "noise," a whining sound, no video, or a short to the logic board, be sure to place foam gasket on connector-positioned precisely where shown- after cable is fully connected to logic board. 2010-06-15 MacBook (13-inch, Aluminum, Late 2008 - Apple Macbook Pro Aluminum 13-Inch Black Laptop Keyb | Technical Guide - Page 112
Low-Profile Solid Platform Flex • Use black stick and gentle rocking motion to release tension to replacement steps listed, replace parts in the exact reverse order of the Removal procedure. All screw sizes shown are approximate and represent the total length of the screw. MacBook (13-inch, Aluminum - Apple Macbook Pro Aluminum 13-Inch Black Laptop Keyb | Technical Guide - Page 113
Access Door First Steps: Warning: • Shut down computer. • Wait 10 minutes • Unplug all cables. • Put on ESD strap. Tools • Clean, soft, lint-free cloth • ESD wrist strap and mat 2010-06-15 MacBook (13-inch, Aluminum, Late 2008) Take Apart - Access Door 113 - Apple Macbook Pro Aluminum 13-Inch Black Laptop Keyb | Technical Guide - Page 114
Removal 1 Press locking lever. 2 Lift off access door. 2010-06-15 MacBook (13-inch, Aluminum, Late 2008) Take Apart - Access Door 114 - Apple Macbook Pro Aluminum 13-Inch Black Laptop Keyb | Technical Guide - Page 115
Replacement 1 Attach front of door. 2 Align corners and close door. 3 Close locking lever. 2010-06-15 MacBook (13-inch, Aluminum, Late 2008) Take Apart - Access Door 115 - Apple Macbook Pro Aluminum 13-Inch Black Laptop Keyb | Technical Guide - Page 116
Battery First Steps Remove: • Access door Tools • Clean, soft, lint-free cloth • ESD wrist strap and mat 2010-06-15 MacBook (13-inch, Aluminum, Late 2008) Take Apart - Battery 116 - Apple Macbook Pro Aluminum 13-Inch Black Laptop Keyb | Technical Guide - Page 117
Removal 1 Make sure locking lever is up. 2 Pull battery tab to remove battery. Replacement 1 Insert beveled edge of battery into battery bay. Note: Make sure battery connector is well seated. 2 Reassemble computer. 2010-06-15 MacBook (13-inch, Aluminum, Late 2008) Take Apart - Battery 117 - Apple Macbook Pro Aluminum 13-Inch Black Laptop Keyb | Technical Guide - Page 118
3 Press battery button to check charge level. 2010-06-15 MacBook (13-inch, Aluminum, Late 2008) Take Apart - Battery 118 - Apple Macbook Pro Aluminum 13-Inch Black Laptop Keyb | Technical Guide - Page 119
Steps Remove: • Access door • Battery Caution: Make sure data is backed up before removing the hard drive. Tools • Clean, soft, lint-free cloth • ESD wrist strap and mat • Magnetized Phillips #00 screwdriver 2010-06-15 MacBook (13-inch, Aluminum, Late 2008) Take Apart - Hard Drive Bracket 119 - Apple Macbook Pro Aluminum 13-Inch Black Laptop Keyb | Technical Guide - Page 120
Removal 1 Loosen 1 captive screw. 2 Lift out retaining bar. Replacement Note: Make sure 2 rubber grommets are included in retaining bar before installing it. 2010-06-15 MacBook (13-inch, Aluminum, Late 2008) Take Apart - Hard Drive Bracket 120 - Apple Macbook Pro Aluminum 13-Inch Black Laptop Keyb | Technical Guide - Page 121
: • Access door • Battery • Hard drive bracket Caution: Make sure data is backed up before removing the hard drive. Tools • Clean, soft, lint-free cloth • ESD wrist strap and mat • Magnetized Phillips #00 screwdriver 2010-06-15 MacBook (13-inch, Aluminum, Late 2008) Take Apart - Hard Drive 121 - Apple Macbook Pro Aluminum 13-Inch Black Laptop Keyb | Technical Guide - Page 122
Removal 1 Make sure hard drive bracket is removed. 2 Use pull tab to tilt hard drive out. 2010-06-15 MacBook (13-inch, Aluminum, Late 2008) Take Apart - Hard Drive 122 - Apple Macbook Pro Aluminum 13-Inch Black Laptop Keyb | Technical Guide - Page 123
3 Hold hard drive by the sides only. 4 Disconnect hard drive connector. 5 Follow safe handling: • Do not press drive • Do not touch connector • Do not touch circuitry 2010-06-15 MacBook (13-inch, Aluminum, Late 2008) Take Apart - Hard Drive 123 - Apple Macbook Pro Aluminum 13-Inch Black Laptop Keyb | Technical Guide - Page 124
. Note: The grommets might be a different color than shown. 2 Make sure 4 Torx T6 (922-8655) mounting screws are installed on drive. If replacement drive does not have mounting screws, transfer them from the old drive. 2010-06-15 MacBook (13-inch, Aluminum, Late 2008) Take Apart - Hard Drive 124 - Apple Macbook Pro Aluminum 13-Inch Black Laptop Keyb | Technical Guide - Page 125
3 Attach connector, and tilt hard drive into front of top case. 2010-06-15 MacBook (13-inch, Aluminum, Late 2008) Take Apart - Hard Drive 125 - Apple Macbook Pro Aluminum 13-Inch Black Laptop Keyb | Technical Guide - Page 126
destination disk for installation, continue following onscreen instructions. After restart, insert the next Mac OS X Install Disc 2. 6. Restore the data by reinstalling the backed up files from your backup to the new drive. 2010-06-15 MacBook (13-inch, Aluminum, Late 2008) Take Apart - Hard Drive - Apple Macbook Pro Aluminum 13-Inch Black Laptop Keyb | Technical Guide - Page 127
Bottom Case First Steps Remove: • Access door • Battery Tools • Clean, soft, lint-free cloth • ESD wrist strap and mat • Magnetic Phillips #00 screwdriver 2010-06-15 MacBook (13-inch, Aluminum, Late 2008) Take Apart - Bottom Case 127 - Apple Macbook Pro Aluminum 13-Inch Black Laptop Keyb | Technical Guide - Page 128
: To prevent scratches, use a protective cloth when working with metal tools. 1 Remove 8 screws: • 1 (3 mm) 922-8660 • 3 (13 mm) 922-8666 • 4 (3.55 mm) 922-8653 Replacement Note: Install screws in the order shown. 2010-06-15 MacBook (13-inch, Aluminum, Late 2008) Take Apart - Bottom Case 128 - Apple Macbook Pro Aluminum 13-Inch Black Laptop Keyb | Technical Guide - Page 129
2 Grasp lever and tilt up bottom case. Replacement 1 Press corners to align bottom case to top case. 2 Check alignment as you install screws. 2010-06-15 MacBook (13-inch, Aluminum, Late 2008) Take Apart - Bottom Case 129 - Apple Macbook Pro Aluminum 13-Inch Black Laptop Keyb | Technical Guide - Page 130
Memory First Steps Remove: • Access door • Battery • Bottom case Caution: Avoid touching anything other than the memory area. Tools • Clean, soft, lint-free cloth • ESD wrist strap and mat 2010-06-15 MacBook (13-inch, Aluminum, Late 2008) Take Apart - Memory 130 - Apple Macbook Pro Aluminum 13-Inch Black Laptop Keyb | Technical Guide - Page 131
Removal Memory cards must be: • 1.25 inch or smaller • 1 GB or 2 GB • 204-pin • PC-8500 DDR3, 1066 MHz RAM This computer comes with a Pull out the card. 3 Hold the card by the edges. 4 Do not touch the gold connectors. 2010-06-15 MacBook (13-inch, Aluminum, Late 2008) Take Apart - Memory 131 - Apple Macbook Pro Aluminum 13-Inch Black Laptop Keyb | Technical Guide - Page 132
Replacement 1 Install cards at an angle. If installing just one card, install it in lower slot. 2 Spread ejection residue on the gold connectors. 3 If you installed additional memory, check that computer recognizes it. 2010-06-15 MacBook (13-inch, Aluminum, Late 2008) Take Apart - Memory 132 - Apple Macbook Pro Aluminum 13-Inch Black Laptop Keyb | Technical Guide - Page 133
• Bottom case Tools • Clean, soft, lint-free cloth • ESD wrist strap and mat • Magnetized Phillips #00 screwdriver Caution: The screws for this procedure require a newer screwdriver. Using a dull screwdriver can damage the screw heads. 2010-06-15 MacBook (13-inch, Aluminum, Late 2008) Take Apart - Apple Macbook Pro Aluminum 13-Inch Black Laptop Keyb | Technical Guide - Page 134
prevent scratches to the computer housing, use a soft cloth when removing and installing screws. 1 Remove 4 (10.5-mm) 922-8656 screws in order shown. Replacement Note: Install screws in order shown. 2 Lift out mid wall. 2010-06-15 MacBook (13-inch, Aluminum, Late 2008) Take Apart - Mid Wall 134 - Apple Macbook Pro Aluminum 13-Inch Black Laptop Keyb | Technical Guide - Page 135
scratches to the computer housing, use a soft cloth when removing and installing screws. Tools • Clean, soft, lint-free cloth • ESD wrist strap and mat • Magnetized Phillips #00 screwdriver • Black stick 2010-06-15 MacBook (13-inch, Aluminum, Late 2008) Take Apart - Battery Connector Cover 135 - Apple Macbook Pro Aluminum 13-Inch Black Laptop Keyb | Technical Guide - Page 136
Removal 1 Remove 3 screws: • 1 (2.5 mm) 922-8652 • 2 (1.5 mm) 922-8651 Replacement Note: Install screws in order shown. 2 Lift out battery connector cover. 2010-06-15 MacBook (13-inch, Aluminum, Late 2008) Take Apart - Battery Connector Cover 136 - Apple Macbook Pro Aluminum 13-Inch Black Laptop Keyb | Technical Guide - Page 137
cover To prevent scratches to the computer housing, use a soft cloth when removing and installing screws. Tools • Clean, soft, lint-free cloth • ESD wrist strap and mat • Magnetized Phillips #00 screwdriver 2010-06-15 MacBook (13-inch, Aluminum, Late 2008) Take Apart - Battery Cable Guide 137 - Apple Macbook Pro Aluminum 13-Inch Black Laptop Keyb | Technical Guide - Page 138
Removal 1 Remove 2.7-mm (922-8661) screw. 2 Lift out battery cable guide. 2010-06-15 MacBook (13-inch, Aluminum, Late 2008) Take Apart - Battery Cable Guide 138 - Apple Macbook Pro Aluminum 13-Inch Black Laptop Keyb | Technical Guide - Page 139
Battery Power Cable First Steps Remove: • Access door • Battery • Bottom case • Mid wall • Battery connector cover • Battery cable guide Tools • Clean, soft, lint-free cloth • ESD wrist strap and mat 2010-06-15 MacBook (13-inch, Aluminum, Late 2008) Take Apart - Battery Power Cable 139 - Apple Macbook Pro Aluminum 13-Inch Black Laptop Keyb | Technical Guide - Page 140
Removal 1 Disconnect the battery cable, and peel it up from the top case. 2 Route the cable through the top case slot. Replacement 1 Connect cable to logic board. 2 Press cable to top case so it lays flat. 2010-06-15 MacBook (13-inch, Aluminum, Late 2008) Take Apart - Battery Power Cable 140 - Apple Macbook Pro Aluminum 13-Inch Black Laptop Keyb | Technical Guide - Page 141
Battery • Bottom case • Mid wall • Battery connector cover Tools • Clean, soft, lint-free cloth • ESD wrist strap and mat • Magnetized Phillips #00 screwdriver • Permanent marking felt-tip pen 2010-06-15 MacBook (13-inch, Aluminum, Late 2008) Take Apart - Battery Indicator Light (BIL) Cable 141 - Apple Macbook Pro Aluminum 13-Inch Black Laptop Keyb | Technical Guide - Page 142
Draw line on inner edge of cable. to mark cable routing. 2 Remove 2.7 mm (922-8661) screw. 3 Disconnect cable from logic board. 4 Remove battery cable guide. 5 Route cable through top case wall. 2010-06-15 MacBook (13-inch, Aluminum, Late 2008) Take Apart - Battery Indicator Light (BIL) Cable 142 - Apple Macbook Pro Aluminum 13-Inch Black Laptop Keyb | Technical Guide - Page 143
case. 8 Disconnect cable from BIL board. Note: With board removed, BIL button might pop out. Make sure you retain the BIL button. 2010-06-15 MacBook (13-inch, Aluminum, Late 2008) Take Apart - Battery Indicator Light (BIL) Cable 143 - Apple Macbook Pro Aluminum 13-Inch Black Laptop Keyb | Technical Guide - Page 144
Replacement 1 Make sure rubber gasket is installed on inner side of BIL board. 2 Set and hold button in top case wall. Then install cable and BIL board. 3 Press cable so it lays completely flat. 2010-06-15 MacBook (13-inch, Aluminum, Late 2008) Take Apart - Battery Indicator Light (BIL) Cable 144 - Apple Macbook Pro Aluminum 13-Inch Black Laptop Keyb | Technical Guide - Page 145
Camera Cable Guide First Steps Remove: • Access door • Battery • Bottom case Tools • Clean, soft, lint-free cloth • ESD wrist strap and mat • Magnetized Phillips #00 screwdriver • Black stick 2010-06-15 MacBook (13-inch, Aluminum, Late 2008) Take Apart - Camera Cable Guide 145 - Apple Macbook Pro Aluminum 13-Inch Black Laptop Keyb | Technical Guide - Page 146
. 2 Use a black stick to tilt out the camera cable guide. Replacement 1 Important: Insert the cable guide under the speaker and install the 4-mm screw (9228650). 2 Make sure the ground tab is over the cable guide before installing the 2 remaining screws. 2010-06-15 MacBook (13-inch, Aluminum, Late - Apple Macbook Pro Aluminum 13-Inch Black Laptop Keyb | Technical Guide - Page 147
LVDS Cable Guide First Steps Remove: • Access door • Battery • Bottom case Tools • Clean, soft, lint-free cloth • ESD wrist strap and mat • Magnetized Phillips #00 screwdriver 2010-06-15 MacBook (13-inch, Aluminum, Late 2008) Take Apart - LVDS Cable Guide 147 - Apple Macbook Pro Aluminum 13-Inch Black Laptop Keyb | Technical Guide - Page 148
Removal 1 Remove 2 screws: • 5-mm in corner (9228658) • 7-mm (922-8645) 2 Lift out cable guide. Replacement Note: Align locator pin to hole in top case. 2010-06-15 MacBook (13-inch, Aluminum, Late 2008) Take Apart - LVDS Cable Guide 148 - Apple Macbook Pro Aluminum 13-Inch Black Laptop Keyb | Technical Guide - Page 149
door • Battery • Bottom case • Camera cable guide • LVDS cable guide Tools • Clean, soft, lint-free cloth • ESD wrist strap and mat • Magnetized Phillips #00 screwdriver • Torx T6 screwdriver • Foam wedge fixture 2010-06-15 MacBook (13-inch, Aluminum, Late 2008) Take Apart - Display Assembly 149 - Apple Macbook Pro Aluminum 13-Inch Black Laptop Keyb | Technical Guide - Page 150
: Refer to Connector Types before disconnecting cables. 3. Disconnect and unroute 3 cables: • subwoofer • camera • LVDS 4. Remove 4-mm screw (922-8644) from the subwoofer. 2010-06-15 MacBook (13-inch, Aluminum, Late 2008) Take Apart - Display Assembly 150 - Apple Macbook Pro Aluminum 13-Inch Black Laptop Keyb | Technical Guide - Page 151
then tighten screws in the order shown. 8. Separate display assembly from top case. Replacement Important: Before returning a display assembly, be sure to • remove clutch cover • remove to install the AirPort Card. 2010-06-15 MacBook (13-inch, Aluminum, Late 2008) Take Apart - Display Assembly 151 - Apple Macbook Pro Aluminum 13-Inch Black Laptop Keyb | Technical Guide - Page 152
operation. Replacement Caution: To prevent video "noise," a whining sound, no video, or a short to the logic board, be sure to place foam gasket on LVDS connector-positioned precisely where shown- after cable is fully connected to logic board. 2010-06-15 MacBook (13-inch, Aluminum, Late 2008 - Apple Macbook Pro Aluminum 13-Inch Black Laptop Keyb | Technical Guide - Page 153
Display Clutch Cover First Steps Remove: • Access door • Battery • Bottom case • Camera cable guide • LVDS cable guide • Display assembly Tools • Clean, soft, lint-free cloth • ESD wrist strap and mat 2010-06-15 MacBook (13-inch, Aluminum, Late 2008) Take Apart - Display Clutch Cover 153 - Apple Macbook Pro Aluminum 13-Inch Black Laptop Keyb | Technical Guide - Page 154
with clean, soft cloth. 2 Holding left hinge, slide clutch cover 1/4 inch (6.35 mm) away from the LVDS cable. 3 Press down on clutch cover to loosen 4 hooks inside. 4 Tilt up end of clutch cover as you roll it toward display face. 5 Remove clutch cover. 2010-06-15 MacBook (13-inch, Aluminum, Late - Apple Macbook Pro Aluminum 13-Inch Black Laptop Keyb | Technical Guide - Page 155
Replacement 1 Note shape of clutch cover: • flat at bottom • curved at top 2 Make sure flat edge is at Listen for snapping sound as hooks engage. 6 Check for good fit. Avoid: • gaps • bulges • pinched cables 2010-06-15 MacBook (13-inch, Aluminum, Late 2008) Take Apart - Display Clutch Cover 155 - Apple Macbook Pro Aluminum 13-Inch Black Laptop Keyb | Technical Guide - Page 156
door • Battery • Bottom case • Camera cable guide • LVDS cable guide • Display assembly • Display clutch cover Tools • Clean, soft, lint-free cloth • ESD wrist strap and mat • Black stick • Phillips #00 screwdriver 2010-06-15 MacBook (13-inch, Aluminum, Late 2008) Take Apart - AirPort Card 156 - Apple Macbook Pro Aluminum 13-Inch Black Laptop Keyb | Technical Guide - Page 157
cable clip. Note the wide head on this screw. 3 Lift up cable clip. 4 Disconnect AirPort cable. 5 Disconnect 2 AirPort antenna cables. Replacement Note: Shorter cable is at bottom. 6 Remove 2 (3-mm) screws (076-1326). 2010-06-15 MacBook (13-inch, Aluminum, Late 2008) Take Apart - AirPort Card 157 - Apple Macbook Pro Aluminum 13-Inch Black Laptop Keyb | Technical Guide - Page 158
7 Lift out AirPort Card. Replacement 1 Make sure thermal pad is centered on AirPort Card within 4 corner guides. If the pad sticks to display assembly tab, scrape it away. incorrectly will cause logic board failure! 2010-06-15 MacBook (13-inch, Aluminum, Late 2008) Take Apart - AirPort Card 158 - Apple Macbook Pro Aluminum 13-Inch Black Laptop Keyb | Technical Guide - Page 159
3 After installing the remaining connectors and screws, be sure to install the cable clip with the wider head screw. 2010-06-15 MacBook (13-inch, Aluminum, Late 2008) Take Apart - AirPort Card 159 - Apple Macbook Pro Aluminum 13-Inch Black Laptop Keyb | Technical Guide - Page 160
Battery • Bottom case • Camera cable guide • LVDS cable guide • Display assembly • Display clutch cover • AirPort Card Tools • Clean, soft, lint-free cloth • ESD wrist strap and mat • Magnetized Phillips #00 screwdriver 2010-06-15 MacBook (13-inch, Aluminum, Late 2008) Take Apart - AirPort Antenna - Apple Macbook Pro Aluminum 13-Inch Black Laptop Keyb | Technical Guide - Page 161
Removal 1 Remove 4 ( 3-mm) screws (076-1326). 2 Lift out card. Replacement Note: Make sure the AirPort antenna cable is routed in its channel. 2010-06-15 MacBook (13-inch, Aluminum, Late 2008) Take Apart - AirPort Antenna 161 - Apple Macbook Pro Aluminum 13-Inch Black Laptop Keyb | Technical Guide - Page 162
Optical Drive First Steps Remove: • Access door • Battery • Bottom case • Camera cable guide Tools • Clean, soft, lint-free cloth • ESD wrist strap and mat • Magnetized Phillips #00 screwdriver • Black stick 2010-06-15 MacBook (13-inch, Aluminum, Late 2008) Take Apart - Optical Drive 162 - Apple Macbook Pro Aluminum 13-Inch Black Laptop Keyb | Technical Guide - Page 163
screws: • 1 (4-mm) subwoofer (922-8650) • 3 (2.5-mm) optical drive (922-8662) 3 Use black stick to carefully disconnect optical drive flex cable. Press cable straight down when installing. 4 Tilt up drive to remove. 2010-06-15 MacBook (13-inch, Aluminum, Late 2008) Take Apart - Optical Drive 163 - Apple Macbook Pro Aluminum 13-Inch Black Laptop Keyb | Technical Guide - Page 164
5 Handle drive by sides. 6 If replacing optical drive, make sure it has flex cable. Replacement 1 Do not touch sensor on top case. 2010-06-15 MacBook (13-inch, Aluminum, Late 2008) Take Apart - Optical Drive 164 - Apple Macbook Pro Aluminum 13-Inch Black Laptop Keyb | Technical Guide - Page 165
2 If installing a new optical drive, make sure it has the flex cable attached. 3 Tilt optical drive into top case, making sure cables are out of way.. 2010-06-15 MacBook (13-inch, Aluminum, Late 2008) Take Apart - Optical Drive 165 - Apple Macbook Pro Aluminum 13-Inch Black Laptop Keyb | Technical Guide - Page 166
Optical Drive Flex Cable First Steps Remove: • Access door • Battery • Bottom case • Camera cable guide • Optical drive Tools • Clean, soft, lint-free cloth • ESD wrist strap and mat • Black stick 2010-06-15 MacBook (13-inch, Aluminum, Late 2008) Take Apart - Optical Drive Flex Cable 166 - Apple Macbook Pro Aluminum 13-Inch Black Laptop Keyb | Technical Guide - Page 167
Removal 1 Handle drive by sides. 2 Evenly disconnect optical drive flex cable. 2010-06-15 MacBook (13-inch, Aluminum, Late 2008) Take Apart - Optical Drive Flex Cable 167 - Apple Macbook Pro Aluminum 13-Inch Black Laptop Keyb | Technical Guide - Page 168
/ Subwoofer First Steps Remove: • Access door • Battery • Bottom case • Camera cable guide • Optical drive Tools • Clean, soft, lint-free cloth • ESD wrist strap and mat • Black stick • Kapton tape 2010-06-15 MacBook (13-inch, Aluminum, Late 2008) Take Apart - Right Speaker / Subwoofer 168 - Apple Macbook Pro Aluminum 13-Inch Black Laptop Keyb | Technical Guide - Page 169
Removal 1 Break black tape to free subwoofer cable. Replacement Note: Apply Kapton tape. 2 Pry up speaker body to loosen adhesive. 2010-06-15 MacBook (13-inch, Aluminum, Late 2008) Take Apart - Right Speaker / Subwoofer 169 - Apple Macbook Pro Aluminum 13-Inch Black Laptop Keyb | Technical Guide - Page 170
3 Route speaker under display cable. Replacement 1 Peel adhesive backing off right speaker and install in top case. 2 To finish installing subwoofer, follow steps in • Optical drive • Camera cable guide 2010-06-15 MacBook (13-inch, Aluminum, Late 2008) Take Apart - Right Speaker / Subwoofer 170 - Apple Macbook Pro Aluminum 13-Inch Black Laptop Keyb | Technical Guide - Page 171
Cable First Steps Remove: • Access door • Battery • Hard drive • Bottom case • Mid wall • Camera cable guide • Optical drive Tools • Clean, soft, lint-free cloth • ESD wrist strap and mat • Black stick 2010-06-15 MacBook (13-inch, Aluminum, Late 2008) Take Apart - Hard Drive Connector Cable 171 - Apple Macbook Pro Aluminum 13-Inch Black Laptop Keyb | Technical Guide - Page 172
Removal 1 Pull straight up on connector to disconnect cable. 2 Peel up cable from top case. 2010-06-15 MacBook (13-inch, Aluminum, Late 2008) Take Apart - Hard Drive Connector Cable 172 - Apple Macbook Pro Aluminum 13-Inch Black Laptop Keyb | Technical Guide - Page 173
up adhesive tab. 4 Twist strain relief out of top case. Replacement 1 Peel adhesive backing off cable. 2 Press cable so it lays flat in top case. 3 Connect cable to • logic board • top case • hard drive 2010-06-15 MacBook (13-inch, Aluminum, Late 2008) Take Apart - Hard Drive Connector Cable 173 - Apple Macbook Pro Aluminum 13-Inch Black Laptop Keyb | Technical Guide - Page 174
Fan First Steps Remove: • Access door • Battery • Bottom case Tools • Clean, soft, lint-free cloth • ESD wrist strap and mat • Magnetized Phillips #00 screwdriver • Black stick 2010-06-15 MacBook (13-inch, Aluminum, Late 2008) Take Apart - Fan 174 - Apple Macbook Pro Aluminum 13-Inch Black Laptop Keyb | Technical Guide - Page 175
Removal 1 Use black stick to disconnect fan cable. 2 Remove 3 screws: • 1 (7-mm) 922-8645 • 2 (5-mm) 922-8644 Caution: Do not touch heatsink: Replacement Note: Install screws in order shown. 3 Tilt up fan. 2010-06-15 MacBook (13-inch, Aluminum, Late 2008) Take Apart - Fan 175 - Apple Macbook Pro Aluminum 13-Inch Black Laptop Keyb | Technical Guide - Page 176
Keyboard Flex Bracket First Steps Remove: • Access door • Battery • Bottom case Tools • Clean, soft, lint-free cloth • ESD wrist strap and mat • Magnetized Phillips #00 screwdriver 2010-06-15 MacBook (13-inch, Aluminum, Late 2008) Take Apart - Keyboard Flex Bracket 176 - Apple Macbook Pro Aluminum 13-Inch Black Laptop Keyb | Technical Guide - Page 177
Removal 1 Remove 2 (5-mm) 922-8644 screws. 2 Lift out bracket. 2010-06-15 MacBook (13-inch, Aluminum, Late 2008) Take Apart - Keyboard Flex Bracket 177 - Apple Macbook Pro Aluminum 13-Inch Black Laptop Keyb | Technical Guide - Page 178
• 1 tri-lobe #0 set screw Tools • ESD wrist strap and mat • Sticky (Post-It) notes • Black stick • Large tri-lobe #0 screwdriver (922-8991) • Small tri-lobe #00 screwdriver (922-9013) • Magnetized Torx T5 screwdriver 2010-06-15 MacBook (13-inch, Aluminum, Late 2008) Take Apart - Trackpad 178 - Apple Macbook Pro Aluminum 13-Inch Black Laptop Keyb | Technical Guide - Page 179
screws from flexures. 3 Remove 1 large tri- lobe #0 set screw. 4 Dispose of old screws; they lose their ability to hold securely if reused. 2010-06-15 MacBook (13-inch, Aluminum, Late 2008) Take Apart - Trackpad 179 - Apple Macbook Pro Aluminum 13-Inch Black Laptop Keyb | Technical Guide - Page 180
5 Hold trackpad and press down on edge closest to logic board. 6 Slide trackpad down and back towards keyboard to clear supports in front edge of top case. 2010-06-15 MacBook (13-inch, Aluminum, Late 2008) Take Apart - Trackpad 180 - Apple Macbook Pro Aluminum 13-Inch Black Laptop Keyb | Technical Guide - Page 181
. 9 Remove 2 flexures (thin metal pieces) from top case. 10 Dispose of old flexures; they are matched to each individual trackpad by thickness. 2010-06-15 MacBook (13-inch, Aluminum, Late 2008) Take Apart - Trackpad 181 - Apple Macbook Pro Aluminum 13-Inch Black Laptop Keyb | Technical Guide - Page 182
and tri-lobe screws, and only use new ones included with trackpad kit. 1 Peel and adhere black label (included with new trackpad) to cover trackpad stiffener as shown. 2 Insert flexures squarely into slots in top case. 2010-06-15 MacBook (13-inch, Aluminum, Late 2008) Take Apart - Trackpad 182 - Apple Macbook Pro Aluminum 13-Inch Black Laptop Keyb | Technical Guide - Page 183
rubbing edges of trackpad against top case while installing. This could cause invisible cracks to form in the glass of the trackpad. 2010-06-15 MacBook (13-inch, Aluminum, Late 2008) Take Apart - Trackpad 183 - Apple Macbook Pro Aluminum 13-Inch Black Laptop Keyb | Technical Guide - Page 184
6 Loosely insert 6 small tri-lobe #00 screws into flexures. Do not tighten yet. 7 On the palm rest, insert one sticky (Post-It) note into gap on each of the four sides of trackpad. 2010-06-15 MacBook (13-inch, Aluminum, Late 2008) Take Apart - Trackpad 184 - Apple Macbook Pro Aluminum 13-Inch Black Laptop Keyb | Technical Guide - Page 185
8 Fold sticky notes over so that top case can be laid flat. 9 Tighten 6 small tri- lobe #00 screws at flexures. 10 Inspect that gaps between trackpad and top case are even on all sides. If not, loosen screws and adjust. 2010-06-15 MacBook (13-inch, Aluminum, Late 2008) Take Apart - Trackpad 185 - Apple Macbook Pro Aluminum 13-Inch Black Laptop Keyb | Technical Guide - Page 186
. 12 Slowly turn set screw in small increments until trackpad has a normal clicking motion. Important: Do not overtighten set screw or you may damage trackpad. 13 Connect flex cable to logic board. 2010-06-15 MacBook (13-inch, Aluminum, Late 2008) Take Apart - Trackpad 186 - Apple Macbook Pro Aluminum 13-Inch Black Laptop Keyb | Technical Guide - Page 187
Battery • Bottom case • Memory • Fan • Keyboard flex bracket Tools • Clean, soft, lint-free cloth • ESD wrist strap and mat • Magnetized Phillips #00 screwdriver • Tweezers (optional) • Pencil with eraser • Black stick 2010-06-15 MacBook (13-inch, Aluminum, Late 2008) Take Apart - Logic Board 187 - Apple Macbook Pro Aluminum 13-Inch Black Laptop Keyb | Technical Guide - Page 188
remove or loosen 2 MagSafe board screws. 3 Remove 2 (4-mm) 922-8753 screws at port side for bottom case clip. 4 Remove bottom case clip. 2010-06-15 MacBook (13-inch, Aluminum, Late 2008) Take Apart - Logic Board 188 - Apple Macbook Pro Aluminum 13-Inch Black Laptop Keyb | Technical Guide - Page 189
cables are not pinched. 6 Pivot logic board to free locking pin. 7 Remove 2.7-mm screw (922-8661) and battery cable guide to disconnect battery connector. 8 Disconnect battery connector from underside of logic board. 2010-06-15 MacBook (13-inch, Aluminum, Late 2008) Take Apart - Logic Board 189 - Apple Macbook Pro Aluminum 13-Inch Black Laptop Keyb | Technical Guide - Page 190
Note: Make sure cables are routed as shown.. 11 Do not remove the speaker and heatsink if reinstalling the same logic board. 12 If replacing the logic board with a new one, transfer • Left speaker • Heatsink 2010-06-15 MacBook (13-inch, Aluminum, Late 2008) Take Apart - Logic Board 190 - Apple Macbook Pro Aluminum 13-Inch Black Laptop Keyb | Technical Guide - Page 191
in order shown. Replacement Caution: To prevent video "noise," a whining sound, no video, or a short to the logic board, be sure to place foam gasket on LVDS connector-positioned precisely where shown- after cable is fully connected to logic board. 2010-06-15 MacBook (13-inch, Aluminum, Late 2008 - Apple Macbook Pro Aluminum 13-Inch Black Laptop Keyb | Technical Guide - Page 192
boards include a loose Ethernet ID label. When replacing the logic board with a new one, place the label on the inside front wall of the top case, and use a permanent-ink pen to strike out the old Ethernet ID number. 2010-06-15 MacBook (13-inch, Aluminum, Late 2008) Take Apart - Logic Board 192 - Apple Macbook Pro Aluminum 13-Inch Black Laptop Keyb | Technical Guide - Page 193
Left Speaker First Steps Remove: • Access door • Battery • Bottom case • Memory • Fan • Keyboard flex bracket • Logic board Tools • Clean, soft, lint-free cloth • ESD wrist strap and mat • Black stick 2010-06-15 MacBook (13-inch, Aluminum, Late 2008) Take Apart - Left Speaker 193 - Apple Macbook Pro Aluminum 13-Inch Black Laptop Keyb | Technical Guide - Page 194
Removal Caution: Do not touch heatsink or gold connectors: 1 Disconnect the speaker connector. 2 Caution: Do not touch the soft speaker cone. 3 Remove speaker body. 2010-06-15 MacBook (13-inch, Aluminum, Late 2008) Take Apart - Left Speaker 194 - Apple Macbook Pro Aluminum 13-Inch Black Laptop Keyb | Technical Guide - Page 195
new speaker. Replacement 1 Make sure left speaker body and logic board are free of • dust • scratches • plastic burrs 2 Connect speaker cable to logic board. 3 Remove paper backing from four foam pads, and press speaker onto port side of logic board. 2010-06-15 MacBook (13-inch, Aluminum, Late 2008 - Apple Macbook Pro Aluminum 13-Inch Black Laptop Keyb | Technical Guide - Page 196
First Steps Remove: • Access door • Battery • Bottom case • Memory • Fan • Keyboard flex bracket • Logic board Tools • Clean, soft, lint-free cloth • ESD wrist strap and mat • Magnetized Phillips #00 screwdriver 2010-06-15 MacBook (13-inch, Aluminum, Late 2008) Take Apart - MagSafe Board 196 - Apple Macbook Pro Aluminum 13-Inch Black Laptop Keyb | Technical Guide - Page 197
Removal 1 Remove 2 (7-mm) 922-8645 screws. 2 Tilt out MagSafe board. Replacement 1 Make sure MagSafe cable is routed away from screw standoff, as shown. . 4 With computer fully assembled, test power with power cable. 2010-06-15 MacBook (13-inch, Aluminum, Late 2008) Take Apart - MagSafe Board 197 - Apple Macbook Pro Aluminum 13-Inch Black Laptop Keyb | Technical Guide - Page 198
case • Memory • Fan • Keyboard flex bracket • Logic board Tools • Clean, soft, lint-free cloth • ESD wrist strap and mat • Magnetized Phillips #0 or #1 screwdriver • Thermal grease syringe • Alcohol pads • Black stick 2010-06-15 MacBook (13-inch, Aluminum, Late 2008) Take Apart - Heatsink 198 - Apple Macbook Pro Aluminum 13-Inch Black Laptop Keyb | Technical Guide - Page 199
wiggle heatsink to loosen the bond to the board. Caution: Do not pull heatsink 4 Keeping it level, lift heatsink away from board. 2010-06-15 MacBook (13-inch, Aluminum, Late 2008) Take Apart - Heatsink 199 - Apple Macbook Pro Aluminum 13-Inch Black Laptop Keyb | Technical Guide - Page 200
5 Scrape off thermal grease, and use alcohol pad to clean thermal pads and microprocessors. Replacement Important: New heatsinks include pre-applied thermal grease. Follow steps 1-2 Use a pen to mark the syringe in thirds. 2010-06-15 MacBook (13-inch, Aluminum, Late 2008) Take Apart - Heatsink 200 - Apple Macbook Pro Aluminum 13-Inch Black Laptop Keyb | Technical Guide - Page 201
2 Inject 1/3 of grease on each microprocessor. 3 Important: Connect the thermal sensor. 4 Lower the heatsink over the logic board. 2010-06-15 MacBook (13-inch, Aluminum, Late 2008) Take Apart - Heatsink 201 - Apple Macbook Pro Aluminum 13-Inch Black Laptop Keyb | Technical Guide - Page 202
Keyboard flex bracket • Logic board Caution: Do not strain microphone cable. Tools • Clean, soft, lint-free cloth • ESD wrist strap and mat • Magnetic Phillips #00 screwdriver • Black stick • Pencil with an eraser 2010-06-15 MacBook (13-inch, Aluminum, Late 2008) Take Apart - Microphone Cable 202 - Apple Macbook Pro Aluminum 13-Inch Black Laptop Keyb | Technical Guide - Page 203
mm (922-8658) 2 Remove LVDS cable guide. Replacement Note: When installing the LVDS cable guide, seat the locator pin first. 3 Use black stick to pry up microphone gasket. 4 Remove any adhesive remnants from top case. 2010-06-15 MacBook (13-inch, Aluminum, Late 2008) Take Apart - Microphone Cable - Apple Macbook Pro Aluminum 13-Inch Black Laptop Keyb | Technical Guide - Page 204
eraser to seat the microphone gasket in the top case. 3 Make sure the microphone cable is not pinched when installing the LVDS cable guide. 4 To route the microphone cable to the board, refer to Logic board. 2010-06-15 MacBook (13-inch, Aluminum, Late 2008) Take Apart - Microphone Cable 204 - Apple Macbook Pro Aluminum 13-Inch Black Laptop Keyb | Technical Guide - Page 205
guide • Optical drive • Fan • Keyboard flex bracket • Logic board Tools • Clean, soft, lint-free cloth • ESD wrist strap and mat • Magnetic Phillips #00 screwdriver Removal 1 Remove 2 screws: • 10-mm (922-8648) at top • 6-mm (922-8644) 2 Remove center bracket. 2010-06-15 MacBook (13-inch, Aluminum - Apple Macbook Pro Aluminum 13-Inch Black Laptop Keyb | Technical Guide - Page 206
Kensington Lock First Steps Remove: • Access door • Battery • Bottom case • Mid wall Tools • Clean, soft, lint-free cloth • ESD wrist strap and mat • Magnetic Phillips #00 screwdriver 2010-06-15 MacBook (13-inch, Aluminum, Late 2008) Take Apart - Kensington Lock 206 - Apple Macbook Pro Aluminum 13-Inch Black Laptop Keyb | Technical Guide - Page 207
Removal 1 Remove 2 (3 mm) screws (screw part number not offered). 2 Lift out lock. Note that the lock includes the plastic piece and metal shield. 2010-06-15 MacBook (13-inch, Aluminum, Late 2008) Take Apart - Kensington Lock 207 - Apple Macbook Pro Aluminum 13-Inch Black Laptop Keyb | Technical Guide - Page 208
case • Mid wall • Camera cable guide • Optical drive • Hard drive connector cable Tools • Clean, soft, lint-free cloth • ESD wrist strap and mat • Magnetized Phillips #00 screwdriver • Black stick • Tweezers (optional) 2010-06-15 MacBook (13-inch, Aluminum, Late 2008) Take Apart - Hard Drive - Apple Macbook Pro Aluminum 13-Inch Black Laptop Keyb | Technical Guide - Page 209
top case. Replacement Caution: The narrow end of the cable can be easily torn if mishandled. You may find it helpful to use two plastic tweezers to insert it into the connector. Be sure to insert it squarely to prevent an SMC short or startup issue. 2010-06-15 MacBook (13-inch, Aluminum, Late 2008 - Apple Macbook Pro Aluminum 13-Inch Black Laptop Keyb | Technical Guide - Page 210
• Hard drive • Bottom case • Memory • Mid wall • Battery cable guide • Camera cable guide • LVDS cable guide • Display assembly • Optical drive • Right speaker/ subwoofer • Fan • Keyboard indicator light board and cable 2010-06-15 MacBook (13-inch, Aluminum, Late 2008) Take Apart - Top Case 210 - Apple Macbook Pro Aluminum 13-Inch Black Laptop Keyb | Technical Guide - Page 211
board Replacement Note: When replacing a top case, retain the customer's top case until the repair is complete. Before installing the replacement top case, peel up the serial number label from the original top case and transfer it to the replacement. 2010-06-15 MacBook (13-inch, Aluminum, Late - Apple Macbook Pro Aluminum 13-Inch Black Laptop Keyb | Technical Guide - Page 212
Apple Technician Guide Additional Procedures MacBook (13-inch, Aluminum, Late 2008) © 2009 Apple Inc. All rights reserved. - Apple Macbook Pro Aluminum 13-Inch Black Laptop Keyb | Technical Guide - Page 213
guide • LVDS cable guide • Display assembly • Display clutch cover Tools • Clean, soft, lint-free cloth • ESD wrist strap and mat • plastic alignment guide (Apple part # 922-9272) • Torx T6 screwdriver 2010-06-15 MacBook (13-inch, Aluminum, Late 2008) Additional Procedures - Hinge Replacement - Apple Macbook Pro Aluminum 13-Inch Black Laptop Keyb | Technical Guide - Page 214
height as the alignment guide. 4 Reinstall 2 screws, and reassemble computer. 5 Verify that display opens and closes completely and there are no gaps between top case and display housing. 2010-06-15 MacBook (13-inch, Aluminum, Late 2008) Additional Procedures - Hinge Replacement and Alignment 214 - Apple Macbook Pro Aluminum 13-Inch Black Laptop Keyb | Technical Guide - Page 215
Apple Technician Guide Views MacBook (13-inch, Aluminum, Late 2008) © 2008 Apple Inc. All rights reserved. - Apple Macbook Pro Aluminum 13-Inch Black Laptop Keyb | Technical Guide - Page 216
Exploded Views Main Assembly, 1 of 2 Important: Replace parts like-for-like. For parts with more than one part number, enter the product serial number in GSX to determine the compatible part. 2010-06-15 MacBook (13-inch, Aluminum, Late 2008) Views - Exploded Views 216 - Apple Macbook Pro Aluminum 13-Inch Black Laptop Keyb | Technical Guide - Page 217
Main Assembly, 2 of 2 Important: Replace parts like-for-like. For parts with more than one part number, enter the product serial number in GSX to determine the compatible part. 2010-06-15 MacBook (13-inch, Aluminum, Late 2008) Views - Exploded Views 217 - Apple Macbook Pro Aluminum 13-Inch Black Laptop Keyb | Technical Guide - Page 218
Display Assembly Important: Replace parts like-for-like. For parts with more than one part number, enter the product serial number in GSX to determine the compatible part. 2010-06-15 MacBook (13-inch, Aluminum, Late 2008) Views - Exploded Views 218 - Apple Macbook Pro Aluminum 13-Inch Black Laptop Keyb | Technical Guide - Page 219
Ethernet C = USB 2.0 (1 high powered) D = Mini DisplayPort E = Combo Digital/Analog Audio In F = Combo Digital/Analog Audio Out G = Security Slot H = Battery Indicator Light Button 2010-06-15 MacBook (13-inch, Aluminum, Late 2008) Views - External Views 219 - Apple Macbook Pro Aluminum 13-Inch Black Laptop Keyb | Technical Guide - Page 220
front bracket 922-8652 Phillips #00 Camera cable guide, right speaker 922-8653 Phillips #00 Battery connector cover (2) 922-8654 Phillips #00 shoulder 2010-06-15 Battery connector cover (1) Bottom case to mid wall Logic board (1) MacBook (13-inch, Aluminum, Late 2008) Views - Screw Chart 220 - Apple Macbook Pro Aluminum 13-Inch Black Laptop Keyb | Technical Guide - Page 221
/ 922-8971 Phillips #00 Optical drive 922-8666 Phillips #00 Logic board (4) 922-8692 Phillips #0 or #1 Camera cable guide 922-8756 / 922-8970 Torx T6 Bottom case to top case (3) Heatsink (4) Display assembly hinges 2010-06-15 MacBook (13-inch, Aluminum, Late 2008) Views - Screw Chart 221 - Apple Macbook Pro Aluminum 13-Inch Black Laptop Keyb | Technical Guide - Page 222
922-8660 (1) 3 mm Screw Location Diagrams Bottom Case 922-8666 (3) 13.5 mm Captive screw Hard Drive Bracket Not offered separately 2010-06-15 922-8653 (4) 3.5 mm MacBook (13-inch, Aluminum, Late 2008) Views - Screw Location Diagrams 222 - Apple Macbook Pro Aluminum 13-Inch Black Laptop Keyb | Technical Guide - Page 223
Display Assembly 922-8665 (2) Camera Cable Guide 8 mm 922-8645 (1) LVDS Cable Guide 7 mm 922-8658 (1) LVDS Cable Guide 5 mm 922-8650 (1) Rt Speaker/Subwoofer 4 mm 922-8742 (6) Display Assembly Screws Torx 6 mm 2010-06-15 MacBook (13-inch, Aluminum, Late 2008) Views - Screw Location Diagrams 223 - Apple Macbook Pro Aluminum 13-Inch Black Laptop Keyb | Technical Guide - Page 224
7 mm 922-8654 (1) Logic Board 3.75 mm 922-8649 (2) HD Front Bracket with IR/Sleep 3.3 mm 922-8656 (4) Midwall 10.3 mm 922-8661 (1) Battery Cable Guide 2.7 mm 922-8651 (2) Battery Connection Cover 1.5 mm 2010-06-15 MacBook (13-inch, Aluminum, Late 2008) Views - Screw Location Diagrams 224
-
 1
1 -
 2
2 -
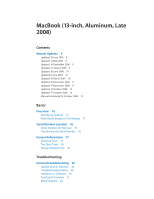 3
3 -
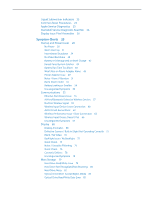 4
4 -
 5
5 -
 6
6 -
 7
7 -
8
-
9
-
10
-
11
-
12
-
13
-
14
-
15
-
16
-
17
-
18
-
19
-
20
-
21
-
22
-
23
-
24
-
25
-
26
-
27
-
28
-
29
-
30
-
31
-
32
-
33
-
34
-
35
-
36
-
37
-
38
-
39
-
40
-
41
-
42
-
43
-
44
-
45
-
46
-
47
-
48
-
49
-
50
-
51
-
52
-
53
-
54
-
55
-
56
-
57
-
58
-
59
-
60
-
61
-
62
-
63
-
64
-
65
-
66
-
67
-
68
-
69
-
70
-
71
-
72
-
73
-
74
-
75
-
76
-
77
-
78
-
79
-
80
-
81
-
82
-
83
-
84
-
85
-
86
-
87
-
88
-
89
-
90
-
91
-
92
-
93
-
94
-
95
-
96
-
97
-
98
-
99
-
100
-
101
-
102
-
103
-
104
-
105
-
106
-
107
-
108
-
109
-
110
-
111
-
112
-
113
-
114
-
115
-
116
-
117
-
118
-
119
-
120
-
121
-
122
-
123
-
124
-
125
-
126
-
127
-
128
-
129
-
130
-
131
-
132
-
133
-
134
-
135
-
136
-
137
-
138
-
139
-
140
-
141
-
142
-
143
-
144
-
145
-
146
-
147
-
148
-
149
-
150
-
151
-
152
-
153
-
154
-
155
-
156
-
157
-
158
-
159
-
160
-
161
-
162
-
163
-
164
-
165
-
166
-
167
-
168
-
169
-
170
-
171
-
172
-
173
-
174
-
175
-
176
-
177
-
178
-
179
-
180
-
181
-
182
-
183
-
184
-
185
-
186
-
187
-
188
-
189
-
190
-
191
-
192
-
193
-
194
-
195
-
196
-
197
-
198
-
199
-
200
-
201
-
202
-
203
-
204
-
205
-
206
-
207
-
208
-
209
-
210
-
211
-
212
-
213
-
214
-
215
-
216
-
217
-
218
-
219
-
220
-
221
-
222
-
223
-
224
 |
 |

Apple Technician Guide
MacBook (13-inch, Aluminum, Late 2008)
Updated 2010-06-15