Asus USB-N13 User Manual - Page 23
Configuring with the WLAN utility Infrastructure - setup
 |
View all Asus USB-N13 manuals
Add to My Manuals
Save this manual to your list of manuals |
Page 23 highlights
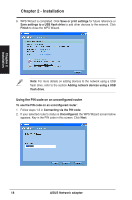
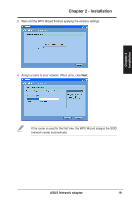
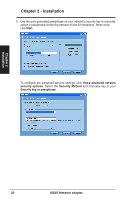
Chapter 2 - Installation 5. Click OK to exit the Wireless Network Setup Wizard. Configuring with the WLAN utility (Infrastructure) Use the ASUS WLAN utility to get connected with an existing wireless network. Chapter 2 Installation 1. Right-click the wireless connection icon and select Wireless Settings. 2. Click Config to set the SSID (network name) to that of your wireless AP. 3. Use Survey if you do not know the SSID of your access point. 4. Encryption settings must match those at the access point. Ask your network administrator about the settings if necessary. Click Apply to activate the settings. ASUS Network adapter 23
-
 1
1 -
2
-
3
-
4
-
5
-
6
-
7
-
8
-
9
-
10
-
11
-
12
-
13
-
14
-
15
-
16
-
17
-
 18
18 -
 19
19 -
 20
20 -
 21
21 -
 22
22 -
 23
23 -
 24
24 -
 25
25 -
 26
26 -
 27
27 -
 28
28 -
29
-
30
-
31
-
32
-
33
-
34
-
35
-
36
-
37
-
38
-
39
-
40
-
41
-
42
-
43
-
44
-
45
-
46
-
47
-
48
-
49
-
50
-
51
-
52
-
53
-
54
-
55
-
56
-
57
-
58
-
59
-
60
-
61
-
62
-
63
-
64
-
65
-
66
-
67
-
68
-
69
 |
 |
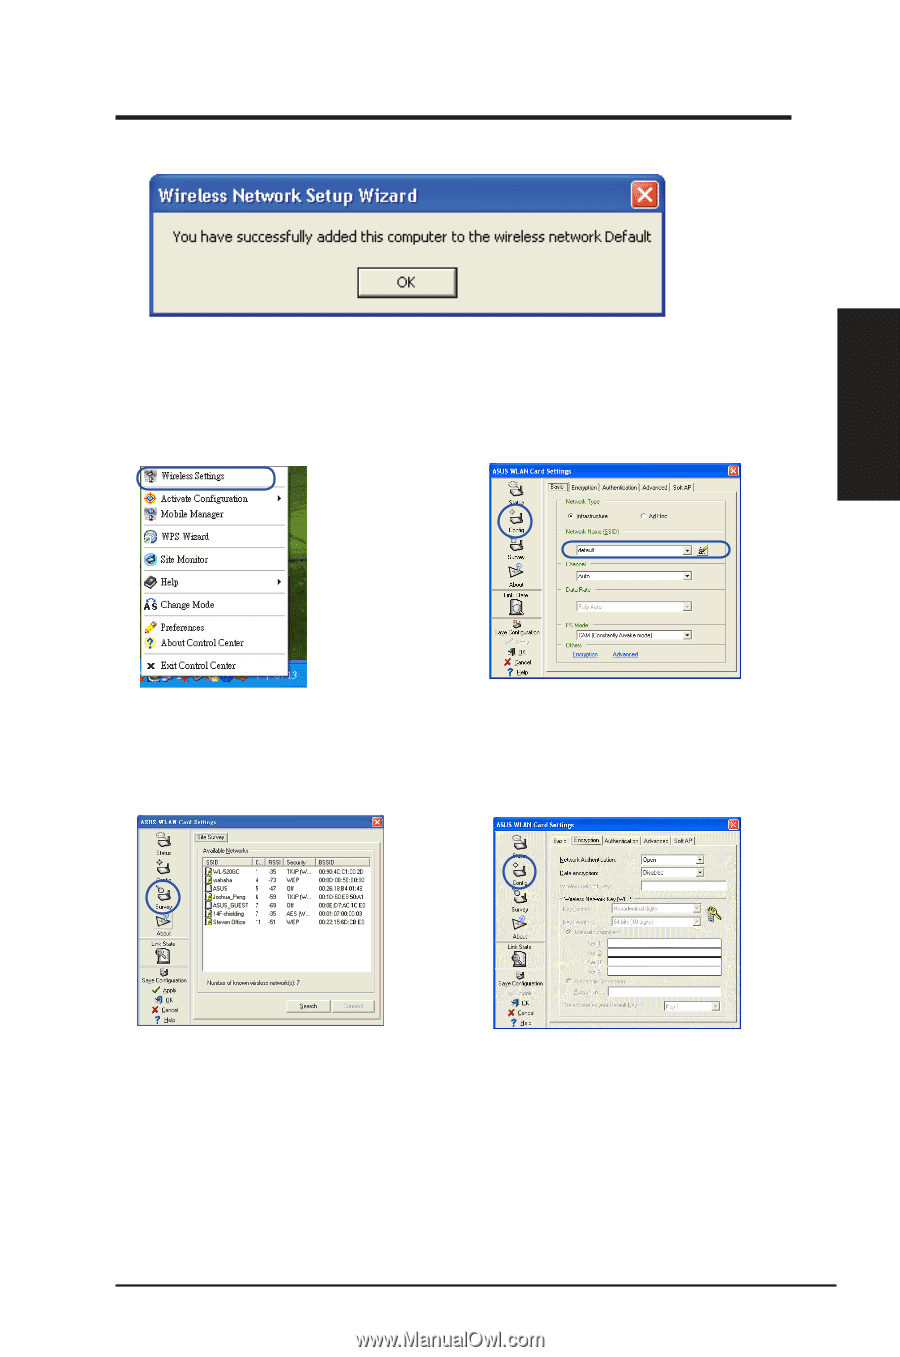
5. Click
OK
to exit the
Wireless Network Setup Wizard
.
Configuring with the WLAN utility (Infrastructure)
Use the ASUS WLAN utility to get connected with an existing wireless network.
1. Right-click the wireless connection
icon and select
Wireless Settings
.
2. Click
Config
to set the SSID
(network name) to that of your
wireless AP.
3. Use
Survey
if you do not know the
SSID of your access point.
4. Encryption settings must match
those at the access point. Ask your
network administrator about the
settings if necessary. Click
Apply
to
activate the settings.
ASUS Network adapter
23
Chapter 2 - Installation
Chapter 2
Installation