Asus USB-N13 User Manual - Page 24
Configuring with the WLAN utility Ad Hoc - wireless
 |
View all Asus USB-N13 manuals
Add to My Manuals
Save this manual to your list of manuals |
Page 24 highlights
Chapter 2 Installation Chapter 2 - Installation 5. Click Status to view the association state. If connection is established, the box shows "Connected - xx: xx:xx:xx:xx:xx". 6. Click the Connection tab to view the signal strength. Click OK to exit the utility. Configuring with the WLAN utility (Ad Hoc) The network adapter supports Ad Hoc mode that allows communication between wireless stations without an AP. 1. Right-click the wireless connection 2. Click Config and set the network icon and select Wireless Settings. adapter to Ad Hoc connection mode. 24 ASUS Network adapter
-
 1
1 -
2
-
3
-
4
-
5
-
6
-
7
-
8
-
9
-
10
-
11
-
12
-
13
-
14
-
15
-
16
-
17
-
18
-
 19
19 -
 20
20 -
 21
21 -
 22
22 -
 23
23 -
 24
24 -
 25
25 -
 26
26 -
 27
27 -
 28
28 -
 29
29 -
30
-
31
-
32
-
33
-
34
-
35
-
36
-
37
-
38
-
39
-
40
-
41
-
42
-
43
-
44
-
45
-
46
-
47
-
48
-
49
-
50
-
51
-
52
-
53
-
54
-
55
-
56
-
57
-
58
-
59
-
60
-
61
-
62
-
63
-
64
-
65
-
66
-
67
-
68
-
69
 |
 |
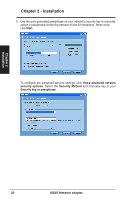
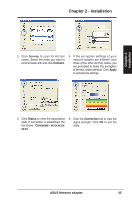
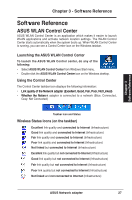
6. Click the
Connection
tab to view
the signal strength. Click
OK
to exit
the utility.
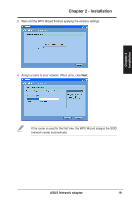
5. Click
Status
to view the association
state. If connection is established,
the box shows
“
Connected - xx:
xx:xx:xx:xx:xx
”.
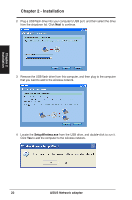
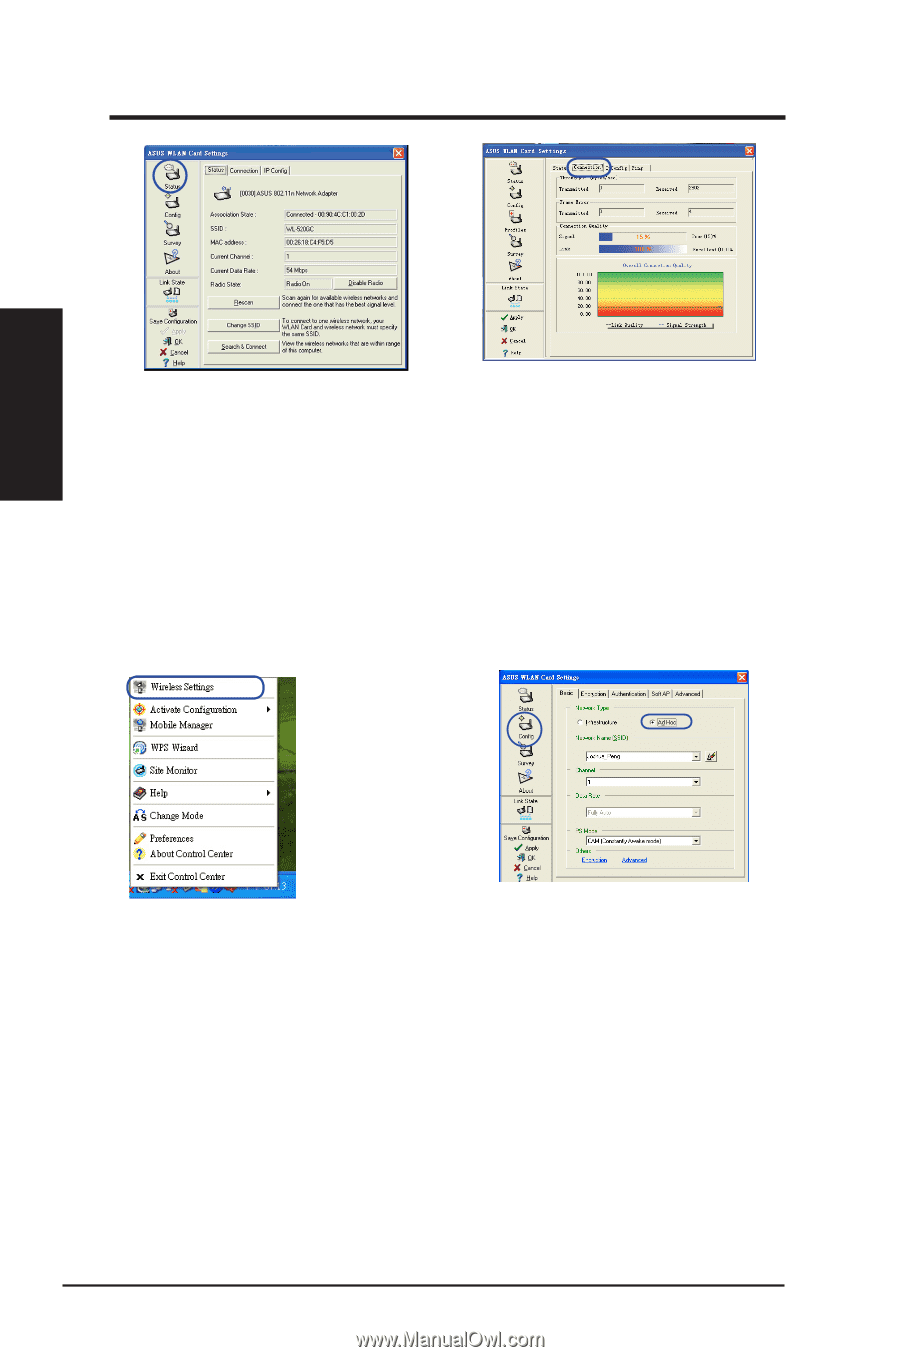
Configuring with the WLAN utility (Ad Hoc)
The network adapter supports Ad Hoc mode that allows communication between
wireless stations without an AP.
2. Click
Config
and set the network
adapter to
Ad Hoc
connection mode.
1. Right-click the wireless connection
icon and select
Wireless Settings.
Chapter 2
2±
ASUS Network adapter
Chapter 2 - Installation
Installation