Asus USB-N13 User Manual - Page 25
Survey, Connect, Apply, Status, Connected - xx:xx:xx:xx, xx:xx, Connection, ASUS Network adapter
 |
View all Asus USB-N13 manuals
Add to My Manuals
Save this manual to your list of manuals |
Page 25 highlights
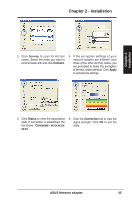
Chapter 2 Installation Chapter 2 - Installation 3. Click Survey to scan for Ad Hoc nodes. Select the node you want to communicate with and click Connect. 4. If the encryption settings of your network adapter are different from those of the other Ad Hoc nodes, you are prompted to make the encryption of the two nodes identical. Click Apply to activate the settings. 5. Click Status to view the association state. If connection is established, the box shows "Connected - xx:xx:xx:xx: xx:xx". 6. Click the Connection tab to view the signal strength. Click OK to exit the utility. ASUS Network adapter 25
-
 1
1 -
2
-
3
-
4
-
5
-
6
-
7
-
8
-
9
-
10
-
11
-
12
-
13
-
14
-
15
-
16
-
17
-
18
-
19
-
 20
20 -
 21
21 -
 22
22 -
 23
23 -
 24
24 -
 25
25 -
 26
26 -
 27
27 -
 28
28 -
 29
29 -
 30
30 -
31
-
32
-
33
-
34
-
35
-
36
-
37
-
38
-
39
-
40
-
41
-
42
-
43
-
44
-
45
-
46
-
47
-
48
-
49
-
50
-
51
-
52
-
53
-
54
-
55
-
56
-
57
-
58
-
59
-
60
-
61
-
62
-
63
-
64
-
65
-
66
-
67
-
68
-
69
 |
 |
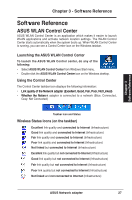
3. Click
Survey
to scan for Ad Hoc
nodes. Select the node you want to
communicate with and click
Connect
.
4. If the encryption settings of your
network adapter are different from
those of the other Ad Hoc nodes, you
are prompted to make the encryption
of the two nodes identical. Click
Apply
to activate the settings.
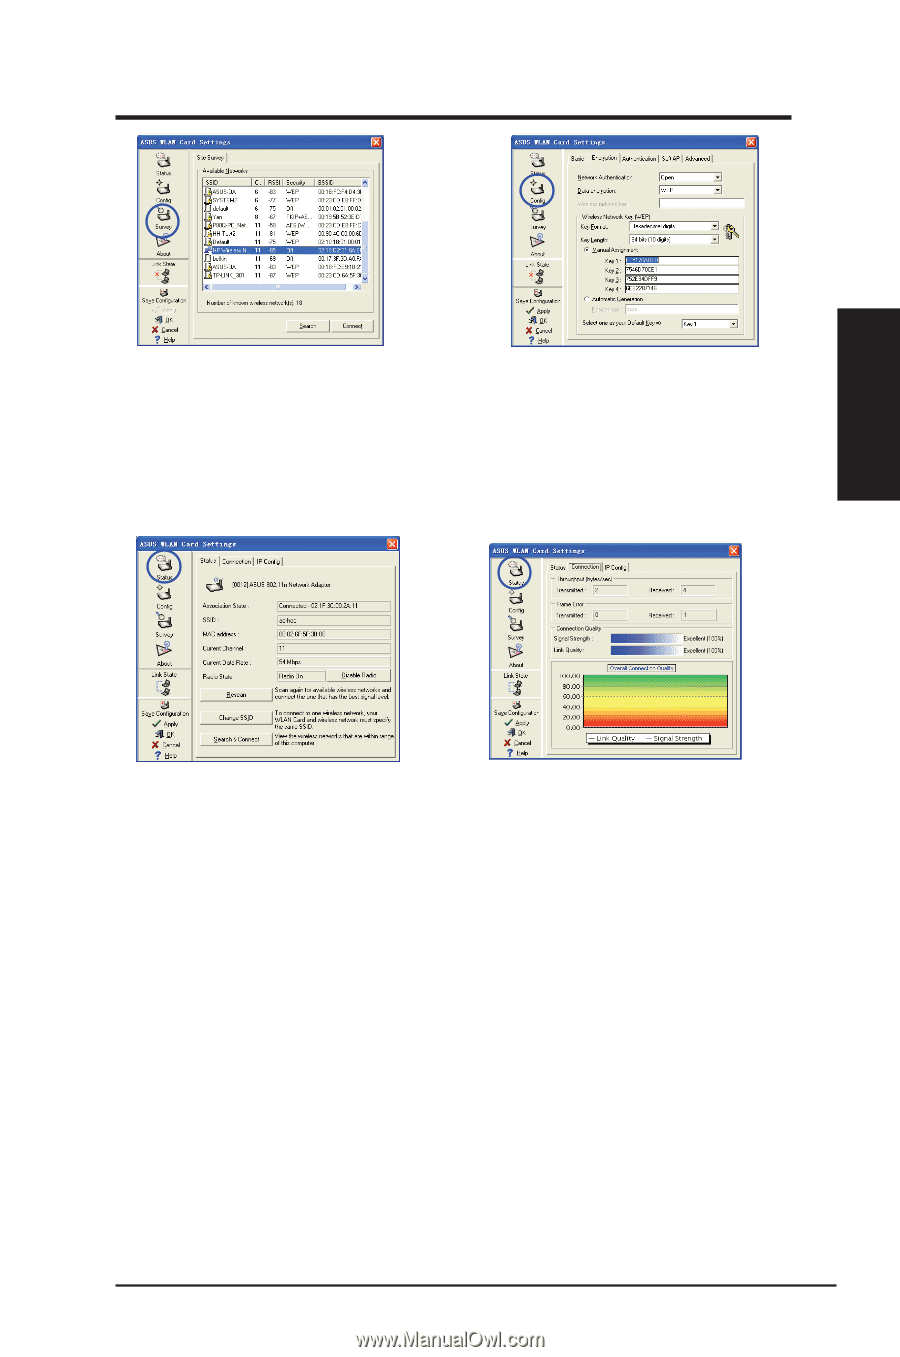
5. Click
Status
to view the association
state. If connection is established, the
box shows
“
Connected - xx:xx:xx:xx:
xx:xx
”.
6. Click the
Connection
tab to view the
signal strength. Click
OK
to exit the
utility.
ASUS Network adapter
2²
Chapter 2 - Installation
Chapter 2
Installation