Belkin F5D8232-4 User Manual - Page 29
Progress Screen, Note for Windows Users, Confirmation Screen
 |
UPC - 722868630921
View all Belkin F5D8232-4 manuals
Add to My Manuals
Save this manual to your list of manuals |
Page 29 highlights
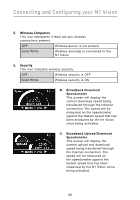
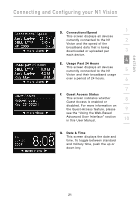
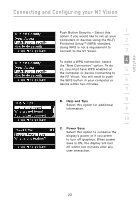
section Connecting and Configuring your N1 Vision Select your language of choice and 1 click "Go" to run the Troubleshooting Assistant. 2 Note for Windows Users: If the Troubleshooting Assistant does 3 not start up automatically, select your CD-ROM drive from "My Computer" and double-click on the 4 file named "Setup.exe" to start the Troubleshooting Assistant. 5 6 Confirmation Screen Verify that you have completed all QIG steps by checking the box to the right 7 of the arrow. Click "Next" to continue. 8 9 Progress Screen Troubleshooting Assistant will show 10 you a progress screen each time a step in the setup has been completed. 25
-
 1
1 -
2
-
3
-
4
-
5
-
6
-
7
-
8
-
9
-
10
-
11
-
12
-
13
-
14
-
15
-
16
-
17
-
18
-
19
-
20
-
21
-
22
-
23
-
 24
24 -
 25
25 -
 26
26 -
 27
27 -
 28
28 -
 29
29 -
 30
30 -
 31
31 -
 32
32 -
 33
33 -
 34
34 -
35
-
36
-
37
-
38
-
39
-
40
-
41
-
42
-
43
-
44
-
45
-
46
-
47
-
48
-
49
-
50
-
51
-
52
-
53
-
54
-
55
-
56
-
57
-
58
-
59
-
60
-
61
-
62
-
63
-
64
-
65
-
66
-
67
-
68
-
69
-
70
-
71
-
72
-
73
-
74
-
75
-
76
-
77
-
78
-
79
-
80
-
81
-
82
-
83
-
84
-
85
-
86
-
87
-
88
-
89
-
90
-
91
-
92
-
93
-
94
-
95
-
96
-
97
-
98
-
99
-
100
-
101
-
102
-
103
-
104
-
105
-
106
-
107
-
108
-
109
-
110
-
111
-
112
-
113
-
114
 |
 |
25
Connecting and Configuring your N1 Vision
section
1
9
2
3
4
5
6
7
8
10
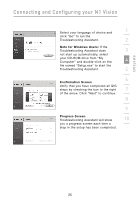
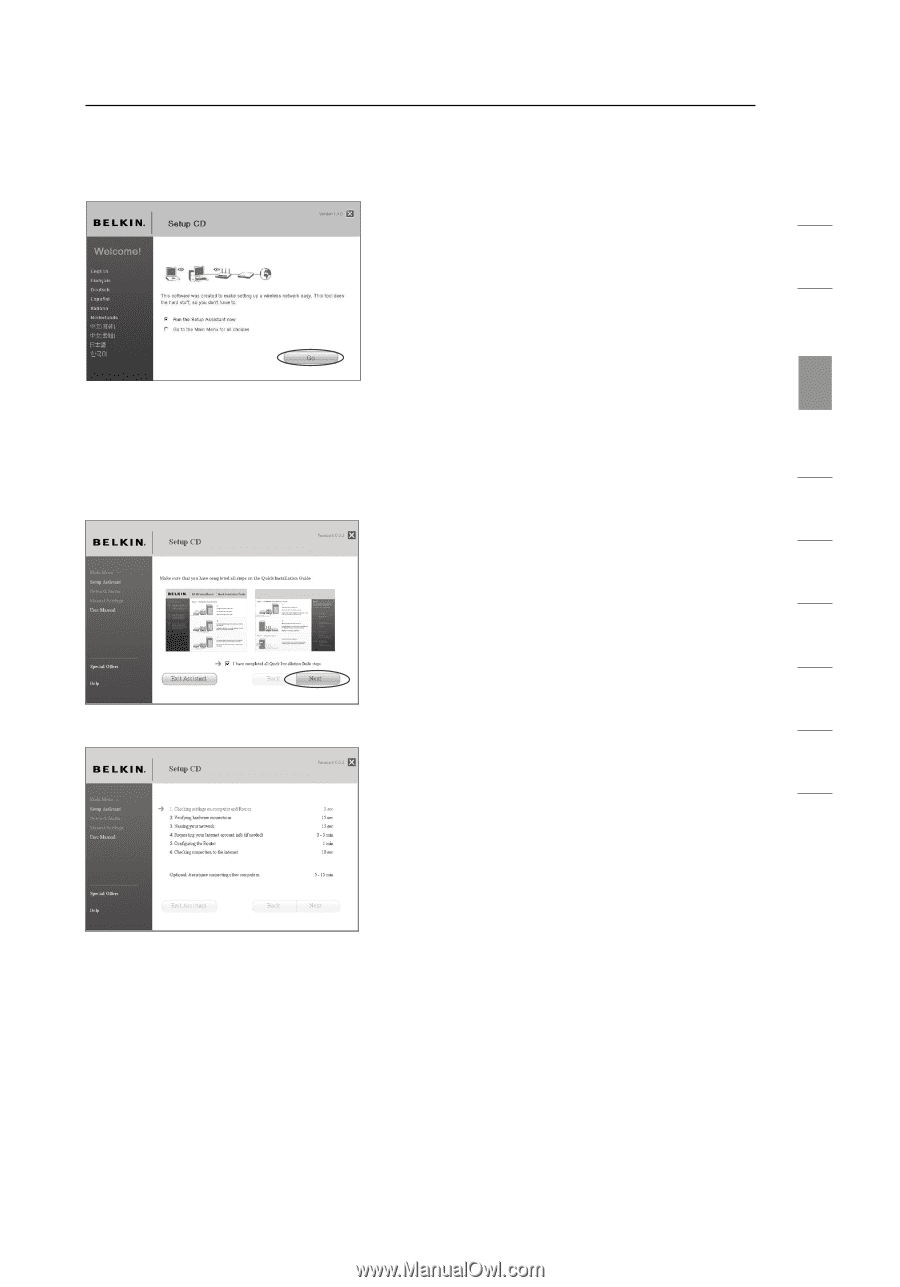
Progress Screen
Troubleshooting Assistant will show
you a progress screen each time a
step in the setup has been completed.
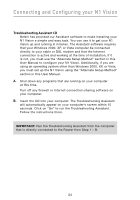
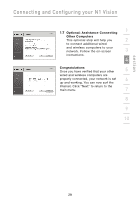
Select your language of choice and
click “Go” to run the
Troubleshooting Assistant.
Note for Windows Users:
If the
Troubleshooting Assistant does
not start up automatically, select
your CD-ROM drive from “My
Computer” and double-click on the
file named “Setup.exe” to start the
Troubleshooting Assistant.
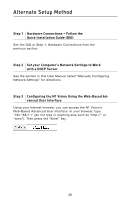
Confirmation Screen
Verify that you have completed all QIG
steps by checking the box to the right
of the arrow. Click “Next” to continue.