Bernina Bernette 340 deco User Guide - Page 18
Embroidery Hoop, Templates - hoop sizes
 |
View all Bernina Bernette 340 deco manuals
Add to My Manuals
Save this manual to your list of manuals |
Page 18 highlights
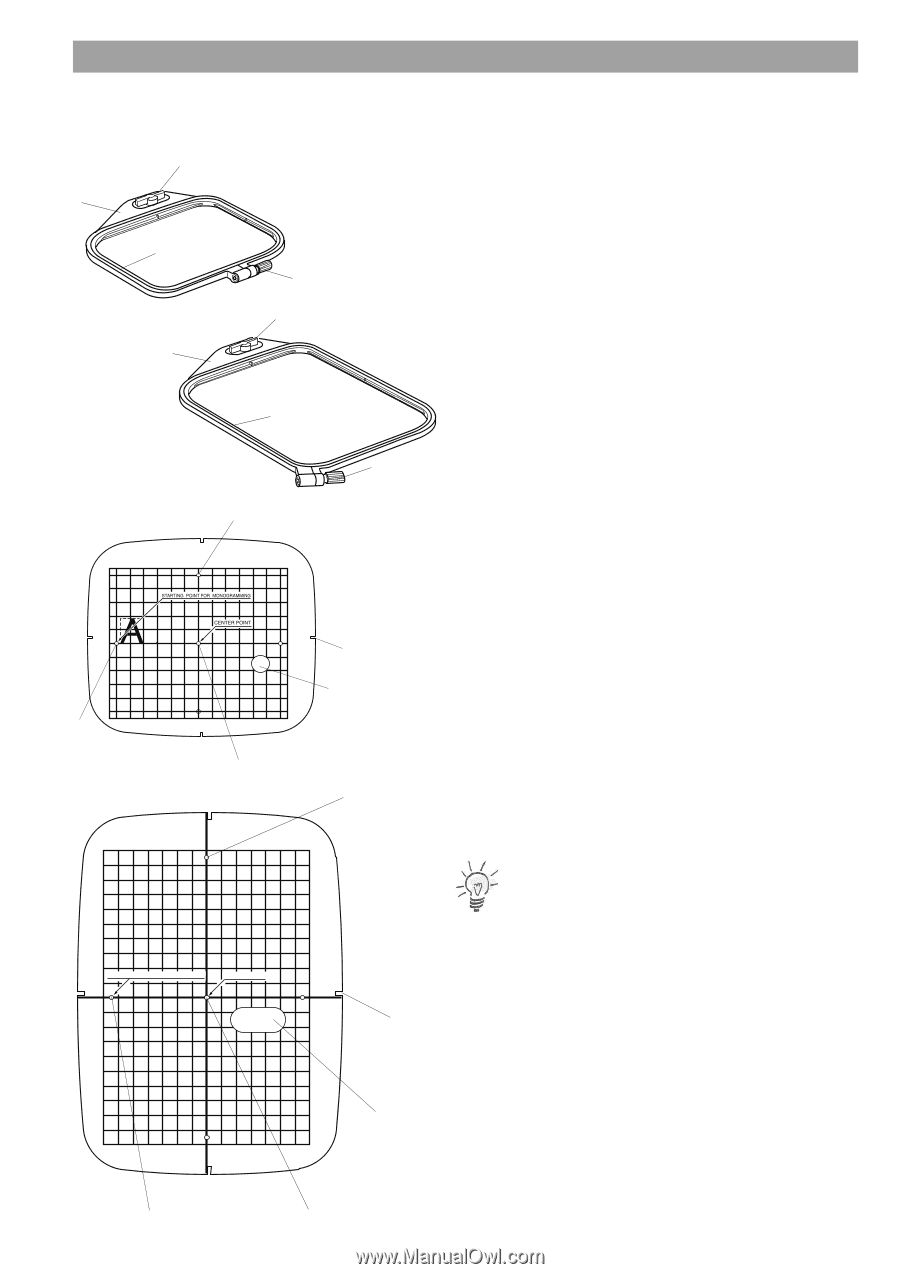
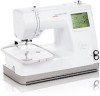
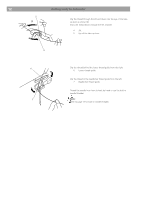
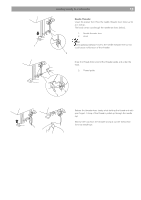
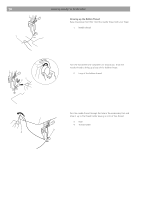
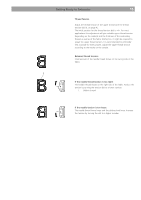
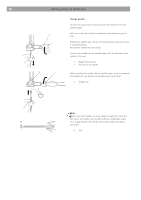
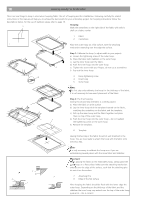
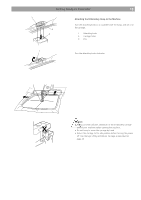
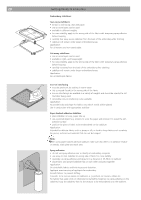
Getting Ready to Embroider 17 3 1 2 1 4 3 2 4 7 Your embroidery computer can handle almost every materials commonly used. However, to achieve best embroidery results it is important to use the correct materials and tools for your project. The next pages will give you a short overview of the most important rules to make this choice. For more detailed informations please contact your BERNINA dealer or read specific technical literature. Embroidery Hoop The Deco 340 is supplied with two hoops. Use hoop A for regular designs up to 126 x 110 mm (5" x 43/8"), while the hoop B will accommodate a large design up to a 200 x 140 mm (8" x 51/2"). 1. Outer hoop 2. Inner hoop 3. Attaching knob 4. Hoop tightening screw Please see your BERNINA dealer for additional hoop sizes. The following hoops are preset in the embroidery computer: Hoop C: for free arm embroidery, 50 x 50 mm Hoop F: round, embroidery area 126 x 110 mm 6 5 STARTINGPOIN T FORMONOGRAMMIN G CENTER POINT 9 8 7 9 Templates When positioning the fabric into the hoop, use the template to align the centerlines on the fabric with the center of the hoop. First mark the centerlines on the fabric and place the fabric on the outer hoop. Place the inner hoop and template over the fabric and adjust the fabric placement. 5. Starting point for built-in designs and Embroidery cards. 6. Starting point for monogramming in horizontal placement 7. Starting point for monogramming in vertical placement 8. Finger hole Note: The four indentations on the template do not correspond with the reference lines. 9. Positioning indentations 8 6 5
-
 1
1 -
2
-
3
-
4
-
5
-
6
-
7
-
8
-
9
-
10
-
11
-
12
-
 13
13 -
 14
14 -
 15
15 -
 16
16 -
 17
17 -
 18
18 -
 19
19 -
 20
20 -
 21
21 -
 22
22 -
 23
23 -
24
-
25
-
26
-
27
-
28
-
29
-
30
-
31
-
32
-
33
-
34
-
35
-
36
-
37
-
38
-
39
-
40
-
41
-
42
-
43
-
44
-
45
-
46
-
47
-
48
-
49
-
50
-
51
-
52
-
53
-
54
-
55
-
56
-
57
-
58
-
59
-
60
-
61
-
62
-
63
-
64
-
65
-
66
-
67
-
68
-
69
-
70
-
71
-
72
-
73
-
74
-
75
 |
 |