Brother International E-100 Users Manual - English
Brother International E-100 Manual
 |
View all Brother International E-100 manuals
Add to My Manuals
Save this manual to your list of manuals |
Brother International E-100 manual content summary:
- Brother International E-100 | Users Manual - English - Page 1
Operation manual Manuel d'instructions Manual de instrucciones - Brother International E-100 | Users Manual - English - Page 2
this machine only for its intended use as described in this manual. Use only accessories recommended by the manufacturer as contained in this manual. 3. Never operate this machine or AC adapter fingers away from all moving parts. SAVE THESE INSTRUCTIONS This machine is intended for household use. - Brother International E-100 | Users Manual - English - Page 3
machine is fitted with a three-pin non-rewireable BS plug, then please read the following. IMPORTANT If the available socket outlet is not suitable for the plug supplied with this equipment main lead are coloured in accordance with the following code: Blue Neutral Brown Live As the colours of - Brother International E-100 | Users Manual - English - Page 4
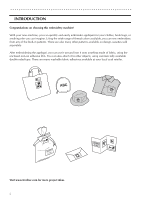
home embroidery. To fully enjoy all the features, we suggest that you read the manual before using. PLEASE READ BEFORE USING THIS MACHINE For safe operation 1. Do not touch the thread cartridge or design frame while embroidering. 2. Remember to unplug the AC adapter: • after each use • when a power - Brother International E-100 | Users Manual - English - Page 5
new machine, you can quickly and easily embroider appliqués for your clothes, book bags, or anything else you can imagine. Using the wide range of thread colors available, you can sew embroidery from any of the built-in patterns. There are also many other patterns available on design cassettes sold - Brother International E-100 | Users Manual - English - Page 6
supplies ...2 Optional supplies...2 Important parts 3 Machine ...3 Operation keys ...3 LCD display ...4 Design frame ...4 Thread cartridge...4 Useful vocabulary 5 Chapter 2 Overview and Patterns 7 Overview 7 Types of patterns 8 Reading the pattern list 8 Chapter 3 Making an Embroidered Appliqu - Brother International E-100 | Users Manual - English - Page 7
pattern from a Design cassette 33 Saving a machine is turned off 43 Removing the design frame 44 Pulling the thread end out of the cartridge 45 Changing the contrast of the LCD display 47 If the safety mechanism was activated 48 Chapter 5 Appendix 49 Cleaning precautions 49 Troubleshooting - Brother International E-100 | Users Manual - English - Page 8
understand how to use it. UNPACKING Machine Chapter 2 Chapter 3 Chapter 4 Chapter 5 Included accessories AC adapter For 120 V areas For 230 V areas 15 Pre-filled thread cartridges (15 individual thread colors) 2 Design frames 10 Pre-cut design fabrics (4 white, 3 beige & 3 gray) 10 Iron - Brother International E-100 | Users Manual - English - Page 9
of embroidery patterns. GG Basic supplies Pre-filled thread cartridges Pre-cut design fabrics with iron-on adhesives (Visit www.brother.com for a complete listing.) GG Optional supplies Design cassettes (Visit www.brother.com for a complete listing.) CAUTION • Only use Brother "AppliquéStation - Brother International E-100 | Users Manual - English - Page 10
keys 3 Slot for an optional design cassette 4 Thread cartridge release button ( ) 5 Thread cartridge slot 6 Design frame mounting bracket (inside the machine) 7 Design frame slot 8 Design frame positioning line 9 AC adapter connector 0 Needle position adjustment dial Chapter 1 Chapter - Brother International E-100 | Users Manual - English - Page 11
Pre-cut design fabric pins 3 Frame-opening tabs 4 Frame side marks 2 3 4 GG Thread cartridge 1 2 7 3 4 5 6 1 Thread color ID number (The color of the label corresponds to the color of the thread.) 2 Look in this window to see how much thread is left in the cartridge. 3 Guide 4 Needle 5 Presser - Brother International E-100 | Users Manual - English - Page 12
the pattern to the starting point of another part of the pattern when sewing different parts of the pattern with the same color Chenille Embroidery made of looped threads, similar to a terry cloth towel Pocket Computer memory area in the machine where a pattern can be stored Right side The - Brother International E-100 | Users Manual - English - Page 13
CONTENTS Chapter 1 Chapter 2 Chapter 3 USEFUL VOCABULARY G G G G G G G G G G G G G G G G G G G G G G G G G G G G G G G G G G G G G G G G G G G G G G G G G G G G G G G G G 6 Chapter 4 Chapter 5 INDEX Chapter 6 - Brother International E-100 | Users Manual - English - Page 14
machine. 4 Use the operation keys to select the pattern. 5 Insert the thread cartridge and design frame following the on-screen instructions. 6 Embroider the appliqué, changing the thread cartridge for each color. 7 After the embroidery is finished, remove the thread cartridge. 8 Remove the design - Brother International E-100 | Users Manual - English - Page 15
means that part of the pattern is embroidered with the chenille texture. (See page 25.) 6 Thread color ID numbers in the sewing order 7 Side of design frame used with the thread color 8 Total number of patterns in the category NOTE • A pattern list is included with each optional design cassette - Brother International E-100 | Users Manual - English - Page 16
to enter the text. MAKING AN EMBROIDERED APPLIQUÉ FROM A ONE-POINT PATTERN As an adapter cord into the connector on the back of the 2 machine. 2 Plug the adapter into an electrical wall outlet. 1 WARNING Use only the enclosed AC adapter, designed exclusively for this machine. If the machine - Brother International E-100 | Users Manual - English - Page 17
cm. However, the actual size of the embroidery will depend on the pattern selected. 1 2 Chapter 3 Chapter 4 Chapter 5 INDEX Chapter 6 CAUTION • Do not embroider onto anything other than the pre-cut design fabrics designed exclusively for this machine. • The smoother (leather-like) side of the - Brother International E-100 | Users Manual - English - Page 18
that appear may be slightly different than those shown in this manual.) Key information • To skip the animation, press any key. NOTE • The design frame holder will make an obvious noise while moving. This is normal and does not mean that the machine is broken. • If it is hard to read the screen - Brother International E-100 | Users Manual - English - Page 19
CONTENTS Chapter 1 Chapter 2 MAKING AN EMBROIDERED APPLIQUÉ FROM A ONE-POINT PATTERN G G G G G G G G G G G G G G G G G G G G G G G G G G G G G G G G G G G G G G G G G G G G saved pattern on page 37. • To select a pattern from a design cassette, see page 33. 3 Press the key. The patterns in the - Brother International E-100 | Users Manual - English - Page 20
CONTENTS Chapter 1 Chapter 2 Chapter 3 MAKING AN EMBROIDERED APPLIQUÉ FROM A ONE-POINT PATTERN G G G G G G G G G G G G G G G G G G G G G G G G G G thread cartridge and design frame 1 The first thread color ID number and the first part thread color ID number. This means that you can use any thread - Brother International E-100 | Users Manual - English - Page 21
the thread cartridge after selecting the pattern and when the screen showing the thread ID number appears. • Before inserting the thread cartridge, make sure there is enough thread in it. Plan ahead when sewing chenille texture embroidery, since it uses more thread than standard embroidery. 14 - Brother International E-100 | Users Manual - English - Page 22
out the thread cartridge. Do not try removing the thread cartridge without pressing the thread cartridge release button ( ) first, otherwise the cartridge may be damaged. 3 A screen appears, showing which side of the design frame should face up. NOTE • If chenille texture embroidery is being sewn - Brother International E-100 | Users Manual - English - Page 23
into the design frame mounting bracket inside the 1 machine. 2 Design frame mount 3 Design frame mounting bracket 4 Frame side marks (A or B) 3 2 4 CAUTION • Make sure that the design frame is inserted correctly, otherwise the embroidery may not be sewn correctly or thread cartridge may break - Brother International E-100 | Users Manual - English - Page 24
the appliqué Before embroidering, check that the thread cartridge and design frame are correctly inserted. 1 Press the key. The part of the pattern shown on the LCD display is embroidered. Key information • To stop embroidering, press the stop. key. After sewing a few stitches, the machine will - Brother International E-100 | Users Manual - English - Page 25
page 41.) WARNING The thread cartridge and design frame move while the embroidery is being sewn. For that reason, do not touch the thread cartridge or design frame, prevent them from moving in any way, or press the thread cartridge release button ( machine or thread cartridge may break. ) while - Brother International E-100 | Users Manual - English - Page 26
EMBROIDERED APPLIQUÉ FROM A ONE-POINT PATTERN G G G G G G G G G G G G G G G G G G G G G G G G G G G G G G G G G G G G G G G G G G G G G G G G G G G G G G G G G 5 Insert the next thread cartridge. A screen appears, showing which side of the design frame should face up. NOTE • If chenille embroidery - Brother International E-100 | Users Manual - English - Page 27
APPLIQUÉ FROM A ONE-POINT PATTERN G G G G G G G G G G G G G G G G G G G G G G G G G G G G G G G G G G G G G G G G G G G G G G G G G G G G G G G G G 7 When the machine is finished embroidering, it automatically stops and the screen shown at the right appears. 8 Remove the thread cartridge. The design - Brother International E-100 | Users Manual - English - Page 28
GG 7. Finishing the appliqué In order to prevent threads from being pulled out, attach the iron-on adhesive film to the wrong side of the embroidery. Then, cut the embroidery into any shape you want. CAUTION • Before the iron-on adhesive film is attached, the embroidery threads can easily be pulled - Brother International E-100 | Users Manual - English - Page 29
wait until the fabric has cooled down before touching it. 3 After the design fabric cools down completely, cut off any extra threads. 1 Extra thread 1 NOTE • The extra threads can be cut off before attaching the iron-on adhesive. But, since the embroidery threads can easily be pulled out, be careful - Brother International E-100 | Users Manual - English - Page 30
to the fabric either by hand or with a sewing machine. To iron on the appliqué: 1 Place the appliqué right side up on the fabric at the place where you want to attach 1 it. Then, place an extra piece of cloth over the embroidery to protect it. Be sure to iron on a hard surface, like an - Brother International E-100 | Users Manual - English - Page 31
Be sure to dry the fabric first. • Do not dry clean the appliqué. • Sew the appliqué onto sweaters and other knitted items. To attach the appliqué like a sticker: Attach a piece of commercially available double-sided tape to the back of the applique. Then, attach it to anything you want. 24 Chapter - Brother International E-100 | Users Manual - English - Page 32
" means that part of the pattern is embroidered with the When a chenille pattern is selected: When sewing chenille embroidery, the side of the design frame facing up will have to be changed from side B to side A or from side A to side B. After replacing the thread cartridge, check that the design - Brother International E-100 | Users Manual - English - Page 33
the appliqué. NOTE • The parts of the patterns that will be sewn with the chenille texture are pre-set. Also, the built-in fonts cannot be sewn with the chenille texture. • Sewing chenille embroidery uses a lot of thread. Make sure that there is enough thread left in the cartridge before sewing - Brother International E-100 | Users Manual - English - Page 34
The number of lines and characters that can be entered depends on the pattern selected. CAUTION • Template patterns are embroidery that have only text. If no text is entered, the embroidery cannot be sewn. The following two fonts are available in two sizes. Large (about 10 mm high) Satin stitches - Brother International E-100 | Users Manual - English - Page 35
CONTENTS Chapter 1 Chapter 2 WORKING WITH TEXT (WHEN A FRAME OR TEMPLATE PATTERN IS SELECTED) G G G G G G G G G G G G G G G G G G G G G G G G G G G G G G G G G G G G G G G G G G G G G G G G G G G G G G G G G GG Entering text After a template pattern is selected, the screen shown at the right - Brother International E-100 | Users Manual - English - Page 36
CONTENTS Chapter 1 Chapter 2 Chapter 3 WORKING WITH TEXT (WHEN A FRAME OR TEMPLATE PATTERN IS SELECTED) G G G G G G G G G G G G G G G G G G G G G G G G G G G G G G G G G G G G G G G G G G G G G G G G G G G G G G G G G The following are the sets of available characters in the two fonts shown - Brother International E-100 | Users Manual - English - Page 37
CONTENTS Chapter 1 Chapter 2 Chapter 3 WORKING WITH TEXT (WHEN A FRAME OR TEMPLATE PATTERN IS SELECTED) G G G G G G G G G G G G G G G G G G G G G G G G G G G G G G G G G G G G G G G G G G G G G G G G G G G G G G G G G 6 Press the key until "r" is highlighted, and then press the key. 7 Press the - Brother International E-100 | Users Manual - English - Page 38
Then, the screen shown on page 13 under Inserting the thread cartridge and design frame appears. Continue in same way that a one-point machine stops and a screen like the one shown at the right appears. " " appears instead of the thread color ID number. This means that you can use any thread - Brother International E-100 | Users Manual - English - Page 39
CONTENTS Chapter 1 Chapter 2 Chapter 3 WORKING WITH TEXT (WHEN A FRAME OR TEMPLATE PATTERN IS SELECTED) G G G G G G G G G G G G G G G G G G G G G G G G G G G G G G G G G G G G G G G G G G G G G G G G G G G G G G G G G 3 Enter "ar૽" as described on pages 29 and 30. GG Checking the text If the - Brother International E-100 | Users Manual - English - Page 40
correctly. Also, be sure not to insert anything other than the design cassette into the slot, otherwise the machine may break. • Do not try to disassemble the design cassette. Also, do not touch the connectors of the design cassette. 2 Press the key. key, and then press After the start-up - Brother International E-100 | Users Manual - English - Page 41
each optional design cassette. 3 Select the pattern, enter the text, and sew the embroidery in the same thread cartridge and design frame is displayed. 2 Press the key. 12 3 A screen like the one shown at the right appears. 1 This indicates that this screen is for saving patterns. 2 This means - Brother International E-100 | Users Manual - English - Page 42
pocket with the mark was selected, " " appears at 2, and the indicator at 5 appears. To check the saved 34 pattern, turn off the machine, insert the design cassette for the saved pattern, and then start again from the beginning. (Even if " " is displayed, the new pattern can be saved.) 3 This - Brother International E-100 | Users Manual - English - Page 43
to keep the old pattern, press the key. 7 Then, the screen shown at the right appears. CAUTION • Do not turn off the machine or disconnect the AC adapter from it or from the electrical outlet while a pattern is being saved, otherwise the pattern will not be saved correctly. 36 Chapter 4 Chapter - Brother International E-100 | Users Manual - English - Page 44
the or key until is highlighted. NOTE • If the saved pattern that you want to retrieve is from a design cassette, be sure that the design cassette is inserted before turning on the machine. 2 Press the key. 1 A screen like the one shown at the right appears. 1 Indicates that this screen is for - Brother International E-100 | Users Manual - English - Page 45
cassette for the saved pattern, and then start again from the beginning. 5 To retrieve the saved pattern, press the key. The embroidering animation appears on the LCD display, and then a screen like the one shown at the right appears. Go back to the section Inserting the thread cartridge and design - Brother International E-100 | Users Manual - English - Page 46
were selecting a saved pattern, an animation appears, and then a screen like the one shown at the right appears. Go back to the section Inserting the thread cartridge and design frame on page 13 to start embroidering. Chapter 3 Chapter 4 Chapter 5 INDEX Chapter 6 39 - Brother International E-100 | Users Manual - English - Page 47
CONTENTS Chapter 1 Chapter 2 Chapter 3 EDITING THE TEXT IN A SAVED PATTERN G G G G G G G G G G G G G G G G G G G G G G G G G G G G G G G G G G G G G G G G G G G G G G G G G G G G G G G G G EDITING THE TEXT IN A SAVED PATTERN After a saved template pattern is selected, the text can be changed. - Brother International E-100 | Users Manual - English - Page 48
new thread cartridge. If the thread broke: Pull the thread out of the cartridge. For details on pulling the thread out from the cartridge, see the section Pulling the thread end out of the cartridge on page 45. 1 Press the key to stop embroidering. 1 After sewing a few stitches, the machine stops - Brother International E-100 | Users Manual - English - Page 49
to step 1. • To go back to step 3, press the key. 6 Insert the thread cartridge, and then press the key to continue sewing. NOTE • If embroidering is stopped and restarted, some extra needle holes may be punched in the pre-cut design fabric, but it can still be used. • If you wish to remove the - Brother International E-100 | Users Manual - English - Page 50
continue embroidering from the second color 1 Turn on the machine and insert the design frame. 2 Select the pattern that you wish to finish press the key to go forward to the point where sewing stopped. Go back a little before the point where sewing stopped so the stitches will overlap a little. Key - Brother International E-100 | Users Manual - English - Page 51
, follow the steps below. 1 Press the key to stop embroidering. After sewing a few stitches, the machine stops. 2 Press the thread cartridge release button ( ), and then remove the thread cartridge. 3 Press the key. After the design frame moves to its starting point, pull it straight out. NOTE • If - Brother International E-100 | Users Manual - English - Page 52
or is not feeding out of the cartridge, the embroidery will not be sewn correctly. Follow the steps below to pull the end of the thread out from the cartridge. 1 Put the needle guard cap over the needle. 1 Needle guard cap 1 2 Swing open the cover of the thread cartridge. CAUTION • Do not open the - Brother International E-100 | Users Manual - English - Page 53
hooked over the pin, the machine cannot embroider. 6 Trim the thread at the bottom of the cartridge so it is 3/4 to 1" (2 to 3 cm) long. 1 3/4 to 1" (2 to 3 cm) 1 WARNING Keep the needle guard cap over the needle while guiding the thread through the cartridge. If the needle sticks out, it could - Brother International E-100 | Users Manual - English - Page 54
DISPLAY If the LCD display is hard to read, it can be made either lighter or darker. 1 Turn off the machine. 2 Hold down the key, and press the key to turn the machine on again. The screen shown at the right appears. 3 Press the or key to change the contrast. To make - Brother International E-100 | Users Manual - English - Page 55
the AC adapter from the machine and from the electrical outlet. 4 Turn the needle position adjustment dial (at the bottom of the machine) in either direction as shown until the thread cartridge is level. 1 Level position 2 Needle position adjustment dial 5 Press the thread cartridge release button - Brother International E-100 | Users Manual - English - Page 56
retailer or visit www.brother.com for the name of your nearest authorized service center. Symptom Cause Solution The machine cannot The AC adapter is not connected be turned on. correctly. Make sure that the AC adapter is connected correctly. (page 9) The embroidery cannot be sewn. The - Brother International E-100 | Users Manual - English - Page 57
on the design cassette that is inserted. Turn off the machine before inserting the correct design cassette. (page 33) This design cassette cannot be used. The design cassette that is inserted cannot be used with this machine. Remove the design cassette and check with your Brother retailer. Chapter - Brother International E-100 | Users Manual - English - Page 58
release button ( ) was pressed while embroidering. Turn off the machine, remove the thread cartridge, and then continue embroidering from the point where sewing was stopped. (page 14) The safety mechanism has activated. Follow the instructions in the section If the safety mechanism was activated on - Brother International E-100 | Users Manual - English - Page 59
G G G G G G G G SPECIFICATIONS Input LCD display Embroidering Power supply Size Solid rubber keyboard Number of keys: 9 (8 + power key) Dot matrix LCD Size: 32 × 96 dots Indicators: 2 Thread insertion method (using specially designed thread cartridges) Maximum embroidering area: 60 × 60 mm Maximum - Brother International E-100 | Users Manual - English - Page 60
G groove 14 guide 4, 14 H highlighting 4 I inserting design cassette 33 design frame 16 pre-cut design fabric 10 thread cartridge 14 iron-on adhesive 1, 21 K keys 3 N needle position adjustment dial 3, 48 O OK key 3 On/off key 3 one-point patterns 8 operation keys 3 P parts 3 pattern - Brother International E-100 | Users Manual - English - Page 61
50 quick reference guide 55 selecting characters 28 patterns 11 slot for design cassette 3, 33 specifications 52 start/stop key 3 supplies 2 T template patterns 8, 27 text checking 32, 39 editing 31, 40 entering 28 fonts 27 size 27 thread amount check window 4 thread cartridge 1, 45 - Brother International E-100 | Users Manual - English - Page 62
CONTENTS 6 Chapter 6Quick Reference Guide Chapter 1 Chapter 2 Chapter 3 Chapter 4 This chapter shows a saved pattern 2 3 9 H 0 A B C I J 4 Insert the thread cartridge. 5 K While embroidering D D Insert the design frame. Then, . 6 Embroidering finishes 7 8 8 E G F To save the - Brother International E-100 | Users Manual - English - Page 63
See page 1 Appears when the machine is turned on. p. 11 design frame with the side shown in the p. 16 display facing up. Then, press . 6 The embroidery is being sewn. p. 17 Repeat for each color. 7 Press the thread cartridge release button ( ), p. 20 and then remove the thread cartridge - Brother International E-100 | Users Manual - English - Page 64
CONTENTS G G G G G G G G G G G G G G G G G G G G G G G G G G G G G G G G G G G G G G G G G G G G G G G G G G G G G G G G G No. Screen Details 8 To sew the same pattern again (Then, continue with 4.): To save the pattern (Then, continue with D.): To select a different pattern (Then, continue - Brother International E-100 | Users Manual - English - Page 65
continue p. 37 Check the text in the pattern. (Then, continue with 4.) For more than one line, press line. to check the next p. 39 To find a thread color, press or . To find a stitch, press or . (Then, continue with 4.) p. 43 Chapter 2 Chapter 3 Chapter 4 Chapter 5 INDEX Chapter 6 58 - Brother International E-100 | Users Manual - English - Page 66
ENGLISH FRANÇAIS ESPAÑOL 885-311 194311-014 0202 Printed in China
-
 1
1 -
 2
2 -
 3
3 -
 4
4 -
 5
5 -
 6
6 -
 7
7 -
8
-
9
-
10
-
11
-
12
-
13
-
14
-
15
-
16
-
17
-
18
-
19
-
20
-
21
-
22
-
23
-
24
-
25
-
26
-
27
-
28
-
29
-
30
-
31
-
32
-
33
-
34
-
35
-
36
-
37
-
38
-
39
-
40
-
41
-
42
-
43
-
44
-
45
-
46
-
47
-
48
-
49
-
50
-
51
-
52
-
53
-
54
-
55
-
56
-
57
-
58
-
59
-
60
-
61
-
62
-
63
-
64
-
65
-
66
 |
 |
Operation manual
Manuel d’instructions
Manual de instrucciones