Brother International E-100 Users Manual - English - Page 21
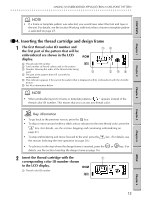
Inserting a thread cartridge - embroidery needle cartridge
 |
View all Brother International E-100 manuals
Add to My Manuals
Save this manual to your list of manuals |
Page 21 highlights
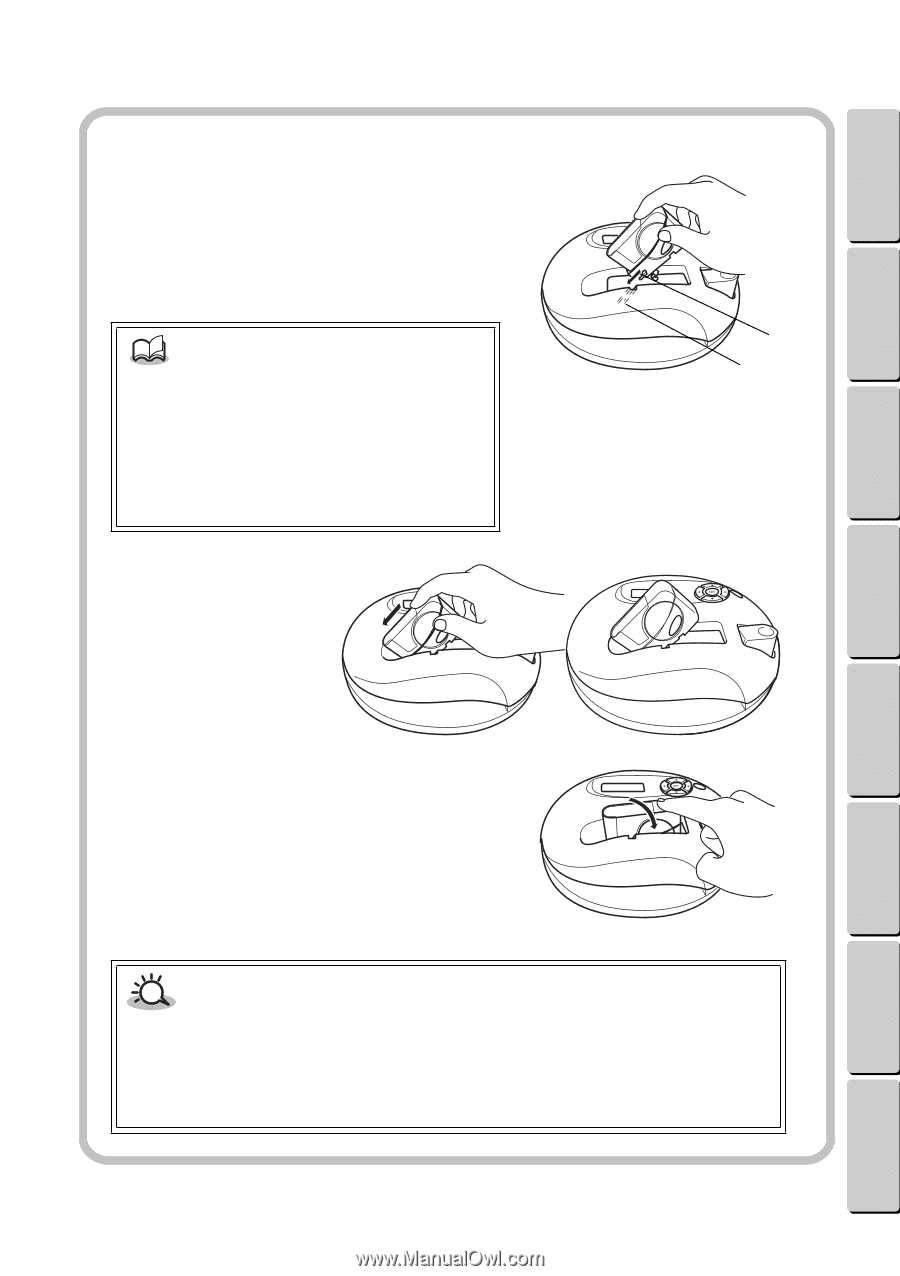
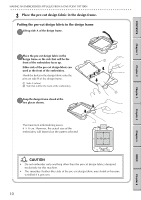
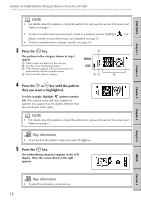
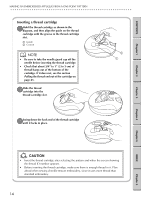
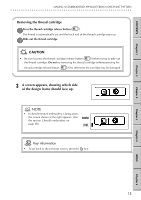
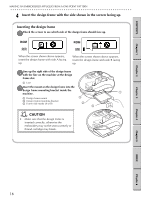
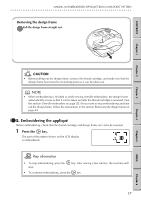
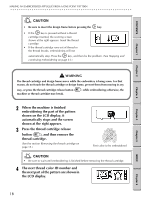
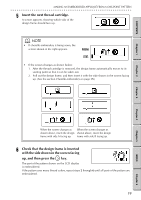
CONTENTS Chapter 1 MAKING AN EMBROIDERED APPLIQUÉ FROM A ONE-POINT PATTERN G G G G G G G G G G G G G G G G G G G G G G G G G G G G G G G G G G G G G G G G G G G G G G G G G G G G G G G G G Inserting a thread cartridge 1Hold the thread cartridge as shown in the diagram, and then align the guide on the thread cartridge with the groove in the thread cartridge slot. 1 Guide 2 Groove NOTE • Be sure to take the needle guard cap off the needle before inserting the thread cartridge. • Check that about 3/4" to 1" (2 to 3 cm) of thread hangs out of the bottom of the cartridge. If it does not, see the section Pulling the thread end out of the cartridge on page 45. 2Slide the thread cartridge into the thread cartridge slot. 2 1 3Swing down the back end of the thread cartridge until it locks in place. Chapter 2 Chapter 3 Chapter 4 Chapter 5 INDEX Chapter 6 CAUTION • Insert the thread cartridge after selecting the pattern and when the screen showing the thread ID number appears. • Before inserting the thread cartridge, make sure there is enough thread in it. Plan ahead when sewing chenille texture embroidery, since it uses more thread than standard embroidery. 14
-
 1
1 -
2
-
3
-
4
-
5
-
6
-
7
-
8
-
9
-
10
-
11
-
12
-
13
-
14
-
15
-
 16
16 -
 17
17 -
 18
18 -
 19
19 -
 20
20 -
 21
21 -
 22
22 -
 23
23 -
 24
24 -
 25
25 -
 26
26 -
27
-
28
-
29
-
30
-
31
-
32
-
33
-
34
-
35
-
36
-
37
-
38
-
39
-
40
-
41
-
42
-
43
-
44
-
45
-
46
-
47
-
48
-
49
-
50
-
51
-
52
-
53
-
54
-
55
-
56
-
57
-
58
-
59
-
60
-
61
-
62
-
63
-
64
-
65
-
66
 |
 |