Brother International E-100 Users Manual - English - Page 38
Changing the text
 |
View all Brother International E-100 manuals
Add to My Manuals
Save this manual to your list of manuals |
Page 38 highlights
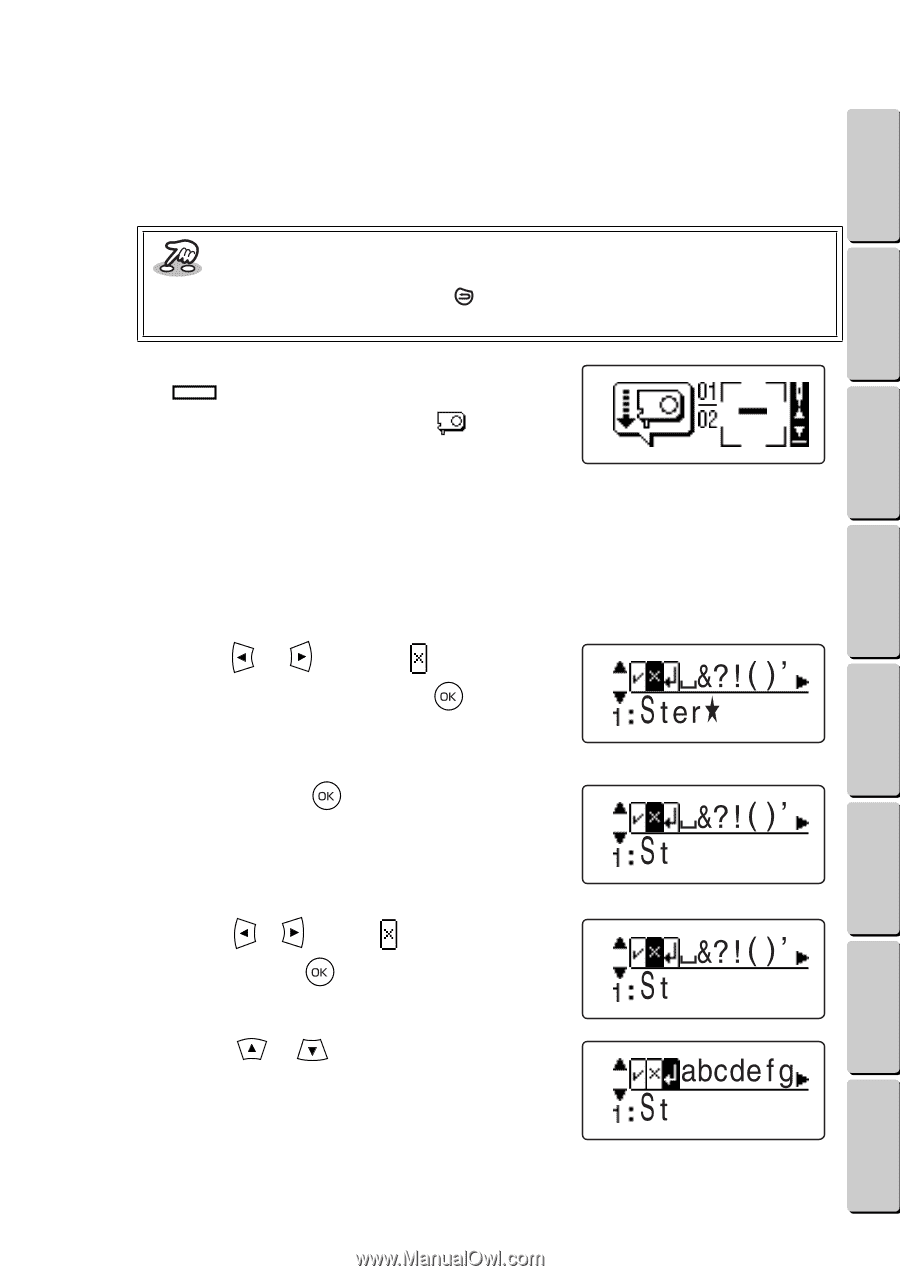
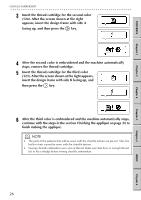
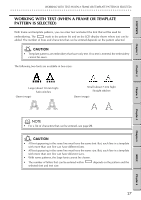
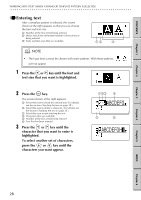
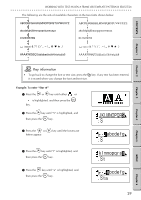
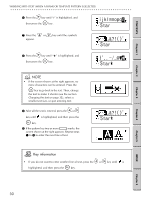
CONTENTS Chapter 1 Chapter 2 Chapter 3 WORKING WITH TEXT (WHEN A FRAME OR TEMPLATE PATTERN IS SELECTED) G G G G G G G G G G G G G G G G G G G G G G G G G G G G G G G G G G G G G G G G G G G G G G G G G G G G G G G G G A After all of the text is entered, the embroidering animation appears on the LCD display. Then, the screen shown on page 13 under Inserting the thread cartridge and design frame appears. Continue in same way that a one-point pattern is embroidered. Key information • To go back to edit the text, press the page 31.) key. (See the section Changing the text on When it is time to embroider a line of text ( ), the machine stops and a screen like the one shown at the right appears. " " appears instead of the thread color ID number. This means that you can use any thread color that you would like for the text. The text is embroidered starting from the top line. GG Changing the text If you would like to edit the text, you will have to delete the characters that you have entered, starting from the last one, until you reach the point where your editing should begin. Then, enter the text. 1 Press the or key until is highlighted, and then press the key. The last entered character is deleted. 2 Keep pressing the key until you reach the place in the text that you want to change. Example: To change "Ster ૽" to "Star ૽" 1 Press the or key until is highlighted, and then press the delete "er૽". key three times to 2 Press the or letters appear. key until the lowercase Chapter 4 Chapter 5 INDEX Chapter 6 31
-
 1
1 -
2
-
3
-
4
-
5
-
6
-
7
-
8
-
9
-
10
-
11
-
12
-
13
-
14
-
15
-
16
-
17
-
18
-
19
-
20
-
21
-
22
-
23
-
24
-
25
-
26
-
27
-
28
-
29
-
30
-
31
-
32
-
 33
33 -
 34
34 -
 35
35 -
 36
36 -
 37
37 -
 38
38 -
 39
39 -
 40
40 -
 41
41 -
 42
42 -
 43
43 -
44
-
45
-
46
-
47
-
48
-
49
-
50
-
51
-
52
-
53
-
54
-
55
-
56
-
57
-
58
-
59
-
60
-
61
-
62
-
63
-
64
-
65
-
66
 |
 |