Brother International E-100 Users Manual - English - Page 17
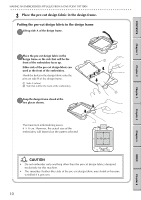
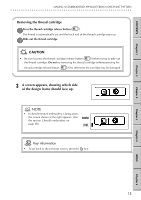
Place the pre-cut design fabric in the design frame., CAUTION - embroidery machine
 |
View all Brother International E-100 manuals
Add to My Manuals
Save this manual to your list of manuals |
Page 17 highlights
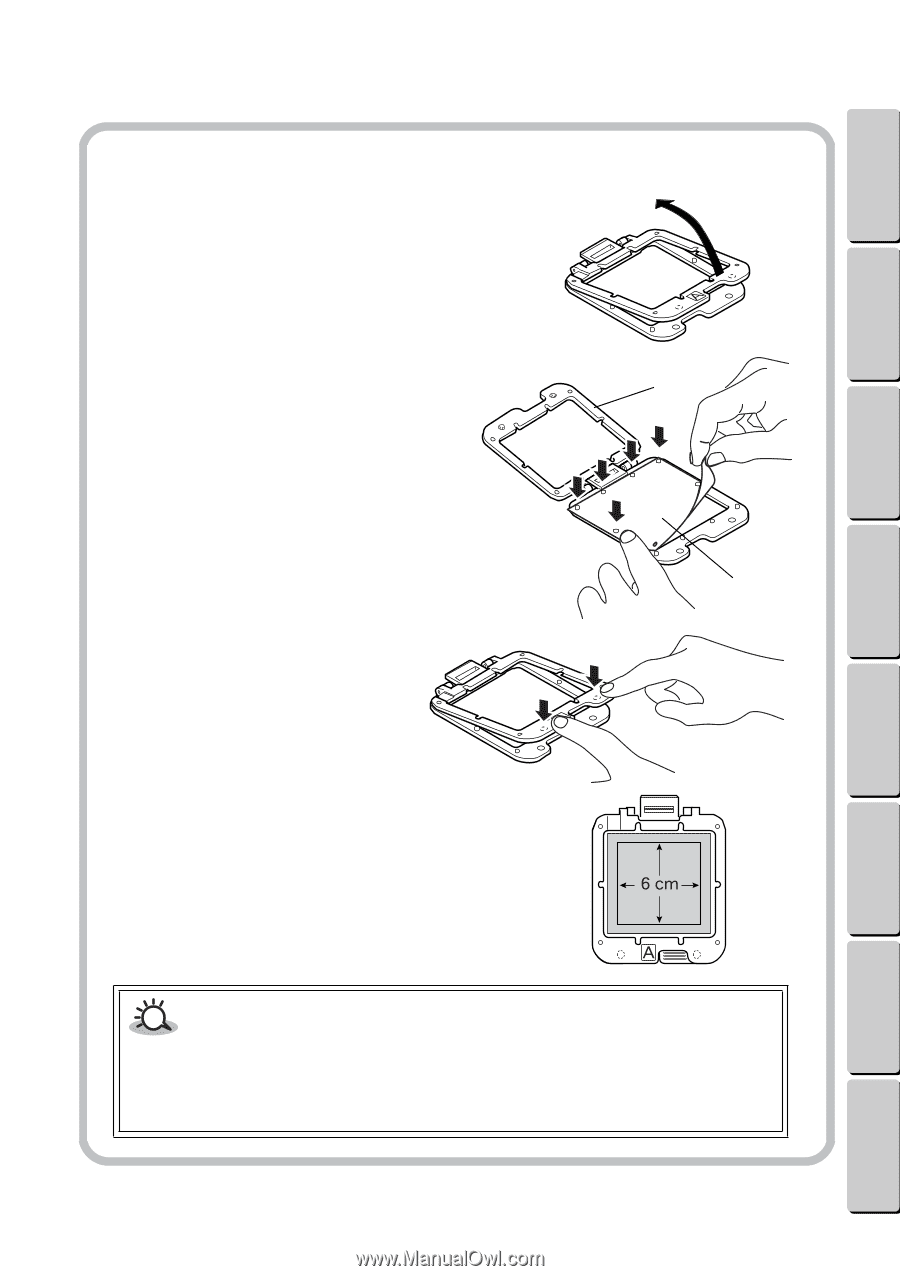
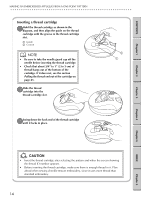
CONTENTS Chapter 1 Chapter 2 MAKING AN EMBROIDERED APPLIQUÉ FROM A ONE-POINT PATTERN G G G G G G G G G G G G G G G G G G G G G G G G G G G G G G G G G G G G G G G G G G G G G G G G G G G G G G G G G 3 Place the pre-cut design fabric in the design frame. Putting the pre-cut design fabric in the design frame 1Lift up side A of the design frame. 2Place the pre-cut design fabric in the design frame so the side that will be the front of the embroidery faces up. Either side of the pre-cut design fabric can used as the front of the embroidery. Hook the holes in the design fabric onto the pins on side B of the design frame. 1 Side A (white) 2 Side that will be the front of the embroidery 3Snap the design frame closed at the two places shown. The maximum embroidering area is 6 ן6 cm. However, the actual size of the embroidery will depend on the pattern selected. 1 2 Chapter 3 Chapter 4 Chapter 5 INDEX Chapter 6 CAUTION • Do not embroider onto anything other than the pre-cut design fabrics designed exclusively for this machine. • The smoother (leather-like) side of the pre-cut design fabric may shrink or become wrinkled if it gets wet. 10
-
 1
1 -
2
-
3
-
4
-
5
-
6
-
7
-
8
-
9
-
10
-
11
-
 12
12 -
 13
13 -
 14
14 -
 15
15 -
 16
16 -
 17
17 -
 18
18 -
 19
19 -
 20
20 -
 21
21 -
 22
22 -
23
-
24
-
25
-
26
-
27
-
28
-
29
-
30
-
31
-
32
-
33
-
34
-
35
-
36
-
37
-
38
-
39
-
40
-
41
-
42
-
43
-
44
-
45
-
46
-
47
-
48
-
49
-
50
-
51
-
52
-
53
-
54
-
55
-
56
-
57
-
58
-
59
-
60
-
61
-
62
-
63
-
64
-
65
-
66
 |
 |