Brother International MFC-9460CDN IFAX Network Users Manual - English - Page 33
Using One Touch or Speed Dial number, Con Signed PDF Settings, Administrator Settings
 |
UPC - 012502625117
View all Brother International MFC-9460CDN manuals
Add to My Manuals
Save this manual to your list of manuals |
Page 33 highlights
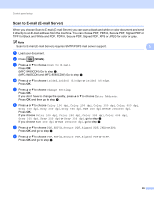
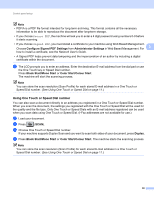
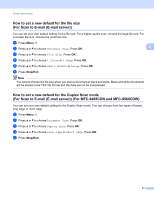
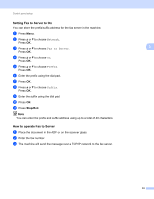
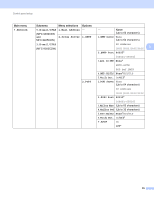
Control panel setup Note • PDF/A is a PDF file format intended for long-term archiving. This format contains all the necessary information to be able to reproduce the document after long-term storage. • If you choose Secure PDF, the machine will ask you to enter a 4 digit password using numbers 0-9 before it starts scanning. • If you choose Signed PDF, you must install a certificate to your machine using Web Based Management. Choose Configure Signed PDF Settings from Administrator Settings in Web Based Management. For 3 how to install a certificate, see the Network User's Guide. • A Signed PDF helps prevent data tampering and the impersonation of an author by including a digital certificate within the document. i The LCD prompts you to enter an address. Enter the destination E-mail address from the dial pad or use the One Touch key or Speed Dial number. Press Black Start/Mono Start or Color Start/Colour Start. The machine will start the scanning process. Note You can store the scan resolution (Scan Profile) for each stored E-mail address in a One Touch or Speed Dial number. (See Using One Touch or Speed Dial on page 11.) Using One Touch or Speed Dial number 3 You can also scan a document directly to an address you registered in a One Touch or Speed Dial number. When you scan the document, the settings you registered with the One Touch or Speed Dial will be used for the quality and the file type. Only One Touch or Speed Dials with an E-mail address registered can be used when you scan data using One Touch or Speed Dial. (I-Fax addresses are not available for use.) a Load your document. b Press (SCAN). c Choose One Touch or Speed Dial number. If your machine supports Duplex Scan and you want to scan both sides of your document, press Duplex. d Press Black Start/Mono Start or Color Start/Colour Start. The machine starts the scanning process. Note You can store the scan resolution (Scan Profile) for each stored E-mail address in a One Touch or Speed Dial number. (See Using One Touch or Speed Dial on page 11.) 30
-
 1
1 -
2
-
3
-
4
-
5
-
6
-
7
-
8
-
9
-
10
-
11
-
12
-
13
-
14
-
15
-
16
-
17
-
18
-
19
-
20
-
21
-
22
-
23
-
24
-
25
-
26
-
27
-
 28
28 -
 29
29 -
 30
30 -
 31
31 -
 32
32 -
 33
33 -
 34
34 -
 35
35 -
 36
36 -
 37
37 -
 38
38 -
39
-
40
-
41
-
42
-
43
 |
 |