Brother International XR1300 Users Manual - English - Page 100
with the two holes at the needle plate
 |
View all Brother International XR1300 manuals
Add to My Manuals
Save this manual to your list of manuals |
Page 100 highlights
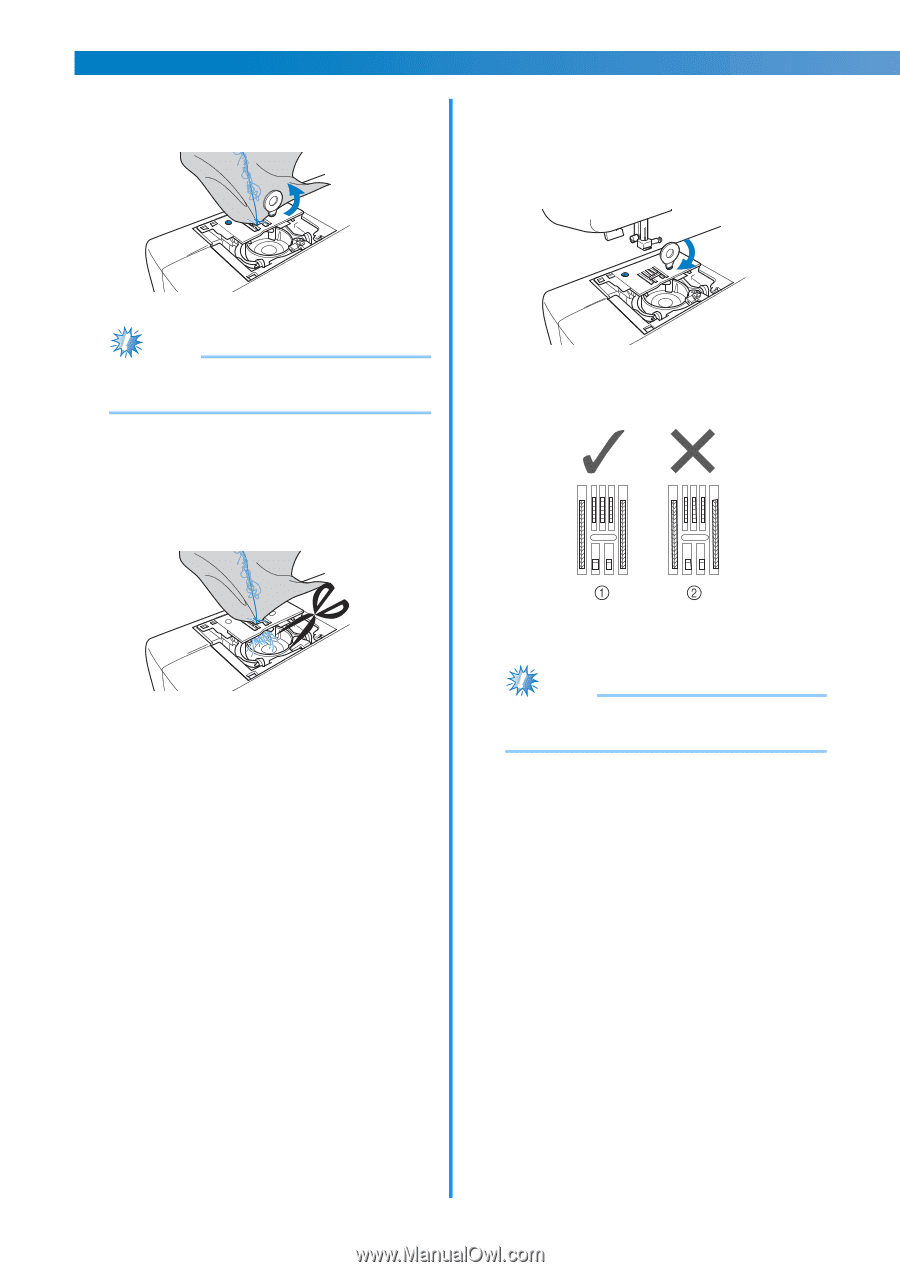
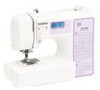
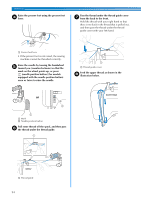
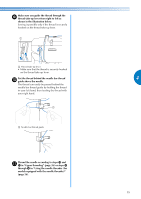
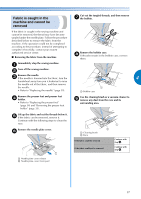
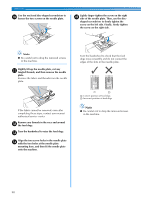
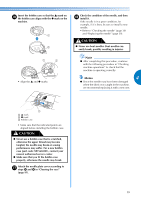
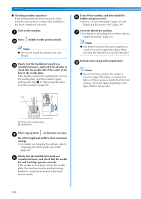
APPENDIX Use the enclosed disc-shaped screwdriver to j loosen the two screws on the needle plate. Lightly finger-tighten the screw on the right o side of the needle plate. Then, use the disc- shaped screwdriver to firmly tighten the screw on the left side. Finally, firmly tighten the screw on the right side. Note ● Be careful not to drop the removed screws in the machine. Slightly lift up the needle plate, cut any k tangled threads, and then remove the needle plate. Remove the fabric and threads from the needle plate. Turn the handwheel to check that the feed dogs move smoothly and do not contact the edges of the slots in the needle plate. If the fabric cannot be removed, even after completing these steps, contact your nearest authorized service center. Remove any threads in the race and around l the feed dogs. Turn the handwheel to raise the feed dogs. m Align the two screw holes in the needle plate n with the two holes at the needle plate mounting base, and then fit the needle plate onto the machine. a Correct position of feed dogs b Incorrect position of feed dogs Note ● Be careful not to drop the removed screws in the machine. 98
-
 1
1 -
2
-
3
-
4
-
5
-
6
-
7
-
8
-
9
-
10
-
11
-
12
-
13
-
14
-
15
-
16
-
17
-
18
-
19
-
20
-
21
-
22
-
23
-
24
-
25
-
26
-
27
-
28
-
29
-
30
-
31
-
32
-
33
-
34
-
35
-
36
-
37
-
38
-
39
-
40
-
41
-
42
-
43
-
44
-
45
-
46
-
47
-
48
-
49
-
50
-
51
-
52
-
53
-
54
-
55
-
56
-
57
-
58
-
59
-
60
-
61
-
62
-
63
-
64
-
65
-
66
-
67
-
68
-
69
-
70
-
71
-
72
-
73
-
74
-
75
-
76
-
77
-
78
-
79
-
80
-
81
-
82
-
83
-
84
-
85
-
86
-
87
-
88
-
89
-
90
-
91
-
92
-
93
-
94
-
 95
95 -
 96
96 -
 97
97 -
 98
98 -
 99
99 -
 100
100 -
 101
101 -
 102
102 -
 103
103 -
 104
104 -
 105
105 -
106
-
107
-
108
-
109
-
110
-
111
-
112
 |
 |