Brother International XR1300 Users Manual - English - Page 34
Sewing with the twin needle
 |
View all Brother International XR1300 manuals
Add to My Manuals
Save this manual to your list of manuals |
Page 34 highlights
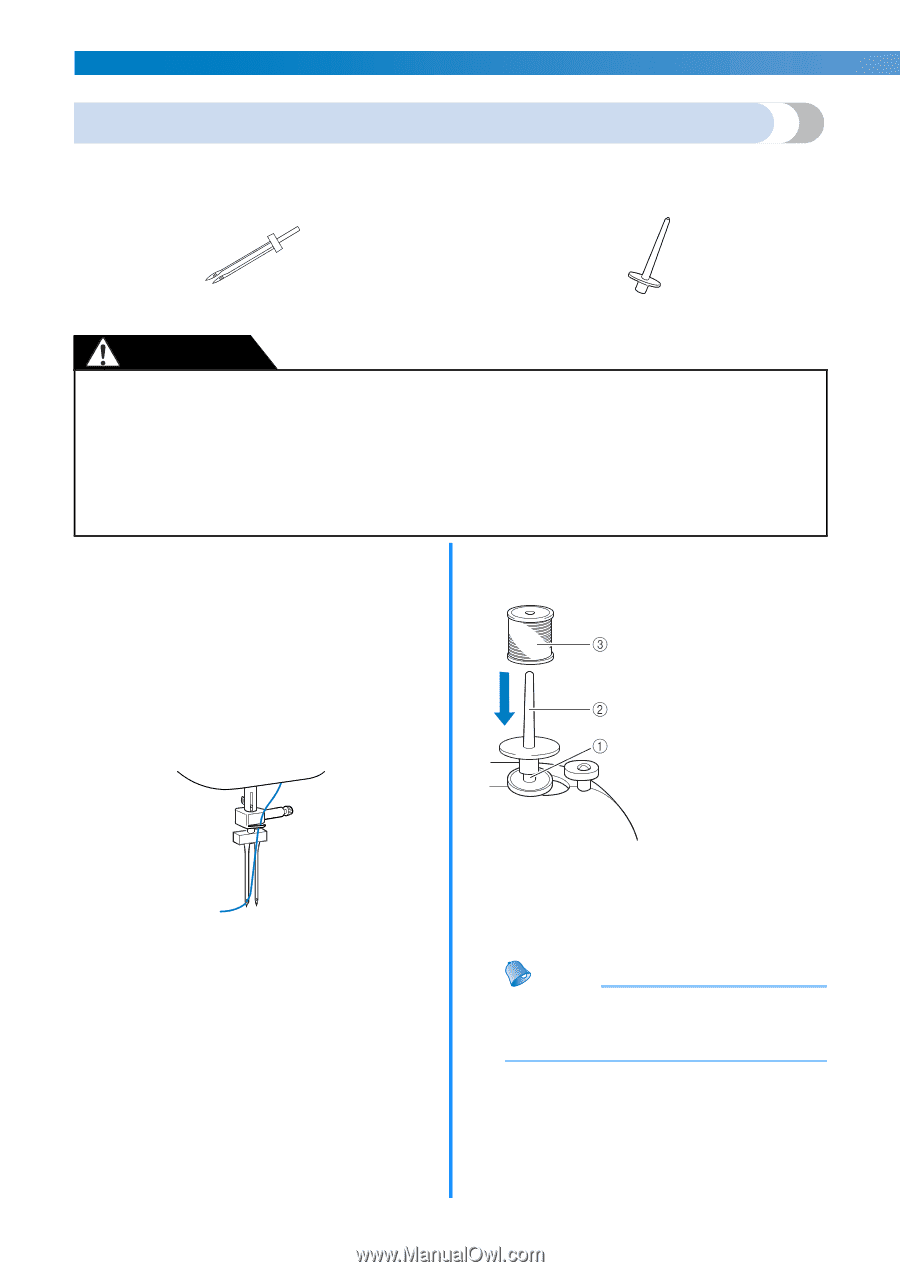
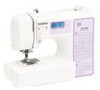
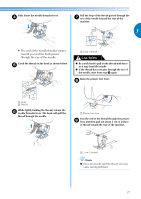
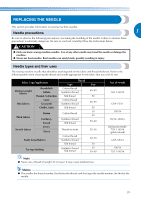
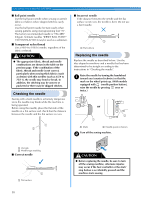
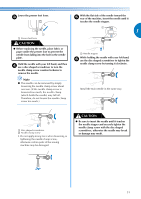
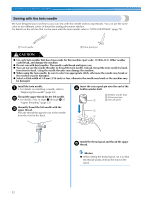
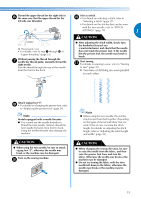
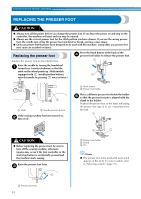
KNOWING YOUR SEWING MACHINE Sewing with the twin needle We have designed your machine so you can sew with this needle and two top threads. You can use the same color or two different colors of thread for making decorative stitches. For details on the stitches that can be sewn with the twin needle, refer to "STITCH SETTINGS" (page 79). a Twin needle b Extra spool pin CAUTION ● Use only twin needles that have been made for this machine (part code: 131096-121). Other needles could break, and damage the machine. ● Do not sew with bent needles. The needle could break and injure you. ● You can not use the needle threader to thread the twin needle. Instead, thread the twin needle by hand, from front to back. Using the needle threader may damage the machine. ● When using the twin needle, be sure to select an appropriate stitch, otherwise the needle may break or the machine may be damaged. ● Select a stitch width of 5.0 mm (3/16 inch) or less, otherwise the needle may break or the machine may be damaged. Install the twin needle. a • For details on installing a needle, refer to "Replacing the needle" (page 30). Thread the upper thread for the left needle. b • For details, refer to steps a through l of "Upper threading" (page 23). Manually thread the left needle with the c upper thread. Pass the thread through the eye of the needle from the front to the back. Insert the extra spool pin onto the end of the d bobbin winder shaft. a Bobbin winder shaft b Extra spool pin c Thread spool Install the thread spool and thread the upper e thread. Memo ● When setting the thread spool, set it so that the thread winds off from the front of the spool. 32
-
 1
1 -
2
-
3
-
4
-
5
-
6
-
7
-
8
-
9
-
10
-
11
-
12
-
13
-
14
-
15
-
16
-
17
-
18
-
19
-
20
-
21
-
22
-
23
-
24
-
25
-
26
-
27
-
28
-
 29
29 -
 30
30 -
 31
31 -
 32
32 -
 33
33 -
 34
34 -
 35
35 -
 36
36 -
 37
37 -
 38
38 -
 39
39 -
40
-
41
-
42
-
43
-
44
-
45
-
46
-
47
-
48
-
49
-
50
-
51
-
52
-
53
-
54
-
55
-
56
-
57
-
58
-
59
-
60
-
61
-
62
-
63
-
64
-
65
-
66
-
67
-
68
-
69
-
70
-
71
-
72
-
73
-
74
-
75
-
76
-
77
-
78
-
79
-
80
-
81
-
82
-
83
-
84
-
85
-
86
-
87
-
88
-
89
-
90
-
91
-
92
-
93
-
94
-
95
-
96
-
97
-
98
-
99
-
100
-
101
-
102
-
103
-
104
-
105
-
106
-
107
-
108
-
109
-
110
-
111
-
112
 |
 |