Brother International XR1300 Users Manual - English - Page 66
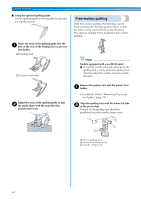
Free-motion quilting
 |
View all Brother International XR1300 manuals
Add to My Manuals
Save this manual to your list of manuals |
Page 66 highlights
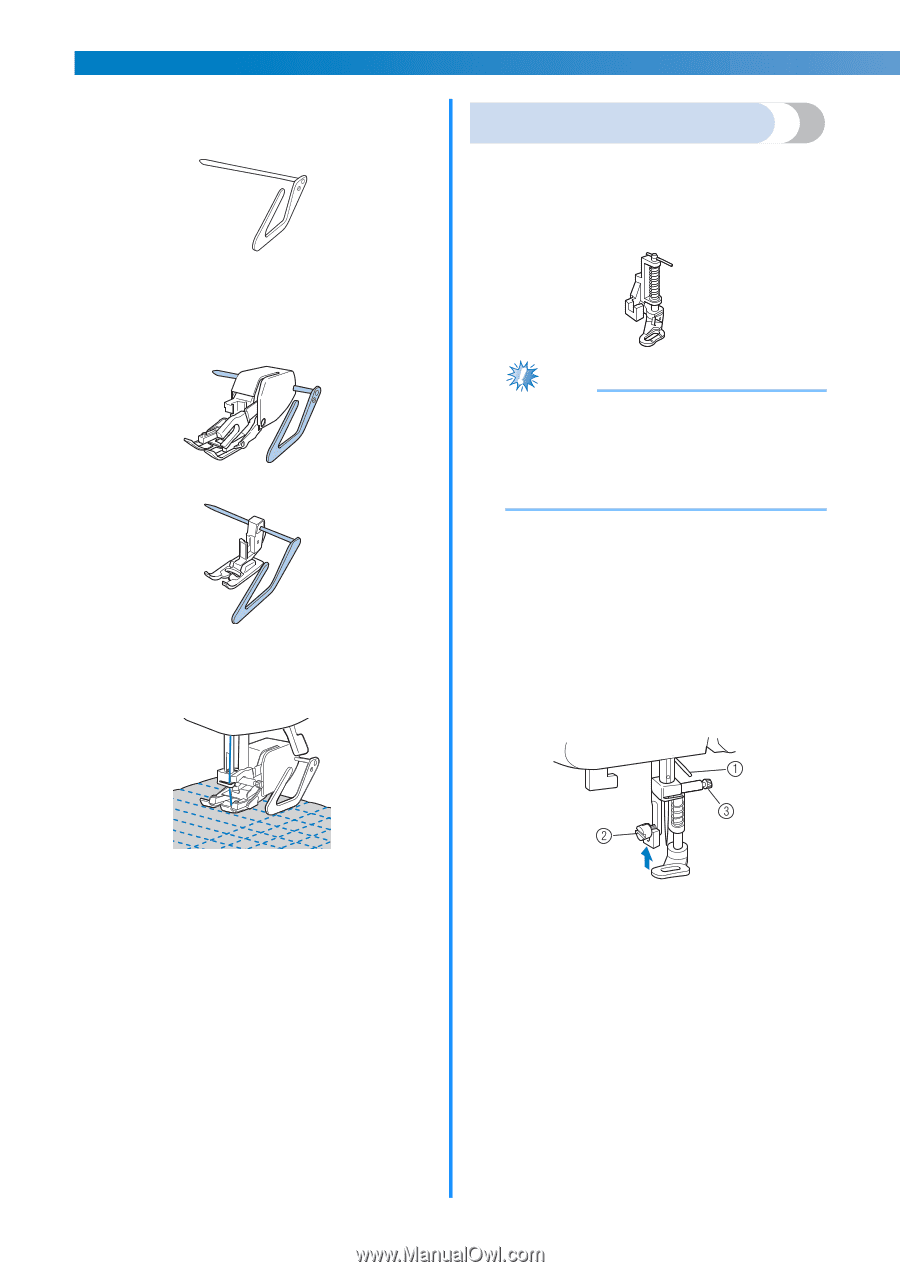
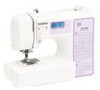
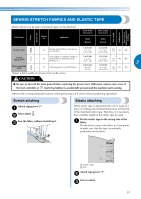
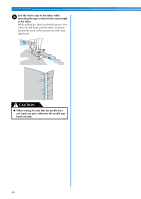
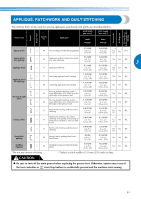
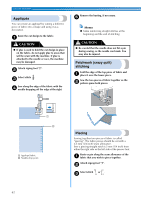
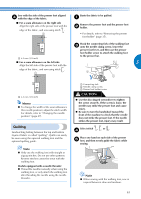
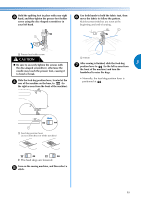
UTILITY STITCHES ■ Using the optional quilting guide Use the quilting guide to sew parallel stitches that are equally spaced. Free-motion quilting With free-motion quilting, the feed dogs can be lowered (using the feed dog position lever) so that the fabric can be moved freely in any direction. The optional quilting foot is needed for free-motion quilting. Insert the stem of the quilting guide into the a hole at the rear of the walking foot or presser foot holder. † Walking foot † Presser foot holder Note Models equipped with a needle threader ● Thread the needle manually when using the quilting foot, or only attach the quilting foot after threading the needle using the needle threader. Adjust the stem of the quilting guide so that b the guide aligns with the seam that has already been sewn. Remove the presser foot and the presser foot a holder. • For details, refer to "Removing the presser foot holder" (page 35). Align the quilting foot with the lower-left side b of the presser bar. The pin on the quilting foot should be positioned over the needle clamp screw. a Pin on quilting foot b Presser foot holder screw c Needle clamp screw 64
-
 1
1 -
2
-
3
-
4
-
5
-
6
-
7
-
8
-
9
-
10
-
11
-
12
-
13
-
14
-
15
-
16
-
17
-
18
-
19
-
20
-
21
-
22
-
23
-
24
-
25
-
26
-
27
-
28
-
29
-
30
-
31
-
32
-
33
-
34
-
35
-
36
-
37
-
38
-
39
-
40
-
41
-
42
-
43
-
44
-
45
-
46
-
47
-
48
-
49
-
50
-
51
-
52
-
53
-
54
-
55
-
56
-
57
-
58
-
59
-
60
-
 61
61 -
 62
62 -
 63
63 -
 64
64 -
 65
65 -
 66
66 -
 67
67 -
 68
68 -
 69
69 -
 70
70 -
 71
71 -
72
-
73
-
74
-
75
-
76
-
77
-
78
-
79
-
80
-
81
-
82
-
83
-
84
-
85
-
86
-
87
-
88
-
89
-
90
-
91
-
92
-
93
-
94
-
95
-
96
-
97
-
98
-
99
-
100
-
101
-
102
-
103
-
104
-
105
-
106
-
107
-
108
-
109
-
110
-
111
-
112
 |
 |