Brother International XR1300 Users Manual - English - Page 12
Operation panel, Spool pin - machine
 |
View all Brother International XR1300 manuals
Add to My Manuals
Save this manual to your list of manuals |
Page 12 highlights
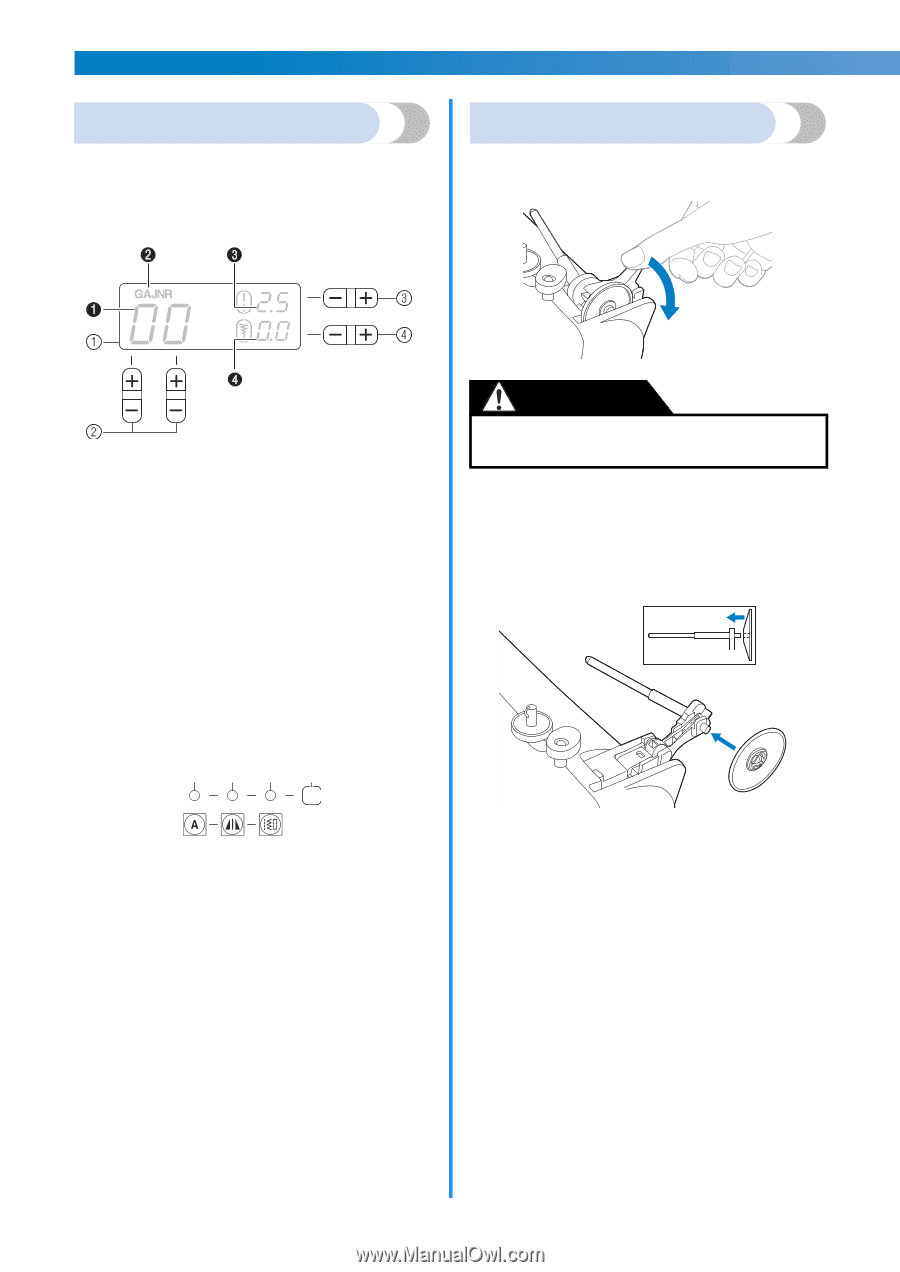
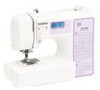
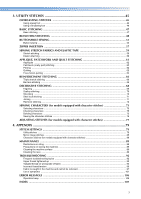
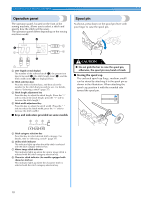
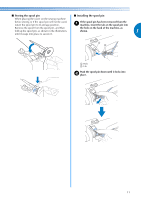
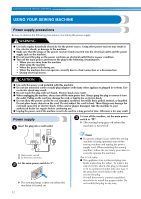
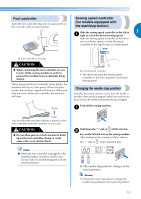
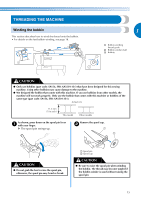
KNOWING YOUR SEWING MACHINE Operation panel The operation panel, located on the front of the sewing machine, allows you to select a stitch and specify how the stitch will be sewn. The operation panel differs depending on the sewing machine model. Spool pin As shown, press down on the spool pin lever with your finger to raise the spool pin. a LCD (liquid crystal display) The number of the selected stitch (1), the presser foot type to be used (2), the stitch length (mm) (3), and the stitch width (mm) (4) are displayed here. b Stitch selection keys Press the stitch selection keys, and then select the number for the stitch that you wish to use. For details, refer to "Selecting a stitch" (page 37). c Stitch length adjustment key Press this key to adjust the stitch length. (Press the "-" side to reduce the stitch length; press the "+" side to increase the stitch length.) d Stitch width adjustment key Press this key to adjust the stitch width. (Press the "-" side to reduce the stitch width; press the "+" side to increase the stitch width.) ■ Keys and indicators provided on some models 876 5 CAUTION ● Do not grab the bar to raise the spool pin, otherwise, the spool pin may bend or break. ■ Storing the spool cap The enclosed spool cap (large, medium, small) can be stored by attaching it to the spool pin as shown in the illustration. When attaching the spool cap, position it with the rounded side toward the spool pin. e Stitch category selection key Press this key to select desired stitch category. For details, refer to "Selecting a stitch" (page 37) . f Utility stitch indicator This indicator lights up when the utility stitch is selected with the stitch category selection key. g Mirror image stitch indicator This indicator lights up when the mirror image stitch is selected with the stitch category selection key. h Character stitch indicator (for models equipped with character stitches) This indicator lights up when the character stitch is selected with the stitch category selection key. 10
-
 1
1 -
2
-
3
-
4
-
5
-
6
-
 7
7 -
 8
8 -
 9
9 -
 10
10 -
 11
11 -
 12
12 -
 13
13 -
 14
14 -
 15
15 -
 16
16 -
 17
17 -
18
-
19
-
20
-
21
-
22
-
23
-
24
-
25
-
26
-
27
-
28
-
29
-
30
-
31
-
32
-
33
-
34
-
35
-
36
-
37
-
38
-
39
-
40
-
41
-
42
-
43
-
44
-
45
-
46
-
47
-
48
-
49
-
50
-
51
-
52
-
53
-
54
-
55
-
56
-
57
-
58
-
59
-
60
-
61
-
62
-
63
-
64
-
65
-
66
-
67
-
68
-
69
-
70
-
71
-
72
-
73
-
74
-
75
-
76
-
77
-
78
-
79
-
80
-
81
-
82
-
83
-
84
-
85
-
86
-
87
-
88
-
89
-
90
-
91
-
92
-
93
-
94
-
95
-
96
-
97
-
98
-
99
-
100
-
101
-
102
-
103
-
104
-
105
-
106
-
107
-
108
-
109
-
110
-
111
-
112
 |
 |