Brother International XR1300 Users Manual - English - Page 95
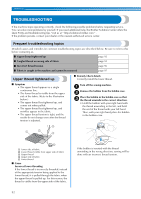
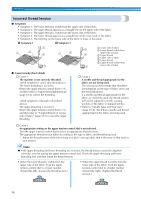
Tangled thread on wrong, side of fabric
 |
View all Brother International XR1300 manuals
Add to My Manuals
Save this manual to your list of manuals |
Page 95 highlights
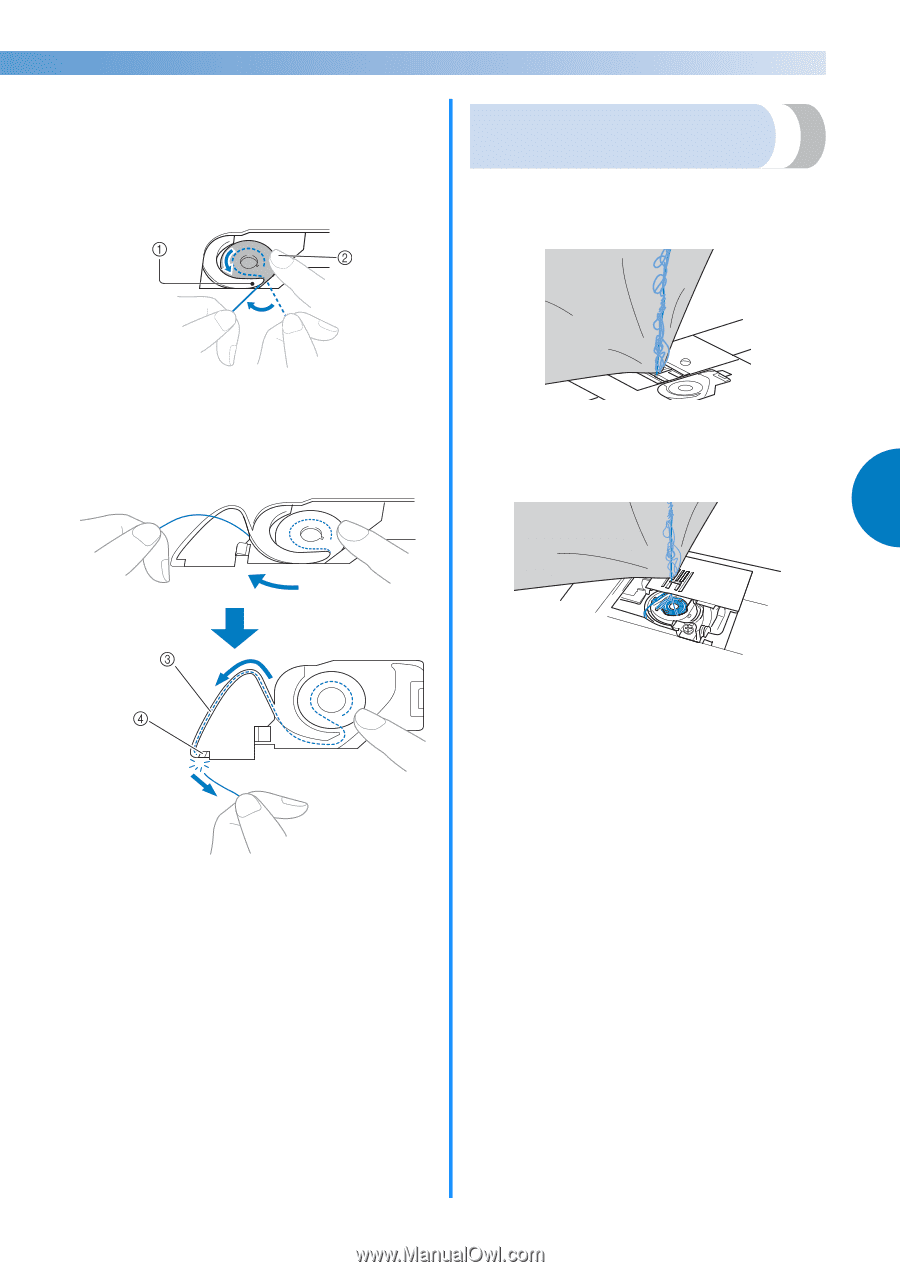
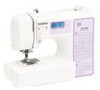
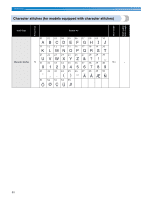
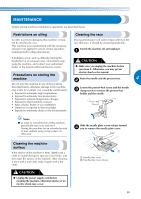
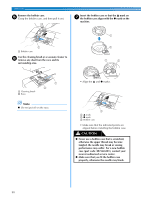
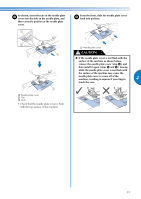
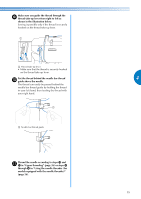
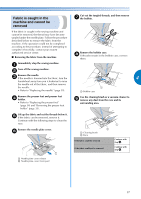
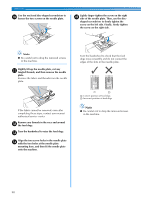
While holding the bobbin in place with your d finger, pass the thread through the slit in the needle plate. • Hold down the bobbin with your right hand, and then pull the end of the thread around the tab with your left hand. Tangled thread on wrong side of fabric ■ Symptom • The thread becomes tangled on the lower side of the fabric. a Tab b Hold down the bobbin with your right hand. On models equipped with the quick-set bobbin, pull the thread to pass it through the slit in the needle plate, then cut it with the cutter. • After starting sewing, a rattling noise is made and sewing cannot continue. • Looking under the fabric, there is tangled thread in the bobbin case. 4 c Slit d Cutter Sewing with the correct thread tension is possible after the bobbin has been correctly installed in the bobbin case. ■ Cause Incorrect upper threading If the upper thread is incorrectly threaded, the upper thread passed through the fabric cannot be firmly pulled up and the upper thread becomes tangled in the bobbin case, causing a rattling noise. ■ Remedy/check details Remove the tangled thread, and then correct the upper threading. Remove the tangled thread. If it cannot be a removed, cut the thread with scissors. • For details, refer to "Cleaning the race" on page 89. Remove the upper thread from the machine. b Refer to the following steps to correct the c upper threading. • If the bobbin was removed from the bobbin case, refer to "Lower threading" (page 20) and "Remedy/check details" in the section "Upper thread tightened up" (page 92) to correctly install the bobbin. 93
-
 1
1 -
2
-
3
-
4
-
5
-
6
-
7
-
8
-
9
-
10
-
11
-
12
-
13
-
14
-
15
-
16
-
17
-
18
-
19
-
20
-
21
-
22
-
23
-
24
-
25
-
26
-
27
-
28
-
29
-
30
-
31
-
32
-
33
-
34
-
35
-
36
-
37
-
38
-
39
-
40
-
41
-
42
-
43
-
44
-
45
-
46
-
47
-
48
-
49
-
50
-
51
-
52
-
53
-
54
-
55
-
56
-
57
-
58
-
59
-
60
-
61
-
62
-
63
-
64
-
65
-
66
-
67
-
68
-
69
-
70
-
71
-
72
-
73
-
74
-
75
-
76
-
77
-
78
-
79
-
80
-
81
-
82
-
83
-
84
-
85
-
86
-
87
-
88
-
89
-
 90
90 -
 91
91 -
 92
92 -
 93
93 -
 94
94 -
 95
95 -
 96
96 -
 97
97 -
 98
98 -
 99
99 -
 100
100 -
101
-
102
-
103
-
104
-
105
-
106
-
107
-
108
-
109
-
110
-
111
-
112
 |
 |