Canon 3305211 User Manual - Page 148
Transferring Images to a Personal Computer
 |
UPC - 689076851770
View all Canon 3305211 manuals
Add to My Manuals
Save this manual to your list of manuals |
Page 148 highlights
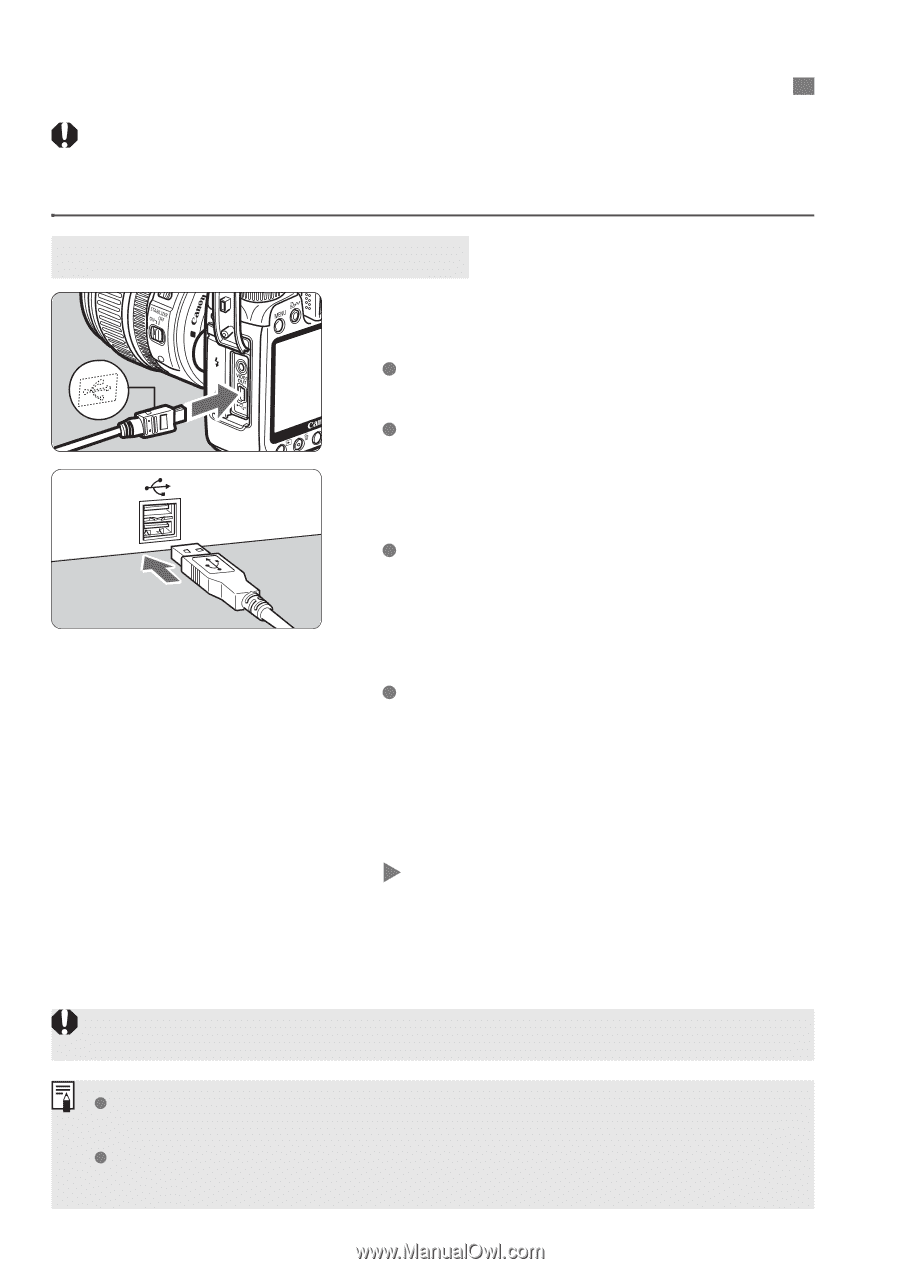
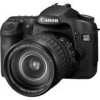
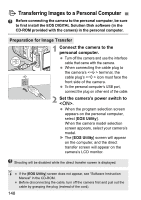
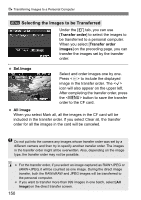
d Transferring Images to a Personal Computer Before connecting the camera to the personal computer, be sure to first install the EOS DIGITAL Solution Disk software (in the CD-ROM provided with the camera) in the personal computer. Preparation for Image Transfer 1 Connect the camera to the personal computer. Turn off the camera and use the interface cable that came with the camera. When connecting the cable plug to the camera's terminal, the cable plug's icon must face the front side of the camera. To the personal computer's USB port, connect the plug on other end of the cable. 2 Set the camera's power switch to . When the program selection screen appears on the personal computer, select [EOS Utility]. When the camera model selection screen appears, select your camera's model. X The [EOS Utility] screen will appear on the computer, and the direct transfer screen will appear on the camera's LCD monitor. Shooting will be disabled while the direct transfer screen is displayed. If the [EOS Utility] screen does not appear, see "Software Instruction Manual" in the CD-ROM. Before disconnecting the cable, turn off the camera first and pull out the cable by grasping the plug (instead of the cord). 148
-
 1
1 -
2
-
3
-
4
-
5
-
6
-
7
-
8
-
9
-
10
-
11
-
12
-
13
-
14
-
15
-
16
-
17
-
18
-
19
-
20
-
21
-
22
-
23
-
24
-
25
-
26
-
27
-
28
-
29
-
30
-
31
-
32
-
33
-
34
-
35
-
36
-
37
-
38
-
39
-
40
-
41
-
42
-
43
-
44
-
45
-
46
-
47
-
48
-
49
-
50
-
51
-
52
-
53
-
54
-
55
-
56
-
57
-
58
-
59
-
60
-
61
-
62
-
63
-
64
-
65
-
66
-
67
-
68
-
69
-
70
-
71
-
72
-
73
-
74
-
75
-
76
-
77
-
78
-
79
-
80
-
81
-
82
-
83
-
84
-
85
-
86
-
87
-
88
-
89
-
90
-
91
-
92
-
93
-
94
-
95
-
96
-
97
-
98
-
99
-
100
-
101
-
102
-
103
-
104
-
105
-
106
-
107
-
108
-
109
-
110
-
111
-
112
-
113
-
114
-
115
-
116
-
117
-
118
-
119
-
120
-
121
-
122
-
123
-
124
-
125
-
126
-
127
-
128
-
129
-
130
-
131
-
132
-
133
-
134
-
135
-
136
-
137
-
138
-
139
-
140
-
141
-
142
-
 143
143 -
 144
144 -
 145
145 -
 146
146 -
 147
147 -
 148
148 -
 149
149 -
 150
150 -
 151
151 -
 152
152 -
 153
153 -
154
-
155
-
156
-
157
-
158
-
159
-
160
-
161
-
162
-
163
-
164
-
165
-
166
-
167
-
168
-
169
-
170
-
171
-
172
-
173
-
174
-
175
-
176
-
177
-
178
-
179
-
180
-
181
-
182
-
183
-
184
-
185
-
186
-
187
-
188
-
189
-
190
-
191
-
192
-
193
-
194
-
195
-
196
 |
 |