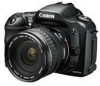
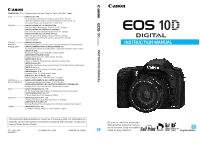
Canon EOS 10D EOS 10D INSTRUCTIONS
Canon EOS 10D - Digital Camera SLR Manual
 |
UPC - 750845811339
View all Canon EOS 10D manuals
Add to My Manuals
Save this manual to your list of manuals |
Canon EOS 10D manual content summary:
- Canon EOS 10D | EOS 10D INSTRUCTIONS - Page 1
on using the camera with system accessories introduced after this date, contact your nearest Canon Service Center. CT1-1241-000 0000Ni0.0 © CANON INC. 2003 PRINTED IN JAPAN INSTRUCTION MANUAL INSTRUCTION MANUAL Be sure to read this Instruction Manual before using your camera for the first - Canon EOS 10D | EOS 10D INSTRUCTIONS - Page 2
Thank you for purchasing a Canon product. The EOS 10D is a high-performance, single-lens reflex, AF digital camera with an ultra-fine CMOS sensor having 6.30 million effective pixels. It is compatible with all Canon EF lenses and designed for quick and easy shooting at any time. It is full-featured - Canon EOS 10D | EOS 10D INSTRUCTIONS - Page 3
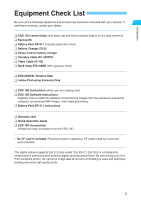
how to install the software for transferring images from the camera to a personal computer, processing RAW images, and image processing. ¢ Battery Pack BP-511 Instructions ¢ Warranty card ¢ Quick Operation Guide ¢ EOS 10D Accessories Introduces major accessories for the EOS 10D. ∗ No CF card is - Canon EOS 10D | EOS 10D INSTRUCTIONS - Page 4
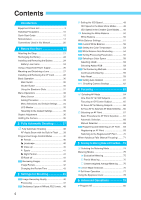
Removing the Battery 24 Battery Level Icons 24 Using a Household Power Supply 26 Mounting and Detaching a Lens 27 Installing and Removing the CF Card 28 Basic Operation 30 Main Switch 30 Shutter Button 30 Using the Electronic Dials 31 Menu Operations 32 Menu Screen 32 Setting Procedure - Canon EOS 10D | EOS 10D INSTRUCTIONS - Page 5
122 Connect the Camera to the Printer 122 Connecting to a Card Photo Printer ..... 122 1 Connecting to a Canon BJ Printer ........ 124 Printing 125 Printing Options 127 2 Setting the Quantity 127 Setting the Printing Style 127 Trimming 129 3 10 DPOF: Digital Print Order Format - Canon EOS 10D | EOS 10D INSTRUCTIONS - Page 6
Digital Camera Model DS6031 used in accordance with the instructions, may cause harmful interference to radio communications. However, there is no the manual. If such changes or modifications should be made, you could be required to stop operation of the equipment. Canon U.S.A. Inc. One Canon Plaza - Canon EOS 10D | EOS 10D INSTRUCTIONS - Page 7
by qualified service personnel authorized by your camera distributor or Canon Customer Support. • To Set the camera's main switch to the OFF position and remove the camera battery or unplug the power cord immediately. Please consult your camera distributor or the closest Canon Customer Support - Canon EOS 10D | EOS 10D INSTRUCTIONS - Page 8
the AC adapter from both the camera and electrical outlet when the camera is not in use to avoid fires and other hazards. • The camera terminal of the DC coupler cord is designed for exclusive use with the EOS 10D. Do not use it with other products or batteries. There is a risk of fire and - Canon EOS 10D | EOS 10D INSTRUCTIONS - Page 9
charger to charge the battery pack. • Do not store the equipment in humid or dusty areas. Storage in these areas could lead to fire, electrical shock or other damage. • Be careful not to bang the camera corrupt image data. Avoid Condensation Related Problems Moving the equipment rapidly between hot - Canon EOS 10D | EOS 10D INSTRUCTIONS - Page 10
to disassemble the camera or service it yourself. (6) Use a commercially available blower brush to remove any dust that accumulates on the camera lens, viewfinder, mirror, or focusing screen. Do not use cleaners that contain organic solvents to wipe off the camera body or lens. If the camera is very - Canon EOS 10D | EOS 10D INSTRUCTIONS - Page 11
hold the battery, or you could cause a short circuit. (3) Do not disassemble or heat the battery, or on them. (6) Use only CF cards specified by Canon. Otherwise, you may be unable to record or Lens Electrical Contacts After detaching the lens from the camera, attach the lens caps or put down the lens - Canon EOS 10D | EOS 10D INSTRUCTIONS - Page 12
Quick Start Guide For detailed instructions, see the reference page indicated in parentheses. 1 Recharge the battery. Connect the power cord to the battery charger, then attach the battery. When the charge lamp stops blinking and stays lit, the battery is completely charged. A full battery charge - Canon EOS 10D | EOS 10D INSTRUCTIONS - Page 13
Start Guide Introduction 3 Mount the lens. Align the red dots on the lens and camera and turn the lens in the direction shown by the arrow in the diagram until it clicks into place. (→p.27) 4 Set the focus mode switch on the lens to < AF >. (→p.27) 7 Turn the < < >. (→p.30) > switch to 8 Set - Canon EOS 10D | EOS 10D INSTRUCTIONS - Page 14
dial (→18) Strap mount (→21) Cover 〈 〉 Flash button (→97) Lens release button (→27) Depth-of-field preview button (→85) Lens lock pin Lens mount Body cap (→27) 14 DIGITAL terminal (→123, See "EOS 10D Software Instructions.") VIDEO OUT terminal (→115) PC terminal (→106) Remote control terminal - Canon EOS 10D | EOS 10D INSTRUCTIONS - Page 15
/ Index/Reduce button (→92/100/110/111,129) 〈 / 〉 AF point selector/Enlarge button (→67/111,129) Strap mount (→21) Access lamp (→29) CF card slot cover (→28) Battery compartment cover release lever (→24) Battery compartment cover (→24) 〈 〉 Quick Control Dial (→31) 〈 〉 Setting button (→32) CF - Canon EOS 10D | EOS 10D INSTRUCTIONS - Page 16
Date/time battery level warning ( ) Processing Parameters ( - , ) ISO Speed ( , - , ) Camera starting ( ) Image-Recording quality Large/Fine Large/Normal Medium/Fine Medium/Normal Small/Fine Small/Normal RAW AF point selection ( ) CF card full warning ( ) CF card error warning ( ) No - Canon EOS 10D | EOS 10D INSTRUCTIONS - Page 17
indicator Exposure compensation amount Flash exposure compensation amount AEB level Red-eye reduction lamp-on indicator CF card full warning ( ) CF card error warning ( ) No CF card warning ( ) The above diagram shows the LCD panel with all icons and indicators displayed. In actual use - Canon EOS 10D | EOS 10D INSTRUCTIONS - Page 18
Auto (→p.38) Allows you fully automatic shooting- the camera makes all the settings. Image zone Allows you fully automatic shooting in specific situations you make a variety of settings. : Program AE (→p.80) : Shutter-priority AE (→p.82) : Aperture-priority AE (→p.84) : Manual exposure (→p.86) : - Canon EOS 10D | EOS 10D INSTRUCTIONS - Page 19
Introduction Battery Charger CB-5L Power cord (→p.22) Nomenclature Battery pack slot (→22) The battery pack slips into this slot for recharging. Power cord socket (→p.22) Plug in power cord here. AC Adaptor Kit ACK-E2 (optional) AC Adaptor AC- - Canon EOS 10D | EOS 10D INSTRUCTIONS - Page 20
Main Switch. All operations described in this Instruction Manual assume that the < > switch is already set to < >. Before proceeding with any lens reflex camera using 35mm film. • These Instructions use the following alert symbols: : The Caution symbol indicates a warning to prevent shooting problems - Canon EOS 10D | EOS 10D INSTRUCTIONS - Page 21
BeforeYou Start This chapter explains a few preliminary steps and the basic operation of the EOS 10D camera. 1 1Before You Start Attaching the Strap Pass the end of the strap through the strap mount from beneath, then back in and out of the - Canon EOS 10D | EOS 10D INSTRUCTIONS - Page 22
will not be lost. 2 •• If you remove the battery from the camera, be sure to reattach the cover to protect against short circuit. mark 3 •Attach the battery. Align the battery's top edge with the mark on the charger. While pressing down the battery, slide it in the direction of the arrow - Canon EOS 10D | EOS 10D INSTRUCTIONS - Page 23
Pack BP-511 or BP-512. •• The battery continues to discharge a low electrical current even while the camera is not used. This may lead to excessive battery discharge and a shorter battery service life. 1 When not using the camera, remove the battery and attach the protective cover to prevent - Canon EOS 10D | EOS 10D INSTRUCTIONS - Page 24
shown by the arrow in the diagram, and open the cover. 2 •Insert the battery into the camera. Make sure the battery pack is facing the right way, and insert it into the battery compartment. • Insert the battery pack until it locks into place. 3 •Close the cover. Press the cover closed until - Canon EOS 10D | EOS 10D INSTRUCTIONS - Page 25
above are based on Canon's standard testing conditions (w/fully charged battery, EF 50mm f/1.4 USM lens, image review [ON], review time of [2 sec.], battery life (number of shots) with Battery Grip BG-ED3 (optional), refer to the BG-ED3's instructions. Removing the Battery 1 •Open the battery - Canon EOS 10D | EOS 10D INSTRUCTIONS - Page 26
you can connect the camera to a household power outlet. Then you do not have to worry about exhausting the battery while using the camera. 1 •Place the the power cord while the camera's < > switch is set to < > . • Do not use the DC coupler with any camera other than the EOS 10D, D60, and D30. 26 - Canon EOS 10D | EOS 10D INSTRUCTIONS - Page 27
normal 35mm film format, the EF lens attached to the camera will have a telephoto effect equivalent to 1.6 times of the marked focal length. AF stands for autofocus. • MF or M stands for manual focus. •• Be careful not to lose the lens caps or body cap. EOS 10D image field (22.7 x 15.1 mm / 0.89 - Canon EOS 10D | EOS 10D INSTRUCTIONS - Page 28
it. mark Eject button 2 •• Label side Insert the CF card. Using CF cards made by Canon is recommended. With the CF card label side (the side with the printed mark) facing toward the rear of the camera, slide the card in the direction of the mark, into the slot. s The Eject button - Canon EOS 10D | EOS 10D INSTRUCTIONS - Page 29
Removing the CF Card Open the cover. Set the < > switch to < >. camera. • Open the CF card slot cover. • Remove the battery. This is to prevent damage to the image data, CF card, or camera using a hard disk. It has a large capacity and the price per megabyte is low. However, compared to a CF card - Canon EOS 10D | EOS 10D INSTRUCTIONS - Page 30
Basic Operation Main Switch The camera operates only after the < > switch is set to < >. < > : Set to this position when the camera is in use. < > : The camera does not operate. Set to this position when not using the camera. • To save battery power, the camera turns off automatically after 1 minute - Canon EOS 10D | EOS 10D INSTRUCTIONS - Page 31
the LCD panel. When the timer runs out or you press the shutter button down halfway, the camera is ready to shoot. • You can select the AF point or set the white balance, ISO speed, and flash exposure compensation. • While looking at the LCD monitor, you can select a menu item, recorded image - Canon EOS 10D | EOS 10D INSTRUCTIONS - Page 32
, press the < > button on the back of the camera and turn the < > or < > dial. Then press the < > button. For details on the various menu settings, see "Menu Settings" on page 139. < > button LCD monitor Menu Screen Menu item Setting Color-coded menu items The menu items are color - Canon EOS 10D | EOS 10D INSTRUCTIONS - Page 33
> dial to select the item, then press < >. The selection goes up The selection goes down 3 •Select the desired setting. Turn the < > dial to select the desired setting. 4 •Set the desired setting. Press < >. 5 •Exit the menu. Press the < > button to exit. • Even while the menu is displayed, you can - Canon EOS 10D | EOS 10D INSTRUCTIONS - Page 34
RAW ✽1 99 ✽2 AEB 90 ✽1 Shooting (Red) WB-BKT 54 ✽1 Playback (Blue) Beep Custom WB Color temp. Parameters ISO expansion Protect Rotate Print Order Auto play Auto power off Review Review time Auto rotate LCD Brightness On Off Set custom white balance 2800 K - 10000 K in 100 K increments - Canon EOS 10D | EOS 10D INSTRUCTIONS - Page 35
The color LCD monitor on the back of the camera enables you to review and select recorded images 1 and set various menu settings. • With the LCD monitor, you can use ) Custom Functions Settings retained Image Recording Settings Quality (Large/Fine) ISO speed 100 White balance ( - Canon EOS 10D | EOS 10D INSTRUCTIONS - Page 36
at the standard setting (-1 dpt). If the camera's dioptric adjustment still cannot provide a clear viewfinder image, using Dioptric Adjustment Lens E (10 types) is recommended. (→p.174) Holding the Camera To obtain sharp images, hold the camera still to minimize camera shake. Horizontal shooting - Canon EOS 10D | EOS 10D INSTRUCTIONS - Page 37
improperly, the buttons do not operate so there is no need to worry about accidental errors. 2Fully Automatic Shooting 2 Basic Zone modes set all the camera settings automatically. All you do is point and shoot. Set the Mode Dial to or < >. • The shooting procedure is the same as with the - Canon EOS 10D | EOS 10D INSTRUCTIONS - Page 38
the shutter button. The Canon EOS 10D can capture subjects at any of seven AF points, so that anybody can take great shots easily. 1 •Turn the Mode dial to < >. The < > AF mode, < > (single) drive mode, < > metering mode, " " ISO speed, and < > white balance will be set automatically. • One of - Canon EOS 10D | EOS 10D INSTRUCTIONS - Page 39
pop-up of the built-in flash is obstructed accidentally, error code " " will appear on the LCD panel. If this happens, set the < > switch to < > and < > again. 2 The focus and exposure are locked when AF focusing is complete. •• The camera automatically focuses on the AF point that is on the - Canon EOS 10D | EOS 10D INSTRUCTIONS - Page 40
mode to suit the target subject, and the camera will be set to obtain the best results. Portrait This mode blurs the background to lens' closest focusing distance. • To obtain a larger magnification, use the telephoto end of a zoom lens. • For better close-ups, an EOS-dedicated macro lens and - Canon EOS 10D | EOS 10D INSTRUCTIONS - Page 41
The camera will > white balance will be set automatically. Night Portrait This mode , and < > white balance will be set automatically. Flash off You can disable the and < > white balance will be set automatically. • If the shutter speed indicator camera shake. Be careful to hold the camera - Canon EOS 10D | EOS 10D INSTRUCTIONS - Page 42
. s The captured image will be displayed on the LCD monitor. • The image will be displayed for the number of seconds set with [Review time]. Review [On] setting Review [On (Info)] setting (→p.109) Histogram Shooting information You can also change the number of seconds the image is displayed - Canon EOS 10D | EOS 10D INSTRUCTIONS - Page 43
halfway. However, if auto power off has been set (→p.142), the camera will turn off automatically after the auto power off time elapses. The [Review time] takes effect only when the [Review] setting is [On] or [On (Info)]. • For continuous shooting, the [Review time] will apply to the last shot - Canon EOS 10D | EOS 10D INSTRUCTIONS - Page 44
44 - Canon EOS 10D | EOS 10D INSTRUCTIONS - Page 45
settings for shooting digital images: Imagerecording quality, ISO speed, white balance, processing parameters, color space, file numbering, and auto rotation. 3Settings for Shooting 3 For Basic Zone modes, only the image-recording quality (except < >), file numbering, auto rotation, and camera - Canon EOS 10D | EOS 10D INSTRUCTIONS - Page 46
Recording Quality You can select one of seven image-recording quality settings. (For the Basic Zone modes, < > is not selectable mode when you want to record a maximum number of images on the CF card. RAW Records the image with lossless compression resulting in about 6.3 megapixels. Use this mode - Canon EOS 10D | EOS 10D INSTRUCTIONS - Page 47
capacity are based on Canon's testing standards (at ISO 100 with [Standard] parameter settings). The maximum capacity RAW images with a personal computer or to extract the JPEG image embedded in the RAW image file, you must use the dedicated software. For details, see "EOS 10D Software Instructions - Canon EOS 10D | EOS 10D INSTRUCTIONS - Page 48
LCD monitor. • When the [Quality] is set to < >, a JPEG image will be recorded simultaneously with the set quality and embedded within the RAW image file. To extract the JPEG image embedded in the RAW image file, use the dedicated software. For details, see "EOS 10D Software Instructions." 48 - Canon EOS 10D | EOS 10D INSTRUCTIONS - Page 49
Varies* Varies* With built-in flash 400** 100 - 400** - 400** - With external Speedlite 100 100 100 100 400 100 - * Automatically set within ISO 100-400. ** For daytime backlit conditions, ISO 100 is set. ISO Speed in the Creative Zone Modes You can set the ISO speed to or " ". If - Canon EOS 10D | EOS 10D INSTRUCTIONS - Page 50
, you can attach a color compensation filter to the lens or use tungsten film to compensate for the color cast caused by the light source's color temperature. With a digital camera's white balance setting, you can digitally compensate (based on a standard white color) the color temperature so that - Canon EOS 10D | EOS 10D INSTRUCTIONS - Page 51
for Shooting White Balance Settings Icon Application The camera sets the white balance automatically. Color balance setting. By using the white balance data from this image, you can set the optimum white balance. (→p.52) You can manually set color temperature for 280010000 K (in 100 - Canon EOS 10D | EOS 10D INSTRUCTIONS - Page 52
captured in step 1, then press < >. s The image's white balance data will be imported. • After the setting is completed, the menu will reappear. • To exit the menu and turn off the LCD monitor, press the < menu command to easily set the white balance best suited for the current lighting condition. 52 - Canon EOS 10D | EOS 10D INSTRUCTIONS - Page 53
< >. • The color temperature can be set from 2800 K to 10000 K in 100 K increments. • After the setting is completed, the menu will reappear. • To adjust the setting to compensate for the difference between the color temperature meter's reading and the camera's color temperature reading. 53 - Canon EOS 10D | EOS 10D INSTRUCTIONS - Page 54
compensation), and reddish tone (increased compensation). The images are assigned a file number and recorded in the CF card. 1 Set the image-recording quality to any setting except [RAW]. (→p.46) On the menu, select [WB-BKT]. Press the < > button. 2 •• Turn the < > dial to select [WB-BKT], then - Canon EOS 10D | EOS 10D INSTRUCTIONS - Page 55
Auto Bracketing Canceling White Balance Auto Bracketing • Follow steps 2 and 3 to set the bracketing amount to < >, then press < >. • You can also set the < > switch to < > to cancel white balance bracketing. 3 Settings for Shooting White balance bracketing will not work if the image - Canon EOS 10D | EOS 10D INSTRUCTIONS - Page 56
The image you capture can be processed automatically by the camera in accordance with the parameter settings you set (five settings each for [Contrast], [Sharpness], [Saturation], and [Color tone]). You can register and save up to three sets of processing parameters. By selecting [Standard], all the - Canon EOS 10D | EOS 10D INSTRUCTIONS - Page 57
button. With the parameters already set, when you set the < > switch to < >, the camera will start up and display " " on the LCD panel until it is ready for shooting. Then the parameter settings will be displayed. If [Set 1], [Set 2], or [Set 3] has been set, " ", " ", or " " will be displayed. And - Canon EOS 10D | EOS 10D INSTRUCTIONS - Page 58
space indicates the color reproduction range. The camera is compatible with the sRGB and Adobe RGB color spaces. Selecting sRGB For normal shooting, set sRGB for the color space. On the menu for [Parameters], selecting any setting except [Adobe RGB] will set sRGB as the color space. On the menu - Canon EOS 10D | EOS 10D INSTRUCTIONS - Page 59
can hold up to 100 images. The folders are numbered from 100 to 999 and saved in the CF card. The automatic file numbering method can be set to [Continuous] or numbering after changing the CF card contains images captured with the camera, the file numbering will start after the highest CF card-1 - Canon EOS 10D | EOS 10D INSTRUCTIONS - Page 60
File Numbering Methods • If the 999CANON folder is created, [Folder number full] will appear on the LCD monitor. You can keep shooting up to file No. 9999, however, you should keep a spare CF card on hand. • If file No. 9999 in folder No. 999 is created, " " will be displayed on the LCD panel - Canon EOS 10D | EOS 10D INSTRUCTIONS - Page 61
setting is completed, the menu will reappear. • Press the < > button to exit the menu and turn off the LCD monitor. 3 •Take a vertical shot. For the image review camera is pointed up or down, the image might not rotate automatically for playback. • If you take a vertical shot with [Auto rotate] set - Canon EOS 10D | EOS 10D INSTRUCTIONS - Page 62
monitor. • Press the < monitor. > button again to clear the LCD Camera Setting Information Date/time (→p.154) AEB amount (→p.90) WB-BKT amount (→p.54) Processing parameter setting (→p.57) Image review (→p.42) Image review time (→p.43) Color temperature (→p.53) ISO speed (→p.49) Auto rotate (→p.61 - Canon EOS 10D | EOS 10D INSTRUCTIONS - Page 63
can be executed while you maintain the desired subject framing. You can also set the AF mode to suit the subject or intended effect. 4Focusing 4 In the Basic Zone modes, only AF lock (→p.65) and manual focusing (→p.71) apply in this chapter. First set the < > switch and < > switch to < >. 63 - Canon EOS 10D | EOS 10D INSTRUCTIONS - Page 64
mode is the autofocusing method. The camera has three AF modes: 1. One Shot AF for still subjects, 2. AI Servo AF for moving subjects, and 3. AI Focus AF that switches automatically from One-Shot AF to AI Servo AF if the subject starts to move. 1 Set the lens focus mode switch to < AF>. 2 Turn - Canon EOS 10D | EOS 10D INSTRUCTIONS - Page 65
, follow the procedure below. This technique is called focus lock. Focus lock works when the AF mode is set to One Shot AF. 1 Aim the AF point over the subject and press the shutter button halfway to Reframe the shot and focus again. Also see "When Autofocus Fails (Manual Focusing)" on page 71. 65 - Canon EOS 10D | EOS 10D INSTRUCTIONS - Page 66
∗, the camera can also focus track a subject which steadily approaches or retreats from the camera. • The exposure settings are set immediately before AF point. The active AF point will not flash in red. • With a manually selected AF point, the selected AF point is used for predictive AF. With C.Fn - Canon EOS 10D | EOS 10D INSTRUCTIONS - Page 67
modes, AF point selection can be set to either automatic or manual. • Automatic Selection From among the seven AF points, the camera selects the AF point automatically to suit the subject. • Manual Selection You can select any of the seven AF points manually. This is best when you want to be sure - Canon EOS 10D | EOS 10D INSTRUCTIONS - Page 68
• When you try to select an AF point beyond a peripheral AF point, automatic focusing selection will be set. • You can also set automatic AF point selection while looking at the LCD panel. Manual Selection Center AF point selected Display the desired AF point in red. • To select the AF point, see - Canon EOS 10D | EOS 10D INSTRUCTIONS - Page 69
Registering and Switching an AF Point By registering the AF point you often use, you can switch to it instantly. You can register an offcenter AF point which suits your preferred framing or automatic selection for the shooting moment priority. Any of the seven AF points can be registered. Only one - Canon EOS 10D | EOS 10D INSTRUCTIONS - Page 70
to the registered AF point. (1) Press the < > button and < > button simultaneously. • This is the default method with C.Fn-13-0. For the setting procedure, see "Setting Custom Functions" (→p.145) or see page 69. (2) Press only the < > button to switch to the registered AF point. C.Fn-13-1 (→p.150 - Canon EOS 10D | EOS 10D INSTRUCTIONS - Page 71
body, etc.). (d) Overlapping near and far objects (animal in a cage, etc.). In such cases, do one of the following: 1. Focus an object at the same distance as the subject and lock the focus before recomposing. 2. Set the lens focus mode switch to < MF> (or < M> on older lenses) and focus manually - Canon EOS 10D | EOS 10D INSTRUCTIONS - Page 72
72 - Canon EOS 10D | EOS 10D INSTRUCTIONS - Page 73
frame, continuous, and selftimer are provided. Select the mode which best suits the subject or your creative intentions. Metering mode Evaluative metering modes, the metering mode and drive mode are set automatically. Only the self-timer setting will apply in this chapter. Selecting the Metering - Canon EOS 10D | EOS 10D INSTRUCTIONS - Page 74
EOS 10D uses three modes for metering: Evaluative, Partial, and Center-weighted average. The Basic Zone uses evaluative metering. In the Creative zone, any of the three modes can be selected. 1 Press the < > button. ( ) 2 •Select a metering mode. While looking at the LCD panel, turn the < to set - Canon EOS 10D | EOS 10D INSTRUCTIONS - Page 75
After detecting the main subject's position, brightness, background, front and back lighting conditions, camera orientation (horizontal or vertical), etc., the camera sets the proper exposure. • During manual focusing, evaluative metering is based on the center AF point. • If the subject brightness - Canon EOS 10D | EOS 10D INSTRUCTIONS - Page 76
, the above figures will apply regardless of the C.Fn-08 setting. •• Figures for the continuous shooting speed and maximum burst are based on Canon's standard testing conditions (1/250 sec. and faster shutter speeds and ISO 100). 1 Press the < > button. ( ) 2 •Select the drive mode. While looking - Canon EOS 10D | EOS 10D INSTRUCTIONS - Page 77
burst number will not be displayed when there is no CF card in the camera. • If you press the shutter button halfway before all the images in bracketing is also 9 shots. •• In step 2, turning the < > dial will set the ISO speed. (→p.49) 5 Self-timer Operation The self-timer is convenient for - Canon EOS 10D | EOS 10D INSTRUCTIONS - Page 78
-timer after it starts, press the < > button. Do not stand in front of the camera when you press the shutter button to start the selftimer. Doing so prevents the camera from focusing on the subject. • You can set the beep that indicates the subject is in focus and the beep that indicates the - Canon EOS 10D | EOS 10D INSTRUCTIONS - Page 79
modes that let you select the shutter speed or aperture value and change the exposure yourself, providing you with more flexibility to set up the camera for a variety of shooting styles. 6 Creativ Advanced Operations 6 • Press the shutter button down halfway and release, and a timer will show the - Canon EOS 10D | EOS 10D INSTRUCTIONS - Page 80
< > (Full Auto) mode, this is a general-purpose shooting mode. The camera automatically sets the shutter speed and aperture value to suit the scene's brightness. This is called Program AE. ∗ stands for Program ∗ AE stands for Auto Exposure 1 Set the Mode Dial to < >. AF point Maximum burst Focus - Canon EOS 10D | EOS 10D INSTRUCTIONS - Page 81
or set the following functions in the < > mode, but not in the < > mode. Shooting Functions EX-Series Speedlite Functions AF mode selection Manual/Multi-Speedlite curtain sync AE lock with < > button Modeling flash Depth-of-field preview Camera setting reset Custom Functions (C.Fn) Clear all - Canon EOS 10D | EOS 10D INSTRUCTIONS - Page 82
Priority AE In this mode, you set the shutter speed and the camera automatically sets the aperture value to suit the brightness for "time value." Fast shuter speed Slow shuter speed 1 Set the Mode Dial to < >. 2 Turn the < > dial to set the desired shutter speed. 3 •Focus on the subject. Press - Canon EOS 10D | EOS 10D INSTRUCTIONS - Page 83
lens' maximum aperture (lowest f/number like f/3.5) blinks, it indicates underexposure. Turn the < > dial to set a slower shutter speed until the aperture display stops blinking. • If the lens be obtained with any aperture set by the camera, the camera automatically sets a faster or slower shutter - Canon EOS 10D | EOS 10D INSTRUCTIONS - Page 84
Aperture-Priority AE In this mode, you set the desired aperture and the camera sets the shutter speed automatically to suit the subject brightness. The larger or brighter the aperture (lower f/number) the more blurred the background will become. This - Canon EOS 10D | EOS 10D INSTRUCTIONS - Page 85
. The higher the aperture value, the smaller the aperture opening. The range of aperture settings displayed depends on the lens mounted on the camera. 6 If no lens is mounted on the camera, the aperture setting is displayed as " ". • C.Fn-16-1 enables the safety shift feature. (→p.151) If a correct - Canon EOS 10D | EOS 10D INSTRUCTIONS - Page 86
the exposure level indicator in the viewfinder or use a handheld exposure meter. This method is called manual exposure. ∗ stands for manual. 1 Set the Mode Dial to < >. 2 Turn the < > dial to set the desired shutter speed. 3 •Set the aperture. Turn the < > switch to < >, then turn the < > dial to - Canon EOS 10D | EOS 10D INSTRUCTIONS - Page 87
under-exposed by more than two stops. 6 •Shoot. Compose the shot, then press the shutter button down fully. 6 Advanced Operations With C.Fn-06-1, you can set the camera so that you can set the shutter speed or aperture value in 1/3-stop increments. (→p.147) 87 - Canon EOS 10D | EOS 10D INSTRUCTIONS - Page 88
photos and landscapes. The camera uses the seven AF points to detect the nearest and farthest subjects to be in focus. ∗ stands for Auto-depth of field. 1 Set distances from the camera. • The < > mode cannot be used if the lens' focus mode switch is set to (or on older lenses). • If the - Canon EOS 10D | EOS 10D INSTRUCTIONS - Page 89
camera's standard exposure setting. You can make the image look lighter (increased exposure) or darker (decreased exposure). The exposure compensation amount can be set the shutter button halfway and check the exposure level indicator. 3 Set the exposure compensation amount. • Turn the < > switch to - Canon EOS 10D | EOS 10D INSTRUCTIONS - Page 90
With autoexposure bracketing (AEB), the camera automatically changes the exposure level up to AEB], then press < >. AEB range standard exposure decreased exposure increased exposure 2 •Set the AEB amount. Turn the < > dial to set the desired AEB amount, then press < >. s The menu will reappear. - Canon EOS 10D | EOS 10D INSTRUCTIONS - Page 91
be canceled automatically if you turn the < > switch to < >, change lenses, have flash-ready, replace the battery, or replace the CF card. Advanced Operations Neither flash nor bulb exposures can be used in AEB mode. •• If you set mirror lockup with C.Fn-12-1 (→p.149) and then use AEB, single - Canon EOS 10D | EOS 10D INSTRUCTIONS - Page 92
of the viewfinder over the subject where the exposure is to be locked, then press the < > button. • Each time you press the < current exposure setting. > button, it locks the AE lock indicator 3 •Compose the shot and shoot. Press the shutter button fully. If One-Shot AF and evaluative metering - Canon EOS 10D | EOS 10D INSTRUCTIONS - Page 93
fireworks, the night sky, etc. 1 Set the Mode Dial to < >. 2 •Set the shutter speed to " ". Look at " ". • The next setting after " " is " ". 3 •Set the aperture. Turn the < > dial to set the desired aperture. 6 4 rough or grainy. With a fully-charged battery, a single bulb exposure can be as - Canon EOS 10D | EOS 10D INSTRUCTIONS - Page 94
mirror-caused vibrations which may blur the image during close-ups or when a super telephoto lens is used. To set this Custom Function, see "Setting a Custom Function" on page 145. When mirror lockup is set, the camera operates as follows. 1 Press the shutter button fully. s The mirror will lock up - Canon EOS 10D | EOS 10D INSTRUCTIONS - Page 95
Shooting with a Flash The EOS 10D can take easy, natural-looking flash shots with correct subject illumination using E-TTL autoflash (preflash evaluative metering in memory) using either the camera's built-in flash or any EOS-dedicated EX-series Speedlite. The procedure is as easy as a normal AE - Canon EOS 10D | EOS 10D INSTRUCTIONS - Page 96
evaluative metering), optimum flash exposure is obtained for the subject in focus. In the aperture-priority AE mode, a slow sync speed is set automatically in low-light situations to obtain a natural-looking, balanced exposure between the subject and background. ● FE (Flash Exposure) Lock FE (flash - Canon EOS 10D | EOS 10D INSTRUCTIONS - Page 97
manually. The main subject is exposed properly by the flash. The background exposure varies according to the shutter speed and aperture settings. : The effect is the same as using flash in < > mode. 7 Built-in Flash Range ISO Speed 100 200 400 800 1600 H: 3200 (using EF24-85mm f/3.5-4.5 USM lens - Canon EOS 10D | EOS 10D INSTRUCTIONS - Page 98
viewfinder while the built-in flash is being charged. E-TTL is an abbreviation for Evaluative-Through-The-Lens. •• In < > or < > mode, if you set the shutter speed faster than 1/200 sec., the camera will automatically reset it to 1/200 sec. • AF flash exposure is always based on the aperture value - Canon EOS 10D | EOS 10D INSTRUCTIONS - Page 99
of the eyes. The camera's red-eye reduction feature turns eye from occurring. Red-eye reduction can be set in any shooting mode except On the menu, >. 2 •Set the red-eye reduction. Turn the < > dial to select [On], then press < >. s After the setting is completed you use an EOS-dedicated Speedlite. - Canon EOS 10D | EOS 10D INSTRUCTIONS - Page 100
the flash, the < > icon will blink. Get closer to the subject and repeat steps 2 to 4. C.Fn-13-4 enables FE lock with just the < > button. (→p.150) 100 - Canon EOS 10D | EOS 10D INSTRUCTIONS - Page 101
flash exposure • To cancel the flash exposure compensation, set the flash exposure compensation amount to < >. 3 Shoot >. • In step 2, turning the < > dial sets the metering mode. (→p.74) • With C.Fn-06-1, you can set the camera to adjust exposure compensation in 1/3-stop increments. (→p.147) - Canon EOS 10D | EOS 10D INSTRUCTIONS - Page 102
aperture-priority AE mode, a slow sync speed is set automatically in low-light situations to obtain a natural- flash exposure compensation can be used to set the flash output up to +/-2 stops as using a Speedlite directly attached to the camera. • In difficult focusing conditions, the AF-assist - Canon EOS 10D | EOS 10D INSTRUCTIONS - Page 103
(30 to 1/200 sec.) Auto (30 to 1/200 sec.) Manual (30 to 1/200 sec.) Aperture (flash aperture) setting Auto Manual Manual ∗ If < > is set in low-light conditions, a slow shutter speed will be set. Therefore, use a tripod to prevent camera shake. (2) When you press the shutter button fully, the - Canon EOS 10D | EOS 10D INSTRUCTIONS - Page 104
to eliminate shadows. Normal flash FP flash FEB (Flash Exposure Bracketing) With the Canon Speedlite 550EX, three successive flash shots can be bracketed automatically up to +/-3 is recommended. With C.Fn-06-1, you can set the camera to change FEB settings in 1/3-stop increments. (→p.147) 104 - Canon EOS 10D | EOS 10D INSTRUCTIONS - Page 105
with Speedlite 550EX FE Lock The procedure for setting FE lock is the same as with the built-in flash (→p.100). FE lock works in both the normal is set with both the Speedlite and camera, the Speedlite's flash exposure compensation setting will override the camera's. Modeling Flash Modeling flash - Canon EOS 10D | EOS 10D INSTRUCTIONS - Page 106
is used with a flash unit or flash accessory dedicated to another camera brand, the camera may not operate properly and malfunction may result. • Some large studio flash units have a sync cord polarity that is the opposite of the EOS 10D's PC + (plus) terminal. Such flash units will not work - Canon EOS 10D | EOS 10D INSTRUCTIONS - Page 107
to a TV monitor. 8Image Playback When attempting to playback images not taken with the 8 camera: The camera might not be able to properly display images captured with a different camera or edited with a personal computer for image processing or changing the file name. Image Playback 107 - Canon EOS 10D | EOS 10D INSTRUCTIONS - Page 108
< > dial clockwise to view the next (newer) image. • To quit the playback, press the < > button. The LCD monitor will turn off. If you leave the camera in the playback mode, the playback mode will quit automatically after the auto power off time elapses. (→p.142) 108 - Canon EOS 10D | EOS 10D INSTRUCTIONS - Page 109
EOS 10D cannot record sound) Metering mode Shooting mode ISO speed WB-BKT Shooting time White balance Color temperature (if specified) Shooting date • While the camera is ready for shooting, pressing the < > button will display the 8 camera settings as explained in "Checking Camera Settings set - Canon EOS 10D | EOS 10D INSTRUCTIONS - Page 110
Image Playback Index Display Nine thumbnail images are displayed on one screen. 1 •Set the camera to the playback mode. Press the < > button. s The last captured image will appear on the LCD monitor. 2 •Display the index. Press the < > button. s The selected - Canon EOS 10D | EOS 10D INSTRUCTIONS - Page 111
Image Playback / Magnified View The selected image can be magnified by 1.5x to 10x on the LCD monitor. Magnified portion 1 •Display the image to be magnified. Display the single images or image with shooting information. 2 •Magnify the image. Press the < > button. s The center of the image will - Canon EOS 10D | EOS 10D INSTRUCTIONS - Page 112
shooting information, index, or magnified image is displayed, you can jump images ahead or back. 1 •Set the camera for playback. Display a single image, image with shooting information, index, or magnified image. 2 •Set jump display. Press the < > button. s The jump bar will appear at the bottom of - Canon EOS 10D | EOS 10D INSTRUCTIONS - Page 113
Image Playback Automated Playback of Images (Auto playback) This function automatically and continuously displays all images recorded on the CF card. Each image is displayed for approximately 3 seconds. On the menu, select [Auto Play]. Press the < > button. 1 •• Turn the < > dial to select [Auto - Canon EOS 10D | EOS 10D INSTRUCTIONS - Page 114
upward. It has been rotated by 270˚. • If the shot was taken vertically with the camera grip pointing downward or upward, rotate the image by 90˚ or 270˚ respectively to display it upright. • If you have set [Auto rotate] to [On] (→p.61) on the menu before taking vertical shots, you need not - Canon EOS 10D | EOS 10D INSTRUCTIONS - Page 115
the EOS 10D to a television (using the video cable provided with your camera) to display your recorded images. Always turn off the camera way, until it clicks into place. 3 Turn the TV on, and set the input switch to Video In. Video input terminal 4 Set the < > switch to < >. 8 5 •Press the < > - Canon EOS 10D | EOS 10D INSTRUCTIONS - Page 116
< > dial to select [Protect], then press < >. s The protect setting screen will appear. • Press the < > button to display the protect again. > Once an image is protected, it cannot be removed by the camera's Erase function. To erase a protected image, you must first remove the protection. - Canon EOS 10D | EOS 10D INSTRUCTIONS - Page 117
be recovered. So be careful when erasing an image. •• To prevent important images from being erased accidentally, protect it. Erasing a Single Image 1 •Set the camera for playback. Press the < > button. s The last captured image will appear on the LCD monitor. 2 •Select the image to be erased. Turn - Canon EOS 10D | EOS 10D INSTRUCTIONS - Page 118
Erasing an Image Erasing All Images 1 •Set the camera for playback. Press the < > button. s The last captured image will appear on the LCD monitor. 2 •Display the erase menu. Press the < > button. s The erase menu - Canon EOS 10D | EOS 10D INSTRUCTIONS - Page 119
before it is used in the EOS 10D camera. Also, if you see the message " " (CF card error) on the LCD panel when you review the contents of a CF card before formatting. • A non-Canon CF card or a CF card formatted with another camera or personal computer might not work with the EOS 10D camera - Canon EOS 10D | EOS 10D INSTRUCTIONS - Page 120
120 - Canon EOS 10D | EOS 10D INSTRUCTIONS - Page 121
the dedicated cable to connect the camera to a card photo printer or Canon BJ printer compatible with direct printing, you can easily print images directly from the camera. All direct printing operations can be done with the camera. 9Direct Printing from the Camera 9 121 Direct Printing from the - Canon EOS 10D | EOS 10D INSTRUCTIONS - Page 122
first. While printing, monitor the battery level. For instructions on how to install the ink cassette, ink tank, and paper into the printer, refer to the printer's manual. Connect the Camera to the Printer Connecting to a Card Photo Printer To connect the camera and printer with the necessary cable - Canon EOS 10D | EOS 10D INSTRUCTIONS - Page 123
to the Printer 1 Turn the < > switch to < >. (→p.30) 2 •Set up the printer. For details, refer to the printer's manual. 3 Connect the camera to the card photo printer. • To connect the camera and printer with the necessary cable, refer to the instructions that came with the printer. • Check the - Canon EOS 10D | EOS 10D INSTRUCTIONS - Page 124
to the Printer Connecting to a Canon BJ Printer To connect the camera and printer with the necessary cable, refer to the manuals that came with the printer. To BJ printer 1 Follow steps 1 to 3 in "Connecting to a Card Photo Printer" to connect the camera to the BJ printer. (→p.123) BJ printer - Canon EOS 10D | EOS 10D INSTRUCTIONS - Page 125
printed directly from the camera. 2 Press < >. s The direct printing screen will appear. • To change the image to be printed, press the < > button and start from step 1. Printing area 3 Set the printing options. See pages 127-130 to set the printing options. With a card photo printer: • On the - Canon EOS 10D | EOS 10D INSTRUCTIONS - Page 126
[OK], then press < >. When Stopping the Printing With a card photo printer: If only one print is being printed, you cannot stop the printing manual to see the error number description and resolve the error. When the error is resolved, the BJ printer will resume printing automatically. If the camera - Canon EOS 10D | EOS 10D INSTRUCTIONS - Page 127
set any number from 1 to 99. Direct Printing from the Camera Setting the Printing Style The available [Style] settings will differ depending on the type of printer connected to the camera. With a card photo or [A4]. Refer to the BJ printer's manual for the selectable paper sizes. The image will - Canon EOS 10D | EOS 10D INSTRUCTIONS - Page 128
Turn the < > dial to select [Image] / [Paper], [Borders], or [Date], then press < >. 3 •Set the style setting. Turn the < > dial to select the desired setting, then press < >. [With a card photo printer] Image Borders Date [With a BJ printer] Paper Borders Date Printing area Printing style - Canon EOS 10D | EOS 10D INSTRUCTIONS - Page 129
[Borders] will be set to [Borderless] and [ trim the image for printing. To trim an image, first see "Setting the Printing Style" (→p.127). 1 On the printing style screen, select screen size. < > Moving direction • If a card photo printer is used and the trimming degrades the image quality, the - Canon EOS 10D | EOS 10D INSTRUCTIONS - Page 130
the shutter button halfway.) • Change the trimming frame to a size bigger than the maximum size. • When setting [Trimming], use the camera's LCD monitor. If you use a TV monitor connected to the camera with a video cable, the trimming frame may not display correctly. The shape of the trimming frame - Canon EOS 10D | EOS 10D INSTRUCTIONS - Page 131
Format) is a standard used to record (on the CF card or other recording media) the image number, number of prints, etc. of images taken by digital cameras. • By fitting a CF card into a printer compatible with DPOF, you can make prints as specified. • You will not need to fill out the desired - Canon EOS 10D | EOS 10D INSTRUCTIONS - Page 132
the CF card to a printing service for easy ordering. 2 Direct printing from the camera with DPOF Notes About DPOF When set DPOF settings, the previous DPOF settings will be completely overwritten. • DPOF settings set with another DPOF-compatible equipment cannot be changed with your EOS 10D camera - Canon EOS 10D | EOS 10D INSTRUCTIONS - Page 133
set, pressing < > will turn off the checkmark < > and the selection will be 10 canceled. • To display three images on the screen, press the < > button. Press the < > button to return to the previous screen. • Images in the format cannot be printed directly from the camera. DPOF: Digital - Canon EOS 10D | EOS 10D INSTRUCTIONS - Page 134
quantity. While looking at the quantity on the screen, turn the < > dial to set the desired quantity, then press < >. • If [Print Type] (→p.135) has been set to [Index], the quantity cannot be set. • To set the printing quantity of another image, repeat steps 3 and 4. s The total quantity of - Canon EOS 10D | EOS 10D INSTRUCTIONS - Page 135
Print Order Printing Options The [Set up] options are as follows: Print Type >. s The print order screen will appear. 2 •Select [Set up]. Turn the < > dial to select [Set up], then press < >. s The set up screen will appear. 3 •Select the set up option. Turn the < > dial to select [Print Type - Canon EOS 10D | EOS 10D INSTRUCTIONS - Page 136
]. Date • Select [On] or [Off]. File No. • Select [On] or [Off]. 5 •Exit the set up screen. Press the < > button. The print order screen will reappear. • If [Print Type] has been set to [Index], the [Date] and [File No.] cannot both be set to [On] at the same time. • If [Print Type] has been - Canon EOS 10D | EOS 10D INSTRUCTIONS - Page 137
camera is not connected to a printer, [Print] will not be displayed. • If the printing options have not been set, [Print] will not be selectable. 4 Set the printing style. For details, see "Setting the Printing Style" (→p.127). With a card photo step 3 above. DPOF: Digital Print Order Format 137 - Canon EOS 10D | EOS 10D INSTRUCTIONS - Page 138
's remaining capacity was low. • If the printing stopped due to low battery power, using AC Adapter Kit ACK-E2 is recommended. Before using a battery pack, recharge it fully. (→p.174) Handling Errors (→p.126) • When the [Print Type] is set to [Index], the number of images that can be printed on the - Canon EOS 10D | EOS 10D INSTRUCTIONS - Page 139
You can set the camera's various settings with on-screen menus. Especially settings for shooting are called Custom Functions (C.Fn). The mark you see in this Instructions gives just a brief description of the respective Custom Function. This chapter explains the menu settings and Custom Functions in - Canon EOS 10D | EOS 10D INSTRUCTIONS - Page 140
or disables [off] the red-eye reduction lamp during flash shot. (→p.99) AEB Three consecutive shots are captured while the exposure setting is altered automatically for each shot. The exposure can be varied up to the reference image to be used for setting the white balance manually. (→p.52) 140 - Canon EOS 10D | EOS 10D INSTRUCTIONS - Page 141
increments). (→p.53) Parameters Besides the [Standard] set of parameter settings (four items with five settings each), up to three other sets of parameter settings can be set and saved [Set 1] [Set 2] or [Set 3]. (→p.56) When [Standard] [Set 1] [Set 2] or [Set 3] is selected, the color space will be - Canon EOS 10D | EOS 10D INSTRUCTIONS - Page 142
period after which the power turns off automatically if the camera is not used. This saves battery power. It can be set to [1 min.] [2 min.] [4 min.] [8 min.] [15 min.] [30 min.] or [Off]. Review Enables or disables the image from displaying on the LCD monitor immediately after capture. Settable - Canon EOS 10D | EOS 10D INSTRUCTIONS - Page 143
Setup Menu Menu Settings Auto rotate Enables the camera orientation (horizontal or vertical) information to be recorded together with the image onto the CF card. Settable to [On] or [Off]. When Auto rotate is [ - Canon EOS 10D | EOS 10D INSTRUCTIONS - Page 144
Functions Resets all the Custom Function settings to [0]. (→p.152) Sensor clean. For cleaning any dust, etc., from the image sensor's surface. (→p.156) Firmware Ver. x.x.x Displays the camera's firmware version. Information on new firmware and firmware updates are provided at Canon's Web site. 144 - Canon EOS 10D | EOS 10D INSTRUCTIONS - Page 145
Custom Functions Custom Functions are camera functions which you can set to suit your shooting preferences. To set a Custom Function, select [Custom Functions (C.Fn)] on the menu. 1 On the menu, select [Custom Functions (C.Fn)]. Press the < > button. •• Turn the < > dial to select [Custom - Canon EOS 10D | EOS 10D INSTRUCTIONS - Page 146
Not possible The shutter release will not work if there is no CF card in the camera, so it prevents you from forgetting to load a CF card. If there is no be locked at 1/200 sec. This prevents a slow shutter speed from being set in very dark conditions. C.Fn-04 Shutter button/AE lock button 0: AF - Canon EOS 10D | EOS 10D INSTRUCTIONS - Page 147
not work. The only exception is when AF stop is executed after AF start. AF-assist beam/Flash firing Sets the AF-assist to be emitted by the camera or external Speedlite and sets the flash to be fired by the built-in flash or external Speedlite. 0: Emits/Fires Enables the AF-assist - Canon EOS 10D | EOS 10D INSTRUCTIONS - Page 148
the RAW image file. Bracket. sequence/Auto cancel. Sets the shooting sequence for AEB and white balance bracketing (WB-BKT). If [Auto cancel] is set, the bracketing will be canceled in the following cases: AEB: Canceled if the < > switch is turned < >, lens is interchanged, flash is ready, battery - Canon EOS 10D | EOS 10D INSTRUCTIONS - Page 149
Displays the preceding menu item that was set. However, if the < > switch is set to < > or if the battery pack or the CF card is replaced, set. 2: Top menu Displays the top menu item [Quality]. Mirror lockup 0: Disable 1: Enable Convenient for close-up and telephoto shots to prevent 11 camera - Canon EOS 10D | EOS 10D INSTRUCTIONS - Page 150
Assigns the exposure compensation and manual aperture setting functions to the < > button. Hold down the < > button and turn the < > dial to set either. Or turn the automatically. 1: Disable Prevents underexposure of a personnel subject set against a bright background such as a sunset. Shutter - Canon EOS 10D | EOS 10D INSTRUCTIONS - Page 151
that keeps moving and stopping. 5: IS start With the lens' IS switch already ON, the Image Stabilizer 11 operates only while you hold down the AF stop button. Menu Settings • The AF stop button is provided only on super telephoto lenses. • AF mode display on the LCD panel does not change - Canon EOS 10D | EOS 10D INSTRUCTIONS - Page 152
]. Turn the < > dial to select [Clear all Custom Functions], and press < >. 3 •Clear all the Custom Function settings. Turn the < > dial to select [OK], then press < >. s All the Custom Function settings will be cleared. • Press the < > button to exit the menu and turn off the LCD monitor. 152 - Canon EOS 10D | EOS 10D INSTRUCTIONS - Page 153
This chapter explains how to set the camera's date and time, replace the date/time battery, and clean the image sensor. 12Maintenance 12 153 Maintenance - Canon EOS 10D | EOS 10D INSTRUCTIONS - Page 154
select one of the following display formats: Year, month, day Month, day, year Day, month, year 4 Press the < > button. s The date and time will be set and the menu will reappear. • Press the < > button to turn off the LCD monitor and exit the menu. Each captured image is recorded with the - Canon EOS 10D | EOS 10D INSTRUCTIONS - Page 155
on the LCD panel. Replace the battery with a new CR2025 lithium battery as described below. • If a battery pack or DC coupler is attached to the camera, the camera's date and time and menu functions will be maintained while you replace the battery. 1 Set the < > switch to < >. 2 •Remove the date - Canon EOS 10D | EOS 10D INSTRUCTIONS - Page 156
a Canon Service Center. • While you clean the image sensor, the camera must be turned on. Use the AC Adapter Kit ACK-E2 (optional accessory, see page 174) or a battery. If you use a battery, make sure the battery level is sufficient. Before cleaning the image sensor, detach the lens from the camera - Canon EOS 10D | EOS 10D INSTRUCTIONS - Page 157
the cleaning. Set the < > switch to < >. s The camera will turn off and the shutter will close. The mirror will also go down. • Set the < > CF card slot cover. • Do not remove the battery. • Do not insert the blower tip inside the camera beyond the lens mount. If the power goes out, shutter will - Canon EOS 10D | EOS 10D INSTRUCTIONS - Page 158
158 - Canon EOS 10D | EOS 10D INSTRUCTIONS - Page 159
This section will help you understand your camera better. It covers basic shooting concepts, camera specifications, system accessories, and other reference information. 13Reference 13 159 Reference - Canon EOS 10D | EOS 10D INSTRUCTIONS - Page 160
EOS 10D. ISO speed This indicates the film's sensitivity to light. It is expressed as a number following "ISO" such as "ISO 100." The higher the number, the higher the sensitivity to light. Digital cameras flash is close to the optical axis of the lens. Use the following procedure to minimize red-eye - Canon EOS 10D | EOS 10D INSTRUCTIONS - Page 161
.JPG File name Extension File number - 100 0001 0002 0099 0100 - 10. 1 0101 0102 0199 0200 . . - 199 9901 9902 9999 - 200 0001 0002 0099 0100 Firmware This is software containing various camera control instructions. The EOS 10D uses the firmware for shooting and image processing - Canon EOS 10D | EOS 10D INSTRUCTIONS - Page 162
telephoto lens. (3) A longer distance between the camera and subject increases the depth of field. (4) The depth of field behind the point of optimum focus (2) is longer than the depth of field in front of the point of optimum focus (1). Depth of field Point of optimum focus 1 2 Aperture set to - Canon EOS 10D | EOS 10D INSTRUCTIONS - Page 163
One-Shot AI Servo AF AI Focus AF Auto point selection Manual Evaluative Partial Centerweighted average Drive Single frame Continuous Auto Manual Red-eye reduction Custom Function (C.Fn) : Automatic Setting : Selection Possible Standard Metering mode Built-in flash AF Modes and - Canon EOS 10D | EOS 10D INSTRUCTIONS - Page 164
speed. 2) Attach a neutral density filter to the lens. The shot will be underexposed. 1) Turn the < > to set a slower shutter speed. 2) Increase the ISO speed. lens. The sample warnings apply when a lens having a maximum aperture of f/3.5 and minimum aperture of f/22 is attached to the camera. - Canon EOS 10D | EOS 10D INSTRUCTIONS - Page 165
Manual selection line applies when the camera is in Program AE 4 2 1 2 4 8 15 30 60 125 250 500 1000 2000 4000 Shutter speed Program Line Description The lower horizontal axis represents the Using an EF50 f/1.4 USM lens with a subject brightness of that the program sets automatically. The - Canon EOS 10D | EOS 10D INSTRUCTIONS - Page 166
stop increments. The larger the number, the smaller the aperture opening. The range of aperture values (f/numbers) displayed depends on the lens used. 1/2-stop increments Shutter speed Aperture value 1/3-stop increments Shutter speed Aperture value C.Fn-06-1, the shutter speed and aperture - Canon EOS 10D | EOS 10D INSTRUCTIONS - Page 167
. No CF card CF card error CF card full There is no CF card. Load a proper CF card into the camera. There is a problem with the CF card. Replace the CF card. Since the CF card is full, no more images can be recorded or no more printing instructions can be saved. No Image - Canon EOS 10D | EOS 10D INSTRUCTIONS - Page 168
displayed.) When the card photo printer for direct printing is connected to the camera, the camera's LCD monitor may display battery is exhausted. battery Communication error Communication error occurred. Readjust trimming Printing was attempted with a style different from the trimming setting - Canon EOS 10D | EOS 10D INSTRUCTIONS - Page 169
manual for the error description. Message Description No paper The paper has not been inserted properly or there is no paper. Or there is a problem can be used with the [Style] setting on the camera's direct printing screen. Paper lever error Set the paper spacing lever to the proper position - Canon EOS 10D | EOS 10D INSTRUCTIONS - Page 170
BJ printer service center (see the service center list in the printer's manual). Communication error An error occurred during communications. Turn off the printer and turn it back on and start printing again. Readjust trimming The style does not match the trimming that was set. Cannot print - Canon EOS 10D | EOS 10D INSTRUCTIONS - Page 171
Canon Service Center (see list of service centers on the back cover). If an error occurs after you shoot, the camera might have missed the shot. Press the < > button to see if the image appears on the LCD monitor. Error code Countermeasures Clean the lens contacts. (→p.11) There is a problem - Canon EOS 10D | EOS 10D INSTRUCTIONS - Page 172
Guide. Power Source The battery cannot be recharged. You are using the wrong battery. s Use Battery Pack BP-511 or BP-512. (→p.7) The battery is not properly attached to the charger. s Attach the battery properly to the charger. (→p.22) The camera does not operate even when the < > switch is set - Canon EOS 10D | EOS 10D INSTRUCTIONS - Page 173
clean the screen. clear image. The LCD's service life has expired. s Contact your dealer or Canon Service Center. The image is out of focus. The lens focus mode switch is set to < MF > or < M>. s Set the lens focus mode switch to < AF >. (→p.27) Camera shake occured when you pressed the shutter - Canon EOS 10D | EOS 10D INSTRUCTIONS - Page 174
cord) for supplying power to the EOS 10D with a household power outlet. The AC adapter's rated input is AC 100 - 240 V. The rated output is DC 7.8 V. The DC coupler is inserted into the camera's battery compartment. Compact Power Adapter CA-PS400 Quick charger for Battery Pack BP-511 and BP-512 - Canon EOS 10D | EOS 10D INSTRUCTIONS - Page 175
set the time from 1 second to 99 hours, 59 minutes, 59 seconds, in 1-second increments. Also includes shutter release lock and a one-touch locking plug for connecting to the EOS 10D's remote control terminal. CF Card Data storage device where the captured images are recorded. CF cards made by Canon - Canon EOS 10D | EOS 10D INSTRUCTIONS - Page 176
Ring Lite MR-14EX Macro Twin Lite MT-24EX E-series Dioptric Adjustment Lenses Eyecup Eb Bundled Accessories Angle Finder C Neck Strap EW-100DB Battery Charger CB-5L Battery Pack BP-511 Date / time CR2025 lithium battery Battery Grip BG-ED3 AC Adapter Kit (Optional) ACK-E2 AC Adapter AC - Canon EOS 10D | EOS 10D INSTRUCTIONS - Page 177
System Map CF card Card reader PC card adapter PC card slot USB port • EOS DIGITAL Solution Disk • Adobe Photoshop Elements Disk Interface cable IFC-300PCU Video Cable VC-100 PC card slot Parallel port USB port Macintosh computer PC/AT-compatible computer TV/Video BJ printer for direct - Canon EOS 10D | EOS 10D INSTRUCTIONS - Page 178
size: File numbering: Color space: Processing parameters: Interface: JPEG (except when Adobe RGB is set) supporting Design rule for Camera File system and RAW JPEG and RAW (12-bit) (1) Large/Fine: Approx. 2.4 MB (3072x2048 pixels) (2) Large/Normal: Approx. 1.2 MB (3072x2048 pixels) (3) Medium/Fine - Canon EOS 10D | EOS 10D INSTRUCTIONS - Page 179
• Partial metering (approx. 9% of viewfinder at center) • Centerweighted average metering Metering range: EV 1-20 (at 20˚C with 50mm f/1.4 lens, ISO 100) Exposure control systems: Program AE (Full Auto, Portrait, Landscape, Close-up, Sports, Night Portrait, Flash Off, Program), shutter-priority - Canon EOS 10D | EOS 10D INSTRUCTIONS - Page 180
Type: Auto pop-up E-TTL autoflash (retractable) Guide No.: 13 (ISO 100, meters), 43 (ISO 100, ft.) Recycling time: Approx. 3 sec. Flash the Camera Compatible printers: Canon card photo printers and BJ printers for direct printing from the camera Printable images: JPEG images Settings: - Canon EOS 10D | EOS 10D INSTRUCTIONS - Page 181
61 settings One Battery Pack Battery Charger CB-5L Compatible batteries: Battery Pack BP-511/BP-512 Battery mount: 1 Power cord length: Approx. 1.8 m / 5.9 ft. Recharging time: Approx. 90 min. Rated input: AC 100 are based on Canon's testing standards. •• The camera's specifications and - Canon EOS 10D | EOS 10D INSTRUCTIONS - Page 182
18 Battery 22 Battery Charger 19 Battery Level Icons 24 Battery Life 25 BJ Printer 124 Built-in Flash 96 Bulb Exposures 93 C Card Photo Printer 122 Center-weighted Average Metering ........ 75 CF Card 11,28,119,160,175 C.Fn 146 Changing the Review Time 43 Checking Camera Settings 62 - Canon EOS 10D | EOS 10D INSTRUCTIONS - Page 183
20,31 Main Switch 30 Manual 86 Manual Focusing 71 Manual Selection 68 Max. Capacity 47 Menu Operations 34 Menu Screen 32 Menu Settings 140 Metering Modes 75 MF 27,71 Mirror Lockup 94 Mode Dial 18 Modeling Flash 105 N Night Portrait 41 Nomenclature 14 Non-Canon Flash Units 106 NTSC
-
 1
1 -
 2
2 -
 3
3 -
 4
4 -
 5
5 -
 6
6 -
 7
7 -
8
-
9
-
10
-
11
-
12
-
13
-
14
-
15
-
16
-
17
-
18
-
19
-
20
-
21
-
22
-
23
-
24
-
25
-
26
-
27
-
28
-
29
-
30
-
31
-
32
-
33
-
34
-
35
-
36
-
37
-
38
-
39
-
40
-
41
-
42
-
43
-
44
-
45
-
46
-
47
-
48
-
49
-
50
-
51
-
52
-
53
-
54
-
55
-
56
-
57
-
58
-
59
-
60
-
61
-
62
-
63
-
64
-
65
-
66
-
67
-
68
-
69
-
70
-
71
-
72
-
73
-
74
-
75
-
76
-
77
-
78
-
79
-
80
-
81
-
82
-
83
-
84
-
85
-
86
-
87
-
88
-
89
-
90
-
91
-
92
-
93
-
94
-
95
-
96
-
97
-
98
-
99
-
100
-
101
-
102
-
103
-
104
-
105
-
106
-
107
-
108
-
109
-
110
-
111
-
112
-
113
-
114
-
115
-
116
-
117
-
118
-
119
-
120
-
121
-
122
-
123
-
124
-
125
-
126
-
127
-
128
-
129
-
130
-
131
-
132
-
133
-
134
-
135
-
136
-
137
-
138
-
139
-
140
-
141
-
142
-
143
-
144
-
145
-
146
-
147
-
148
-
149
-
150
-
151
-
152
-
153
-
154
-
155
-
156
-
157
-
158
-
159
-
160
-
161
-
162
-
163
-
164
-
165
-
166
-
167
-
168
-
169
-
170
-
171
-
172
-
173
-
174
-
175
-
176
-
177
-
178
-
179
-
180
-
181
-
182
-
183
 |
 |

CANON INC.
30-2, Shimomaruko 3-chome, Ohta-ku, Tokyo 146-8501, Japan
U.S.A.
CANON U.S.A. INC.
For all inquiries concerning this camera, call toll free in the U.S.
1-800-OK-CANON or write to: Customer Relations, Canon U.S.A., Inc.
One Canon Plaza, Lake Success, N.Y. 11042-1198
CANADA
CANON CANADA INC. HEADQUARTERS
6390 Dixie Road, Mississauga, Ontario L5T 1P7, Canada
CANON CANADA INC. MONTREAL BRANCH
5990, Côte-de-Liesse, Montréal Québec H4T 1V7, Canada
CANON CANADA INC. CALGARY OFFICE
2828, 16th Street, N.E. Calgary, Alberta T2E 7K7, Canada
For all inquiries concerning this camera, call toll free in Canada
1-800-OK-CANON
EUROPE,
CANON EUROPA N.V.
AFRICA &
Bovenkerkerweg 59-61, P.O. Box 2262, 1180 EG Amstelveen, The Netherlands
MIDDLE EAST
CANON COMMUNICATION & IMAGE FRANCE S.A.
102, Avenue du Général de Gaulle 92257 La Garenne-Colombes Cedex, France
CANON UK LTD.
Woodhatch Reigate Surrey RH2 8BF, United Kingdom
CANON DEUTSCHLAND GmbH
Europark Fichtenhain A10, 47807 Krefeld, Germany
CANON ITALIA S.p.A.
Palazzo L, Strada 6, 20089 Rozzano, Milanofiori, Milano, Italy
CANON Schweiz AG
Geschäftsbereich Wiederverkauf, Industriestrasse 12, CH-8305 Dietlikon, Switzerland
CANON G. m. b. H.
Oberlaaerstrasse 233, 4th floor, 1100 Wien, Austria
CANON España, S. A.
C/Joaquín Costa, 41, 28002 Madrid, Spain
SEQUE Soc. Nac. de Equip., Lda.,
Praça da Alegria, 58, 2
°
, 1269-149 Lisboa, Portugal
CENTRAL &
CANON LATIN AMERICA, INC. DEPTO DE VENTAS
SOUTH AMERICA
703 Waterford Way Suite 400 Miami, FL 33126 U.S.A.
CANON LATIN AMERICA, INC. CENTRO DE SERVICIO Y REPARACION
Apartado 2019, Zona Libre de Colón, República de Panamá
ASIA
CANON HONGKONG CO., LTD.
9/F, The Hong Kong Club Building, 3A Chater Road, Central, Hong Kong
CANON SINGAPORE PTE. LTD.
79 Anson Road #09-01/06 Singapore 079906
OCEANIA
CANON AUSTRALIA PTY. LTD.
1 Thomas Holt Drive, North Ryde, N.S.W. 2113, Australia
CANON NEW ZEALAND LTD.
Akoranga Business Park, Akoranga Drive, Northcote Auckland, New Zealand
JAPAN
CANON SALES CO., INC.
12-15 Mita, 3-Chome, Minato-ku, Tokyo 108-8011, Japan
CT1-1241-000
©
CANON INC. 2003
PRINTED IN JAPAN
0000Ni0.0
This Instruction Manual booklet is current as of February 2003. For information on
using the camera with system accessories introduced after this date, contact your
nearest Canon Service Center.
E
INSTRUCTION MANUAL
INSTRUCTION MANUAL
English Edition
E
Be sure to read this Instruction
Manual before using your camera
for the first time. Keep this booklet
handy for easy reference.