Cisco 877W Hardware Installation Guide - Page 40
Mounting on a Wall, Guidelines for Wall Mounting, Mounting the Router on a Wall
 |
UPC - 882658019579
View all Cisco 877W manuals
Add to My Manuals
Save this manual to your list of manuals |
Page 40 highlights
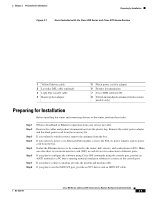
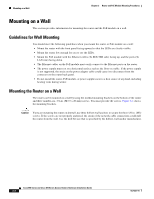
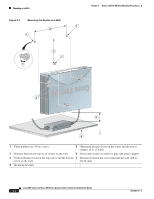
Mounting on a Wall Chapter 3 Router and PoE Module Mounting Procedures Mounting on a Wall This section provides information for mounting the router and the PoE module on a wall. Guidelines for Wall Mounting You should meet the following guidelines when you mount the router or PoE module on a wall: • Mount the router with the front panel facing upward so that the LEDs are clearly visible. • Mount the router low enough for you to see the LEDs. • Mount the PoE module with the Ethernet cables (To ROUTER side) facing up, and the ports (To LAN side) facing down. • The Ethernet cables on the PoE module must easily connect to the Ethernet ports on the router. • The power supply must rest on a horizontal surface such as the floor or a table. If the power supply is not supported, the strain on the power adapter cable could cause it to disconnect from the connector on the router back panel. • Do not install the router, PoE module, or power supplies next to a heat source of any kind, including heating vents during winter. Mounting the Router on a Wall The router can be mounted on a wall by using the molded mounting brackets on the bottom of the router and three number-six, 3/4-in. (M3.5 x 20 mm) screws. You must provide the screws. Figure 3-1 shows the mounting brackets. Caution If you are mounting the router on drywall, use three hollow-wall anchors to secure the three 1/8-in. (M3) screws. If the screws are not properly anchored, the strain of the network cable connections could pull the router from the wall. Use the drill bit size that is specified by the hollow-wall anchor manufacturer. Cisco 850 Series and Cisco 870 Series Access Routers Hardware Installation Guide 3-2 OL-5331-01
-
 1
1 -
2
-
3
-
4
-
5
-
6
-
7
-
8
-
9
-
10
-
11
-
12
-
13
-
14
-
15
-
16
-
17
-
18
-
19
-
20
-
21
-
22
-
23
-
24
-
25
-
26
-
27
-
28
-
29
-
30
-
31
-
32
-
33
-
34
-
 35
35 -
 36
36 -
 37
37 -
 38
38 -
 39
39 -
 40
40 -
 41
41 -
 42
42 -
 43
43 -
 44
44 -
 45
45 -
46
-
47
-
48
-
49
-
50
-
51
-
52
-
53
-
54
-
55
-
56
-
57
-
58
-
59
-
60
-
61
-
62
-
63
-
64
-
65
-
66
-
67
-
68
-
69
-
70
-
71
-
72
-
73
-
74
-
75
-
76
-
77
-
78
-
79
-
80
-
81
-
82
-
83
-
84
-
85
-
86
-
87
-
88
-
89
-
90
-
91
-
92
 |
 |
