Compaq Evo Notebook PC n115 Compaq Evo N115 Series Maintenance and Service Gui - Page 127
Charger board
 |
View all Compaq Evo Notebook PC n115 manuals
Add to My Manuals
Save this manual to your list of manuals |
Page 127 highlights
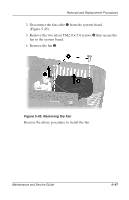
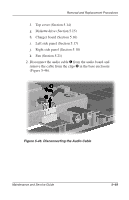
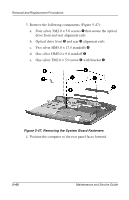
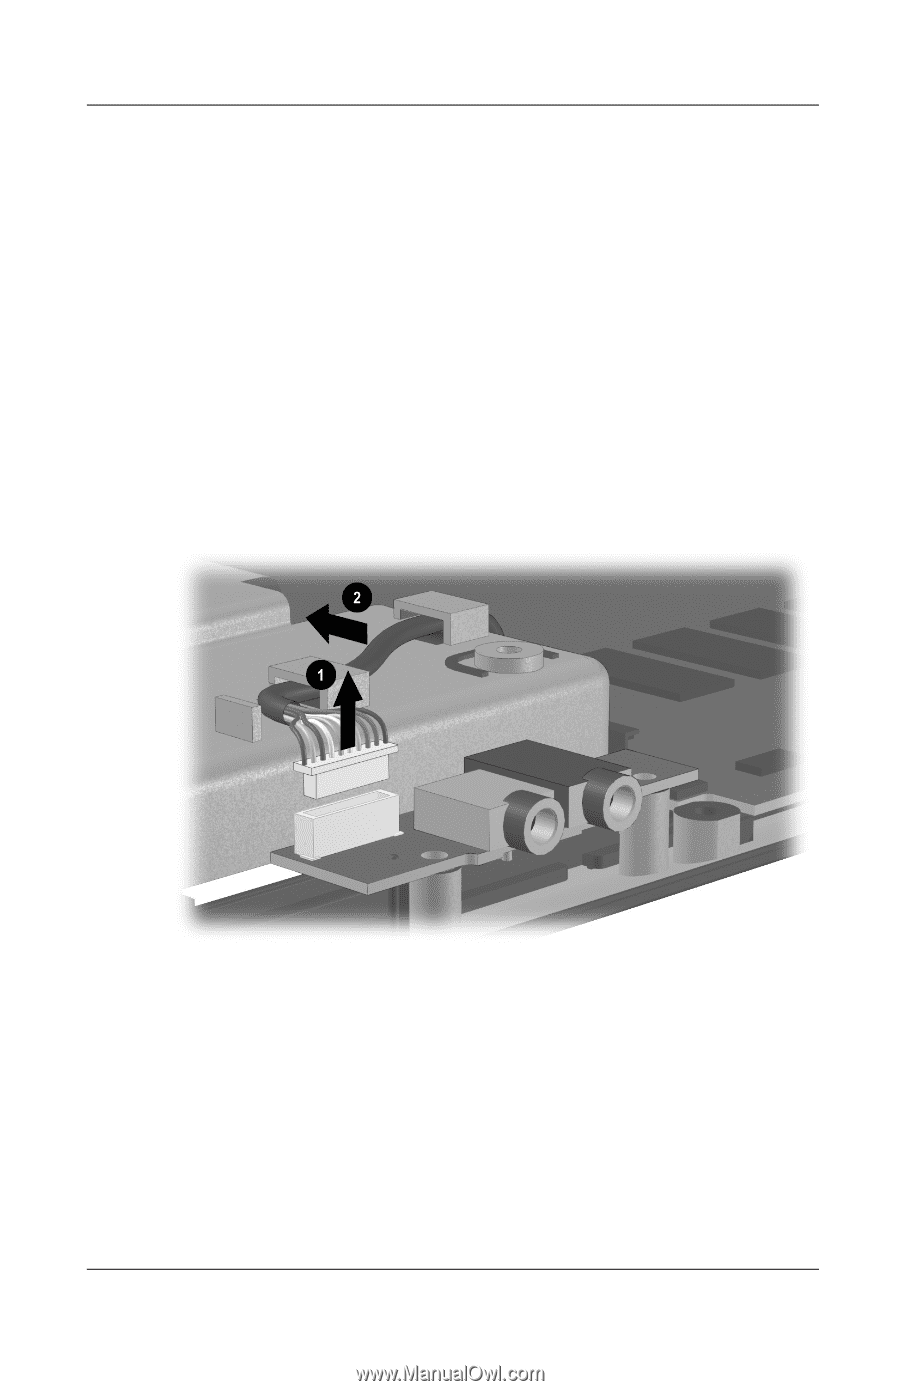
Removal and Replacement Procedures f. Top cover (Section 5.14) g. Diskette drive (Section 5.15) h. Charger board (Section 5.16) i. Left side panel (Section 5.17) j. Right side panel (Section 5.18) k. Fan (Section 5.21) 2. Disconnect the audio cable 1 from the audio board and remove the cable from the clips 2 in the base enclosure (Figure 5-46). Figure 5-46. Disconnecting the Audio Cable Maintenance and Service Guide 5-59
-
 1
1 -
2
-
3
-
4
-
5
-
6
-
7
-
8
-
9
-
10
-
11
-
12
-
13
-
14
-
15
-
16
-
17
-
18
-
19
-
20
-
21
-
22
-
23
-
24
-
25
-
26
-
27
-
28
-
29
-
30
-
31
-
32
-
33
-
34
-
35
-
36
-
37
-
38
-
39
-
40
-
41
-
42
-
43
-
44
-
45
-
46
-
47
-
48
-
49
-
50
-
51
-
52
-
53
-
54
-
55
-
56
-
57
-
58
-
59
-
60
-
61
-
62
-
63
-
64
-
65
-
66
-
67
-
68
-
69
-
70
-
71
-
72
-
73
-
74
-
75
-
76
-
77
-
78
-
79
-
80
-
81
-
82
-
83
-
84
-
85
-
86
-
87
-
88
-
89
-
90
-
91
-
92
-
93
-
94
-
95
-
96
-
97
-
98
-
99
-
100
-
101
-
102
-
103
-
104
-
105
-
106
-
107
-
108
-
109
-
110
-
111
-
112
-
113
-
114
-
115
-
116
-
117
-
118
-
119
-
120
-
121
-
 122
122 -
 123
123 -
 124
124 -
 125
125 -
 126
126 -
 127
127 -
 128
128 -
 129
129 -
 130
130 -
 131
131 -
 132
132 -
133
-
134
-
135
-
136
-
137
-
138
-
139
-
140
-
141
-
142
-
143
-
144
-
145
-
146
-
147
-
148
-
149
-
150
-
151
-
152
-
153
-
154
-
155
-
156
-
157
-
158
-
159
-
160
-
161
-
162
-
163
-
164
-
165
-
166
-
167
-
168
-
169
-
170
-
171
-
172
-
173
-
174
-
175
-
176
-
177
-
178
-
179
-
180
-
181
-
182
-
183
 |
 |
Removal and Replacement Procedures
Maintenance and Service Guide
5–59
f.
Top cover (Section 5.14)
g.
Diskette drive (Section 5.15)
h.
Charger board (Section 5.16)
i.
Left side panel (Section 5.17)
j.
Right side panel (Section 5.18)
k.
Fan (Section 5.21)
2. Disconnect the audio cable
1
from the audio board and
remove the cable from the clips
2
in the base enclosure
(Figure 5-46).
Figure 5-46. Disconnecting the Audio Cable