D-Link DSN-5000-10 Hardware Reference Guide for DSN-5000-10 - Page 44
Replacing the Controller Module on the Primary Array
 |
UPC - 790069324024
View all D-Link DSN-5000-10 manuals
Add to My Manuals
Save this manual to your list of manuals |
Page 44 highlights
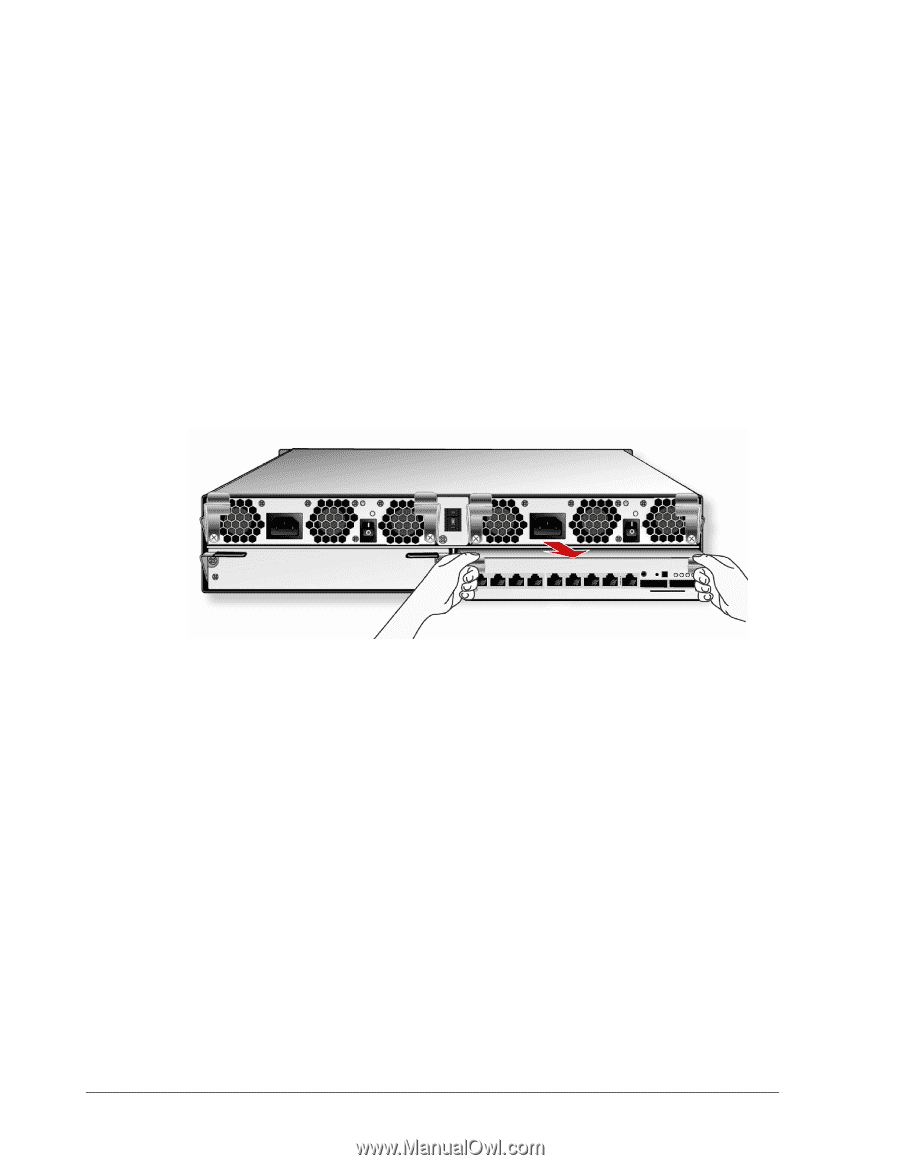
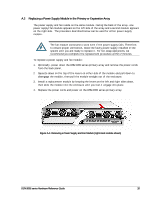
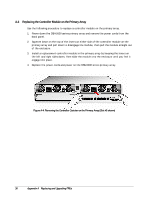
A.3 Replacing the Controller Module on the Primary Array Use the following procedure to replace a controller module on the primary array. 1. Power down the DSN-5000 series primary array and remove the power cords from the back panel. 2. Squeeze down on the top of the levers on either side of the controller module on the primary array and pull down to disengage the module, then pull the module straight out of the enclosure. 3. Install a replacement controller module in the primary array by keeping the levers on the left and right sides down, then slide the module into the enclosure until you feel it engage into place. 4. Replace the power cords and power on the DSN-5000 series primary array. Figure A-4. Removing the Controller Canister on the Primary Array (Slot #0 shown) 36 Appendix A Replacing and Upgrading FRUs
-
 1
1 -
2
-
3
-
4
-
5
-
6
-
7
-
8
-
9
-
10
-
11
-
12
-
13
-
14
-
15
-
16
-
17
-
18
-
19
-
20
-
21
-
22
-
23
-
24
-
25
-
26
-
27
-
28
-
29
-
30
-
31
-
32
-
33
-
34
-
35
-
36
-
37
-
38
-
 39
39 -
 40
40 -
 41
41 -
 42
42 -
 43
43 -
 44
44 -
 45
45 -
 46
46 -
 47
47 -
 48
48 -
 49
49 -
50
-
51
-
52
 |
 |