D-Link DSN-5000-10 Hardware Reference Guide for DSN-5000-10 - Page 46
Connecting to the Diagnostic Serial Port
 |
UPC - 790069324024
View all D-Link DSN-5000-10 manuals
Add to My Manuals
Save this manual to your list of manuals |
Page 46 highlights
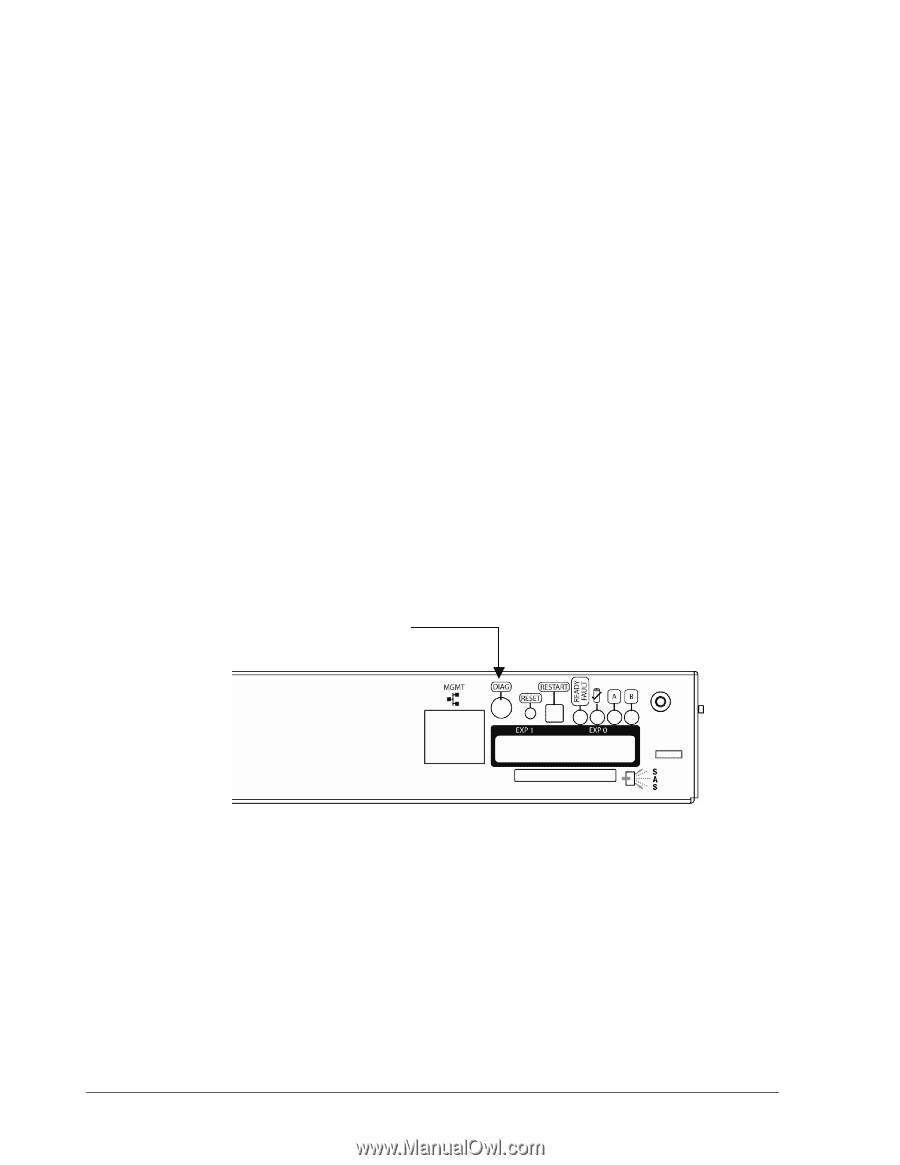
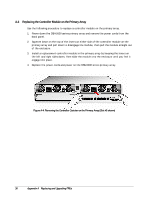
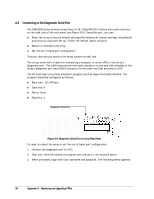
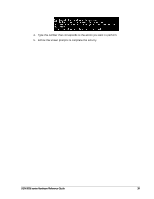
A.5 Connecting to the Diagnostic Serial Port The DSN-5000 series primary arrays have a 115.2 Kbps RS-232-C stereo mini-jack connector on the right side of the rear panel (see Figure A-5). Using this port, you can: Reset the array to factory default settings (this deletes all custom settings, including all accounts you may have set up, except the default admin account) Reboot or shutdown the array Set the out-of-band port configuration This port also lets you monitor the array's power-on self test. The arrays come with a cable for connecting a computer or server (PC) to the array's diagnostic port. The cable has a stereo mini-jack connector on one end that attaches to the array's diagnostic port and a DB-9 connector on the other end that attaches to a PC. The PC must have a terminal-emulation program (such as HyperTerminal) installed. The program should be configured as follows: Baud rate: 115,200 bps Data bits: 8 Parity: None Stop bits: 1 Diagnostic Serial Port Figure A-6. Diagnostic Serial Port on Array Rear Panel To reset or reboot the array or set the out-of-band port configuration: 1. Connect the diagnostic port to a PC. 2. Start your terminal-emulation program and configure it as indicated above. 3. When prompted, login with your username and password. The following menu appears. 38 Appendix A Replacing and Upgrading FRUs
-
 1
1 -
2
-
3
-
4
-
5
-
6
-
7
-
8
-
9
-
10
-
11
-
12
-
13
-
14
-
15
-
16
-
17
-
18
-
19
-
20
-
21
-
22
-
23
-
24
-
25
-
26
-
27
-
28
-
29
-
30
-
31
-
32
-
33
-
34
-
35
-
36
-
37
-
38
-
39
-
40
-
 41
41 -
 42
42 -
 43
43 -
 44
44 -
 45
45 -
 46
46 -
 47
47 -
 48
48 -
 49
49 -
 50
50 -
 51
51 -
52
 |
 |