Epson EX-1000 User Manual - Page 16
Turning On the Printer, left side of the printer see below is turned off; then plug - ribbons
 |
View all Epson EX-1000 manuals
Add to My Manuals
Save this manual to your list of manuals |
Page 16 highlights
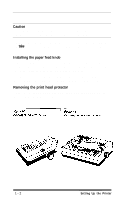
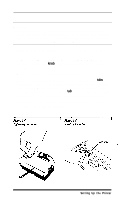
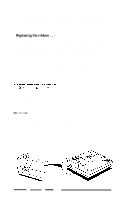
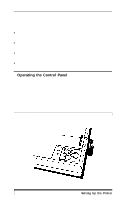
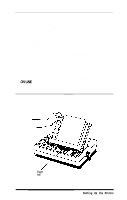
8. Turn the ribbon tightening knob again to see that the ribbon moves freely Replacing the ribbon . . . The EX-800 uses a continuous-loop, inked fabric ribbon. When your printing becomes too light, replace the whole ribbon cartridge. Always use replacement ribbons designed specifically for Epson EX printers. It is not possible to use ribbons for any other series of printer, and you should never try to re-ink the ribbon. To remove the old ribbon, simply grip the cartridge by the two plastic tabs and lift it up and out of the printer. You can then install a new cartridge as described above. Before plugging in the power cord, see that the power switch on the left side of the printer (see Figure 1-6 below) is turned off; then plug the power cord into a properly grounded socket. Warning: Before turning on the printer, be absolutely sure you have removed all packing materials. Turning on the printer when the print head cannot move may seriously damage the mechanism. Figure 1-6. Turning on the printer Setting up the Printer 1-5
-
 1
1 -
2
-
3
-
4
-
5
-
6
-
7
-
8
-
9
-
10
-
 11
11 -
 12
12 -
 13
13 -
 14
14 -
 15
15 -
 16
16 -
 17
17 -
 18
18 -
 19
19 -
 20
20 -
 21
21 -
22
-
23
-
24
-
25
-
26
-
27
-
28
-
29
-
30
-
31
-
32
-
33
-
34
-
35
-
36
-
37
-
38
-
39
-
40
-
41
-
42
-
43
-
44
-
45
-
46
-
47
-
48
-
49
-
50
-
51
-
52
-
53
-
54
-
55
-
56
-
57
-
58
-
59
-
60
-
61
-
62
-
63
-
64
-
65
-
66
-
67
-
68
-
69
-
70
-
71
-
72
-
73
-
74
-
75
-
76
-
77
-
78
-
79
-
80
-
81
-
82
-
83
-
84
-
85
-
86
-
87
-
88
-
89
-
90
-
91
-
92
-
93
-
94
-
95
-
96
-
97
-
98
-
99
-
100
-
101
-
102
-
103
-
104
-
105
-
106
-
107
-
108
-
109
-
110
-
111
-
112
-
113
-
114
-
115
-
116
-
117
-
118
-
119
-
120
-
121
-
122
-
123
-
124
-
125
-
126
-
127
-
128
-
129
-
130
-
131
-
132
-
133
-
134
-
135
-
136
-
137
-
138
-
139
-
140
-
141
-
142
-
143
-
144
-
145
-
146
-
147
-
148
-
149
-
150
-
151
-
152
-
153
-
154
-
155
-
156
-
157
-
158
-
159
-
160
-
161
-
162
-
163
-
164
-
165
-
166
-
167
-
168
-
169
-
170
-
171
-
172
-
173
-
174
-
175
-
176
-
177
-
178
-
179
-
180
-
181
-
182
-
183
-
184
-
185
-
186
-
187
-
188
-
189
-
190
-
191
-
192
 |
 |
