Epson EX-1000 User Manual - Page 20
Loading Paper, ON LINE
 |
View all Epson EX-1000 manuals
Add to My Manuals
Save this manual to your list of manuals |
Page 20 highlights
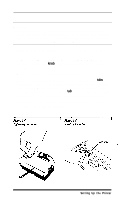
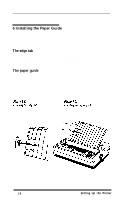
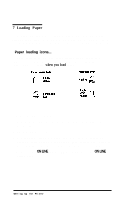
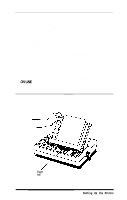
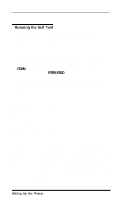
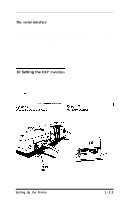
7 Loading Paper Even if you normally use continuous paper, it is simpler to test the printer using a single sheet of paper. If you have an EX-1000, be sure to use 14-inch-wide paper so that none of the self test prints on the platen. Paper loading icons... Roth levers on the EX have icons (small pictures) beside them. These icons (shown below) remind you whether to push the lever back or pull it forward when you load paper. Now load a sheet of paper: 1. Turn the printer ON first. Do not put the paper in the printer before you turn it on. 2. Remove the dust cover 3. Push the paper release and paper bail levers back. Note that the paper bail lever must be in the printing (back) position now. You will move it to the single-sheet loading (forward) position in step 5. 4. Make sure the ON LINE light is OFF If it is ON, press the ON LINE button once. Setting Up the Printer 1-9
-
 1
1 -
2
-
3
-
4
-
5
-
6
-
7
-
8
-
9
-
10
-
11
-
12
-
13
-
14
-
 15
15 -
 16
16 -
 17
17 -
 18
18 -
 19
19 -
 20
20 -
 21
21 -
 22
22 -
 23
23 -
 24
24 -
 25
25 -
26
-
27
-
28
-
29
-
30
-
31
-
32
-
33
-
34
-
35
-
36
-
37
-
38
-
39
-
40
-
41
-
42
-
43
-
44
-
45
-
46
-
47
-
48
-
49
-
50
-
51
-
52
-
53
-
54
-
55
-
56
-
57
-
58
-
59
-
60
-
61
-
62
-
63
-
64
-
65
-
66
-
67
-
68
-
69
-
70
-
71
-
72
-
73
-
74
-
75
-
76
-
77
-
78
-
79
-
80
-
81
-
82
-
83
-
84
-
85
-
86
-
87
-
88
-
89
-
90
-
91
-
92
-
93
-
94
-
95
-
96
-
97
-
98
-
99
-
100
-
101
-
102
-
103
-
104
-
105
-
106
-
107
-
108
-
109
-
110
-
111
-
112
-
113
-
114
-
115
-
116
-
117
-
118
-
119
-
120
-
121
-
122
-
123
-
124
-
125
-
126
-
127
-
128
-
129
-
130
-
131
-
132
-
133
-
134
-
135
-
136
-
137
-
138
-
139
-
140
-
141
-
142
-
143
-
144
-
145
-
146
-
147
-
148
-
149
-
150
-
151
-
152
-
153
-
154
-
155
-
156
-
157
-
158
-
159
-
160
-
161
-
162
-
163
-
164
-
165
-
166
-
167
-
168
-
169
-
170
-
171
-
172
-
173
-
174
-
175
-
176
-
177
-
178
-
179
-
180
-
181
-
182
-
183
-
184
-
185
-
186
-
187
-
188
-
189
-
190
-
191
-
192
 |
 |
