Epson EX-1000 User Manual - Page 25
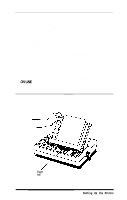
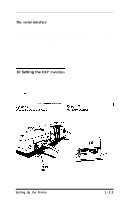
Interface settings, Setting Up the, Sheet Feeder
 |
View all Epson EX-1000 manuals
Add to My Manuals
Save this manual to your list of manuals |
Page 25 highlights
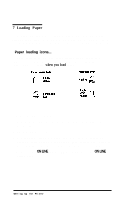
The switches are in two groups of eight and are numbered from l-l to 2-8. As you can see in the example below, the first part of the self test shows the settings of the switches. Condensed Zero CG Table MODE Print Quality Country Page Length Sheet Feeder Skip-Over-Perf. Auto LF Interface OFF 0 Italic ESC/P Draft U.S.A. 11" OFF OFF OFF Parallel You will find your own self test printout helpful as you use this section. Before you change any DIP switch settings, turn the printer around to give you easy access to the switches. You can easily turn the switches on and off with a thin pointed object, such as a small screwdriver or the cap of a ballpoint pen. The switches are ON when they are UP and OFF when they are DOWN. In the tables that follow, shaded boxes indicate the factory settings. Note When you change a DIP switch setting, turn off the power, reset the switch or switches, then turn on the power again. The printer checks and recognizes new settings only at the time you turn the power on. Interface settings If you are using a parallel interface, the interface line of the self test DIP switch printout should be the following: Interface Parallel 1-14 Setting Up the Printer
-
 1
1 -
2
-
3
-
4
-
5
-
6
-
7
-
8
-
9
-
10
-
11
-
12
-
13
-
14
-
15
-
16
-
17
-
18
-
19
-
 20
20 -
 21
21 -
 22
22 -
 23
23 -
 24
24 -
 25
25 -
 26
26 -
 27
27 -
 28
28 -
 29
29 -
 30
30 -
31
-
32
-
33
-
34
-
35
-
36
-
37
-
38
-
39
-
40
-
41
-
42
-
43
-
44
-
45
-
46
-
47
-
48
-
49
-
50
-
51
-
52
-
53
-
54
-
55
-
56
-
57
-
58
-
59
-
60
-
61
-
62
-
63
-
64
-
65
-
66
-
67
-
68
-
69
-
70
-
71
-
72
-
73
-
74
-
75
-
76
-
77
-
78
-
79
-
80
-
81
-
82
-
83
-
84
-
85
-
86
-
87
-
88
-
89
-
90
-
91
-
92
-
93
-
94
-
95
-
96
-
97
-
98
-
99
-
100
-
101
-
102
-
103
-
104
-
105
-
106
-
107
-
108
-
109
-
110
-
111
-
112
-
113
-
114
-
115
-
116
-
117
-
118
-
119
-
120
-
121
-
122
-
123
-
124
-
125
-
126
-
127
-
128
-
129
-
130
-
131
-
132
-
133
-
134
-
135
-
136
-
137
-
138
-
139
-
140
-
141
-
142
-
143
-
144
-
145
-
146
-
147
-
148
-
149
-
150
-
151
-
152
-
153
-
154
-
155
-
156
-
157
-
158
-
159
-
160
-
161
-
162
-
163
-
164
-
165
-
166
-
167
-
168
-
169
-
170
-
171
-
172
-
173
-
174
-
175
-
176
-
177
-
178
-
179
-
180
-
181
-
182
-
183
-
184
-
185
-
186
-
187
-
188
-
189
-
190
-
191
-
192
 |
 |
