Epson Perfection 3200 Pro Color Management Workbook - Page 11
Building the Scanner and Printer Profiles, Scan RGB, Load an, Image
 |
View all Epson Perfection 3200 Pro manuals
Add to My Manuals
Save this manual to your list of manuals |
Page 11 highlights
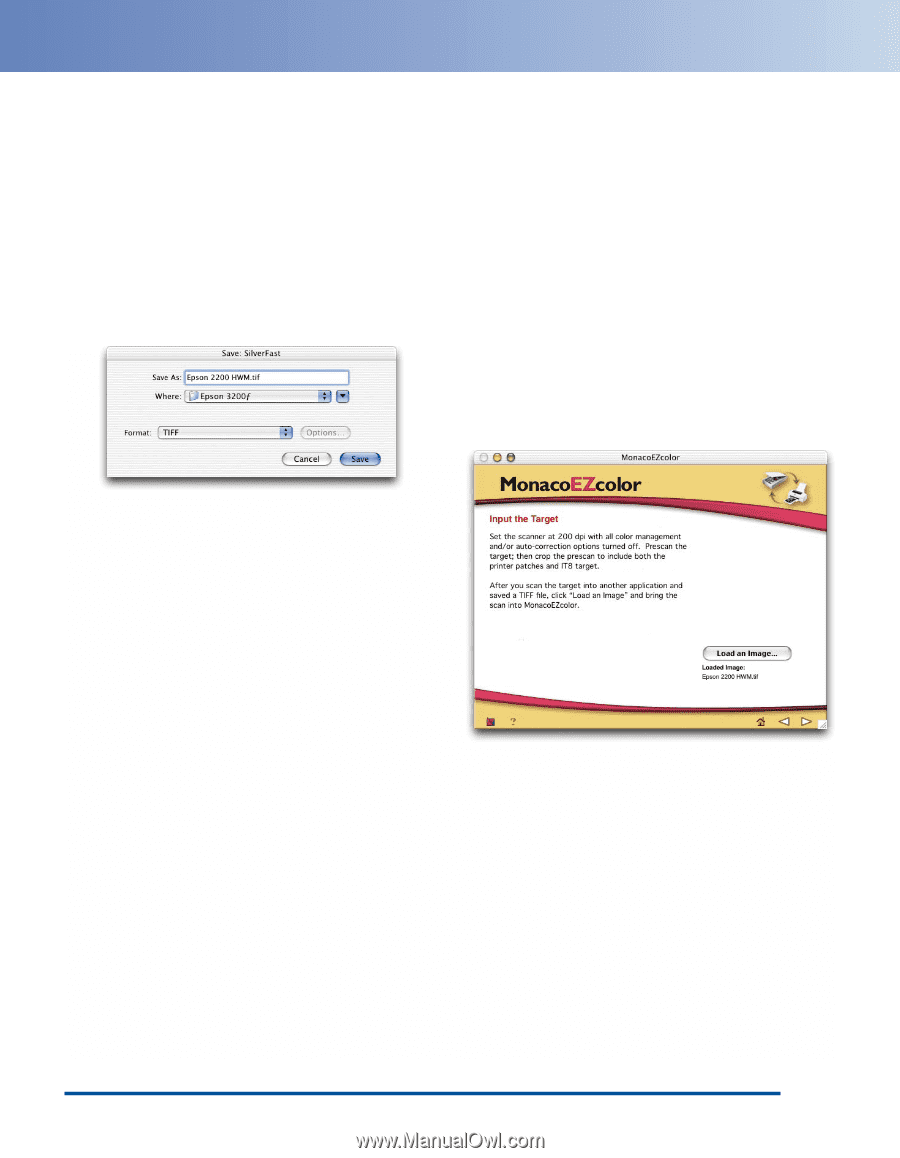
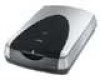
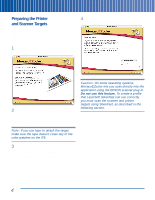
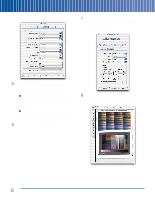
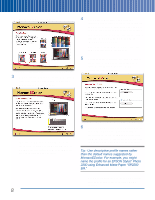
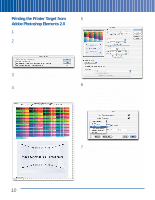
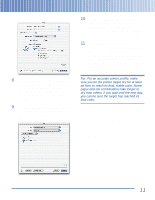
9 Crop the prescan, using the dotted line surrounding the target as a rough guide. Don't worry if the scan is slightly skewed. But if the scan is more than 10 degrees or so from square, reposition the target and redo the prescan. 10 Click Scan RGB to make the final target scan. SilverFast prompts you to choose a location, file format, and file name for the scan, as shown: Building the Scanner and Printer Profiles The final part of the profile-building process is loading the target scan into MonacoEZcolor, then naming, building, and saving the profiles. 1 Return to MonacoEZcolor. If necessary, use the navigation arrows at the lower-right of the MonacoEZcolor screen to navigate to the screen shown below. Then click Load an Image, and load the target scan you created in the previous section. The target's file name is displayed below the button, as shown: 11 Save the scan in TIFF format. We recommend that you include the printer and paper type in the file name. If you profile multiple printers, or multiple papers on the same printer, you'll end up with many scans that look very similar. Including this information in the file name makes it easy to identify which scan belongs to which paper and printer combination. Once you've entered the information, click Save to start the scan. SilverFast scans the target and saves it in the specified location. You've completed the scanning process. Now you can return to MonacoEZcolor and build the profiles for your scanner and printer. 2 Click the right arrow at the lower-right to proceed. 7
-
 1
1 -
2
-
3
-
4
-
5
-
 6
6 -
 7
7 -
 8
8 -
 9
9 -
 10
10 -
 11
11 -
 12
12 -
 13
13 -
 14
14 -
 15
15 -
 16
16 -
17
-
18
-
19
-
20
-
21
-
22
-
23
-
24
-
25
-
26
-
27
-
28
-
29
-
30
-
31
-
32
-
33
-
34
 |
 |