Epson Perfection 3200 Pro Color Management Workbook - Page 19
Options, for HDR output, <NONE>, Frame, HDR Color
 |
View all Epson Perfection 3200 Pro manuals
Add to My Manuals
Save this manual to your list of manuals |
Page 19 highlights
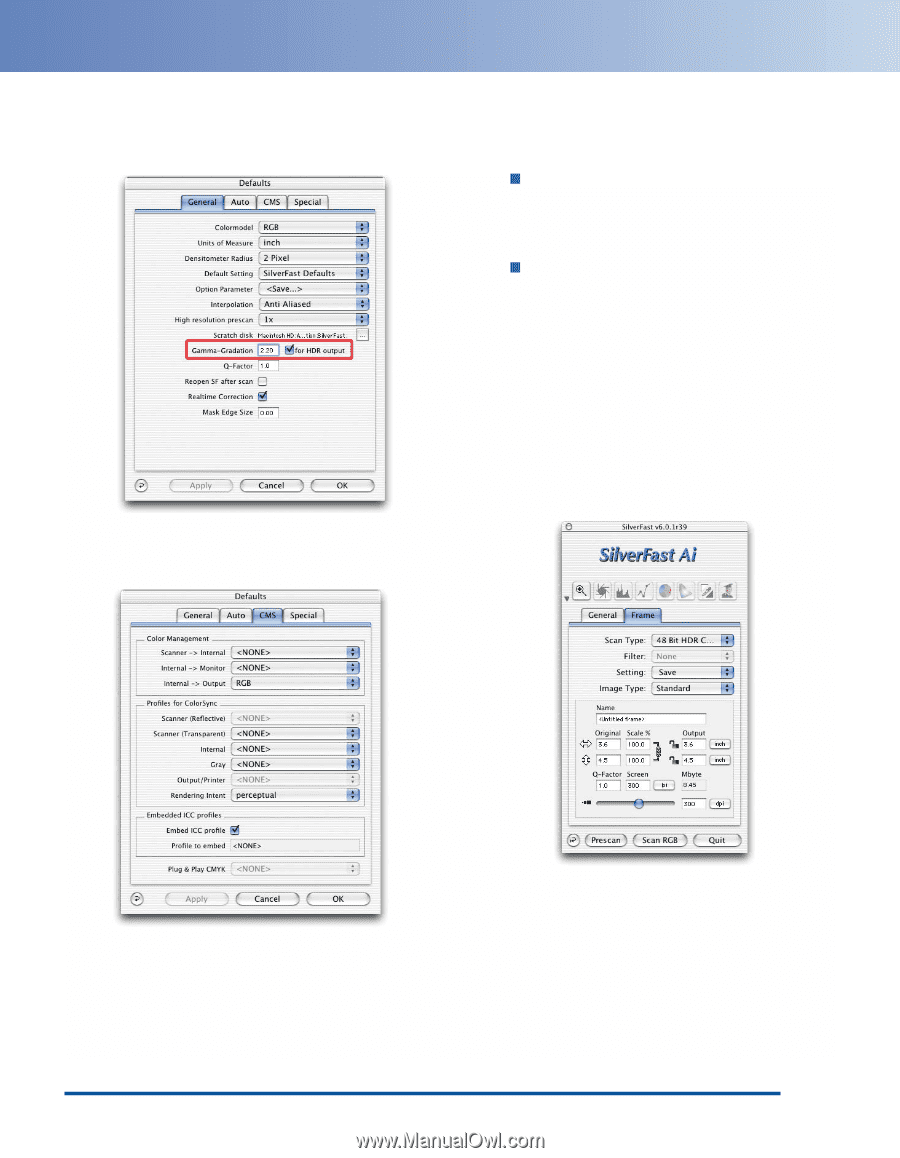
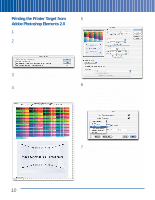
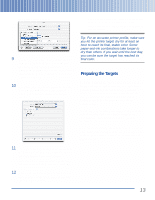
3 Once you've confirmed the settings, click the Options button. The SilverFast Defaults screen appears: 4 For Gamma-Gradation, enter 2.20. Check for HDR output, then click the CMS tab. The CMS Defaults screen appears: 5 Turn off all the color management options for the target scan. You need to do this whenever you scan a profiling target. In the Color Management section, set Scanner->Internal and Internal->Monitor to , and set Internal->Output to RGB. In the Profiles for ColorSync section, set all profiles to . You can leave the other settings at their defaults. 6 When you've completed all the settings, click OK. 7 On the main SilverFast screen, click the Frame tab. Set the Scan Type to 48-bit HDR Color, and set the resolution slider to 300 dpi, as shown: 15
-
 1
1 -
2
-
3
-
4
-
5
-
6
-
7
-
8
-
9
-
10
-
11
-
12
-
13
-
 14
14 -
 15
15 -
 16
16 -
 17
17 -
 18
18 -
 19
19 -
 20
20 -
 21
21 -
 22
22 -
 23
23 -
 24
24 -
25
-
26
-
27
-
28
-
29
-
30
-
31
-
32
-
33
-
34
 |
 |