Epson Perfection 3200 Pro Color Management Workbook - Page 20
Prescan, Scan RGB, recommend that you include the scanner
 |
View all Epson Perfection 3200 Pro manuals
Add to My Manuals
Save this manual to your list of manuals |
Page 20 highlights
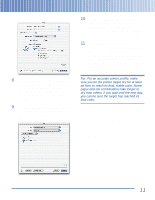
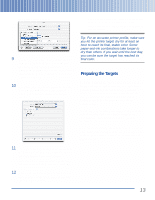
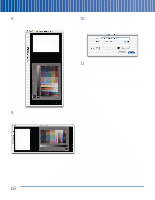
8 Once you've made your settings, click 10 Click Scan RGB to make the final target Prescan. The prescan appears in SilverFast's scan. SilverFast prompts you to choose a scanner window: location, file format, and file name for the scan, as shown: 11 Save the scan in TIFF format. We recommend that you include the scanner and film type in the file name. Once you've entered the information, click Save to start the scan. SilverFast scans the target and saves it in the specified location. 9 Crop the prescan to include only the target, then click the Rotate tool to rotate the image to the correct orientation, as shown: 16
-
 1
1 -
2
-
3
-
4
-
5
-
6
-
7
-
8
-
9
-
10
-
11
-
12
-
13
-
14
-
 15
15 -
 16
16 -
 17
17 -
 18
18 -
 19
19 -
 20
20 -
 21
21 -
 22
22 -
 23
23 -
 24
24 -
 25
25 -
26
-
27
-
28
-
29
-
30
-
31
-
32
-
33
-
34
 |
 |
8
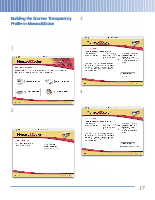
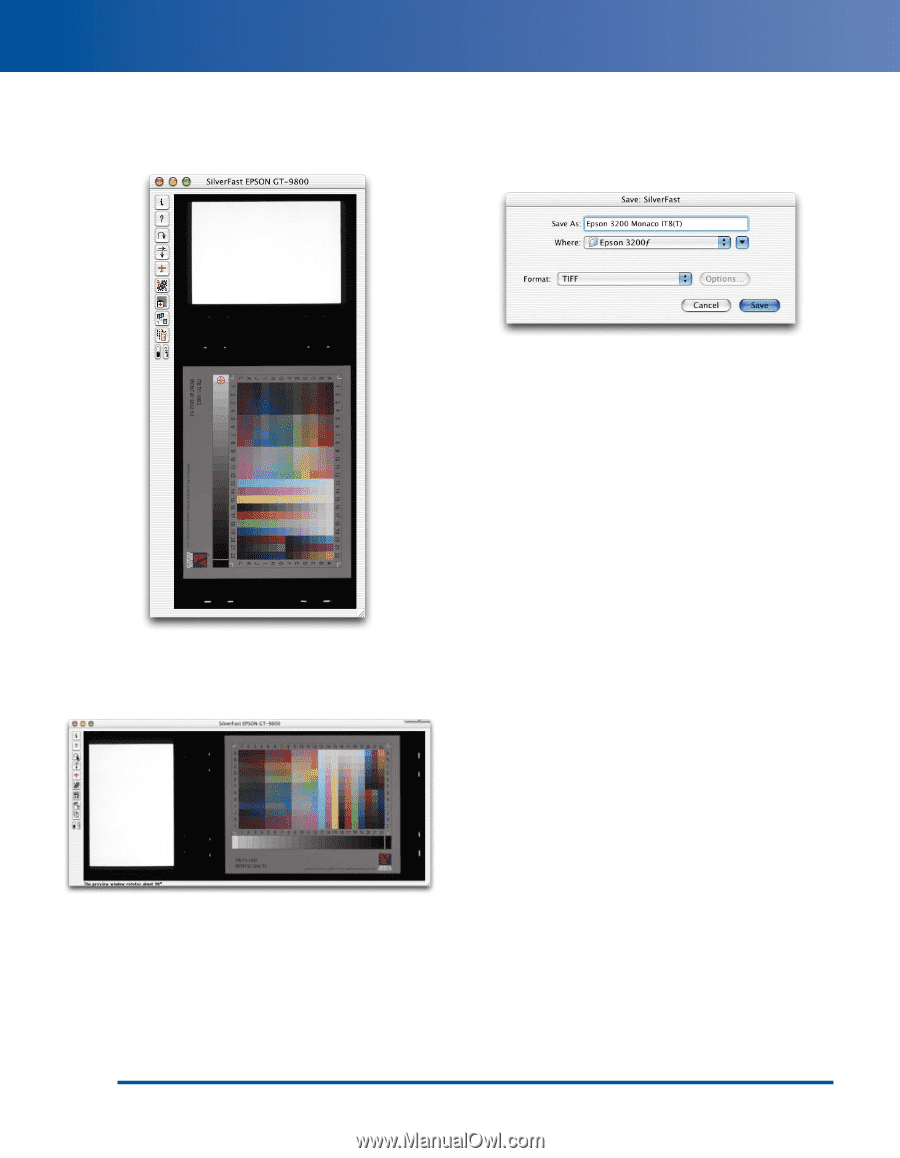
Once you’ve made your settings, click
Prescan
. The prescan appears in SilverFast’s
scanner window:
9
Crop the prescan to include only the target,
then click the Rotate tool to rotate the image
to the correct orientation, as shown:
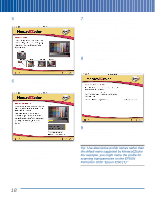
10
Click
Scan RGB
to make the final target
scan. SilverFast prompts you to choose a
location, file format, and file name for the
scan, as shown:
11
Save the scan in TIFF format. We
recommend that you include the scanner
and film type in the file name.
Once you’ve entered the information, click
Save
to start the scan. SilverFast scans the target and
saves it in the specified location.
16