Epson Perfection 3200 Pro Color Management Workbook - Page 30
Reflective Scanning with SilverFast
 |
View all Epson Perfection 3200 Pro manuals
Add to My Manuals
Save this manual to your list of manuals |
Page 30 highlights
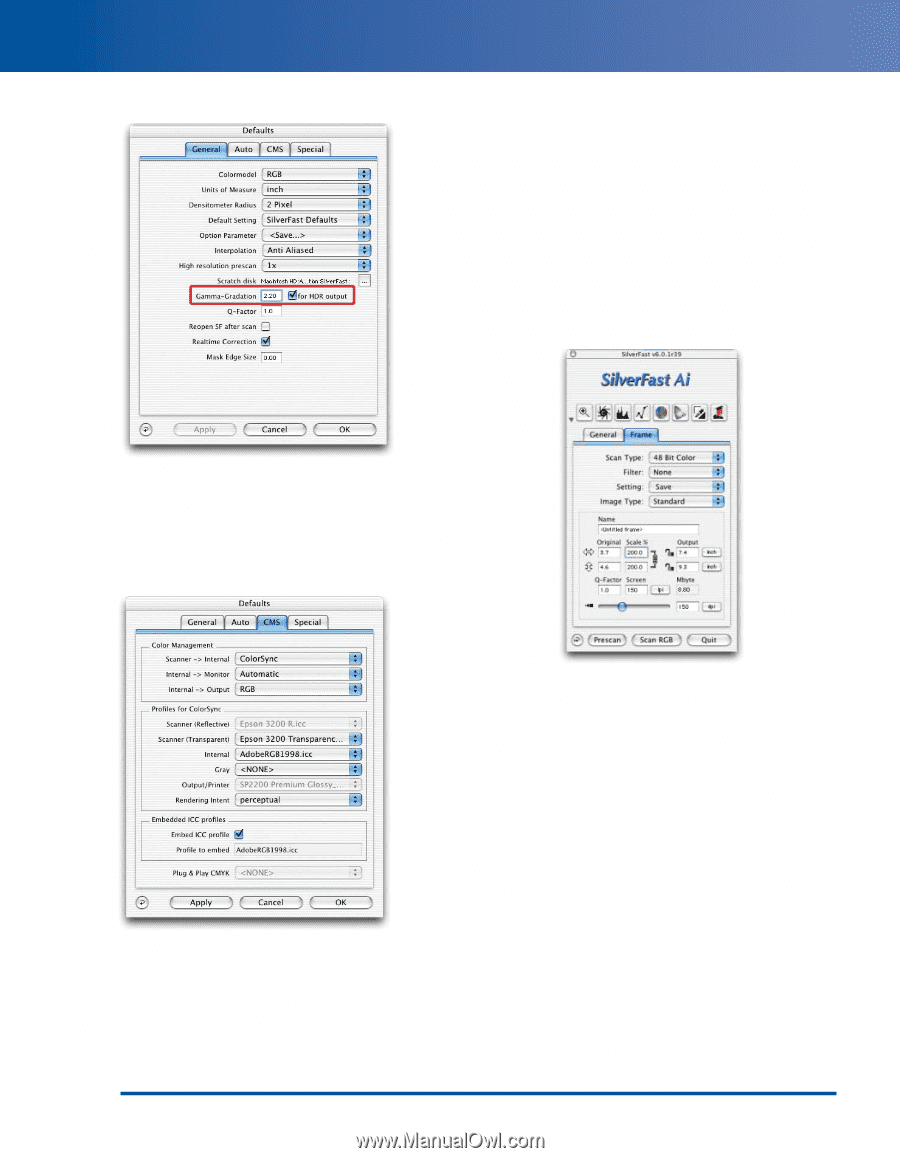
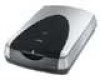
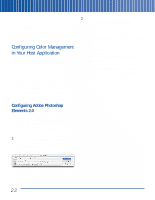
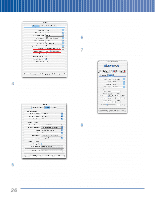
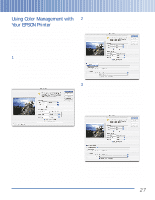
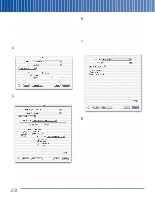
The SilverFast Defaults screen appears: Otherwise, make sure that the other settings are as shown. If necessary, refer to "Reflective Scanning with SilverFast" on page 23. 6 When you've completed all the settings, click OK. 7 On the main SilverFast screen, click the Frame tab. Set the Scan Type to 48->24-bit Color, as shown: 4 Verify that the Gamma-Gradation value is set to 2.20. (If you set it while building a transparency profile, SilverFast remembers the setting.) Then click the CMS tab. The CMS Defaults screen appears: 5 If you've already configured SilverFast for reflective scanning, the only change you need to make is to enter the profile you created for transparency scanning under Scanner (Transparent). 26 You're ready to scan! 8 Click the Prescan button. Once the Prescan is done, you can set the crop and resolution as needed, and use SilverFast's powerful color-correction tools to make any desired enhancements to your image. For details on using SilverFast's image-correction features, see the SilverFast manual. Once you've configured SilverFast, you won't need to change these options. SilverFast automatically remembers the required Gamma-Gradation settings for reflective and transparency, and automatically uses the correct profile for each. In the next section, we'll show you how to print your images, using the printer profiles you created with MonacoEZcolor.
-
 1
1 -
2
-
3
-
4
-
5
-
6
-
7
-
8
-
9
-
10
-
11
-
12
-
13
-
14
-
15
-
16
-
17
-
18
-
19
-
20
-
21
-
22
-
23
-
24
-
 25
25 -
 26
26 -
 27
27 -
 28
28 -
 29
29 -
 30
30 -
 31
31 -
 32
32 -
 33
33 -
 34
34
 |
 |