Epson Perfection 3200 Pro Color Management Workbook - Page 7
Print Settings, Advanced Settings, Color Management, No Color Adjustmen, Print - driver
 |
View all Epson Perfection 3200 Pro manuals
Add to My Manuals
Save this manual to your list of manuals |
Page 7 highlights
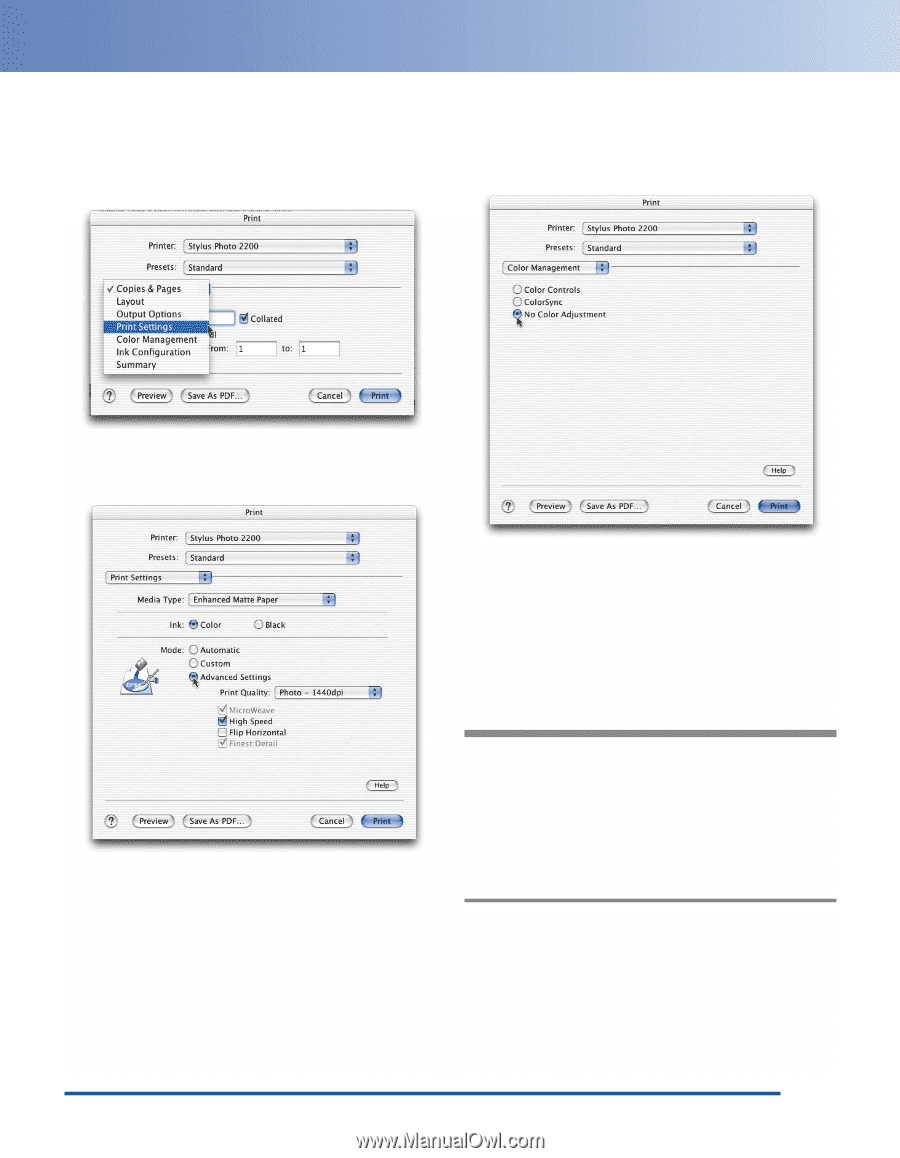
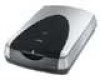
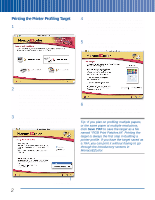
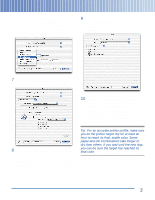
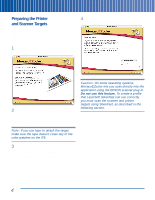
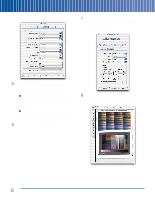
MonacoEZcolor advises you to record the settings you'll make in the printer driver, so you can apply them when you use the profile. When you click OK, the print window appears: 9 Once you've made your selections, choose Color Management from the Options menu. The color management settings appear: 7 Choose Print Settings from the options pop-up menu. The print settings appear: 10 Click No Color Adjustment to ensure that the driver doesn't alter the colors in the profiling target. Then click Print. Once you've printed the target, you're ready to proceed to the next part of the process: using SilverFast to scan both the scanner and printer targets. 8 Choose the paper type you want to profile from the Media Type list-for example, Enhanced Matte Paper. Then click Advanced Settings and choose your desired print settings. Most of the time, the default settings work well. Tip: For an accurate printer profile, make sure you let the printer target dry for at least an hour to reach its final, stable color. Some paper-and-ink combinations take longer to dry than others. If you wait until the next day, you can be sure the target has reached its final color. 3
-
 1
1 -
 2
2 -
 3
3 -
 4
4 -
 5
5 -
 6
6 -
 7
7 -
 8
8 -
 9
9 -
 10
10 -
 11
11 -
 12
12 -
13
-
14
-
15
-
16
-
17
-
18
-
19
-
20
-
21
-
22
-
23
-
24
-
25
-
26
-
27
-
28
-
29
-
30
-
31
-
32
-
33
-
34
 |
 |