Epson WorkForce 320 User Manual - Page 10
paper slight cropping may occur, then press, expand the image all the way to the edge of - only prints in color
 |
View all Epson WorkForce 320 manuals
Add to My Manuals
Save this manual to your list of manuals |
Page 10 highlights
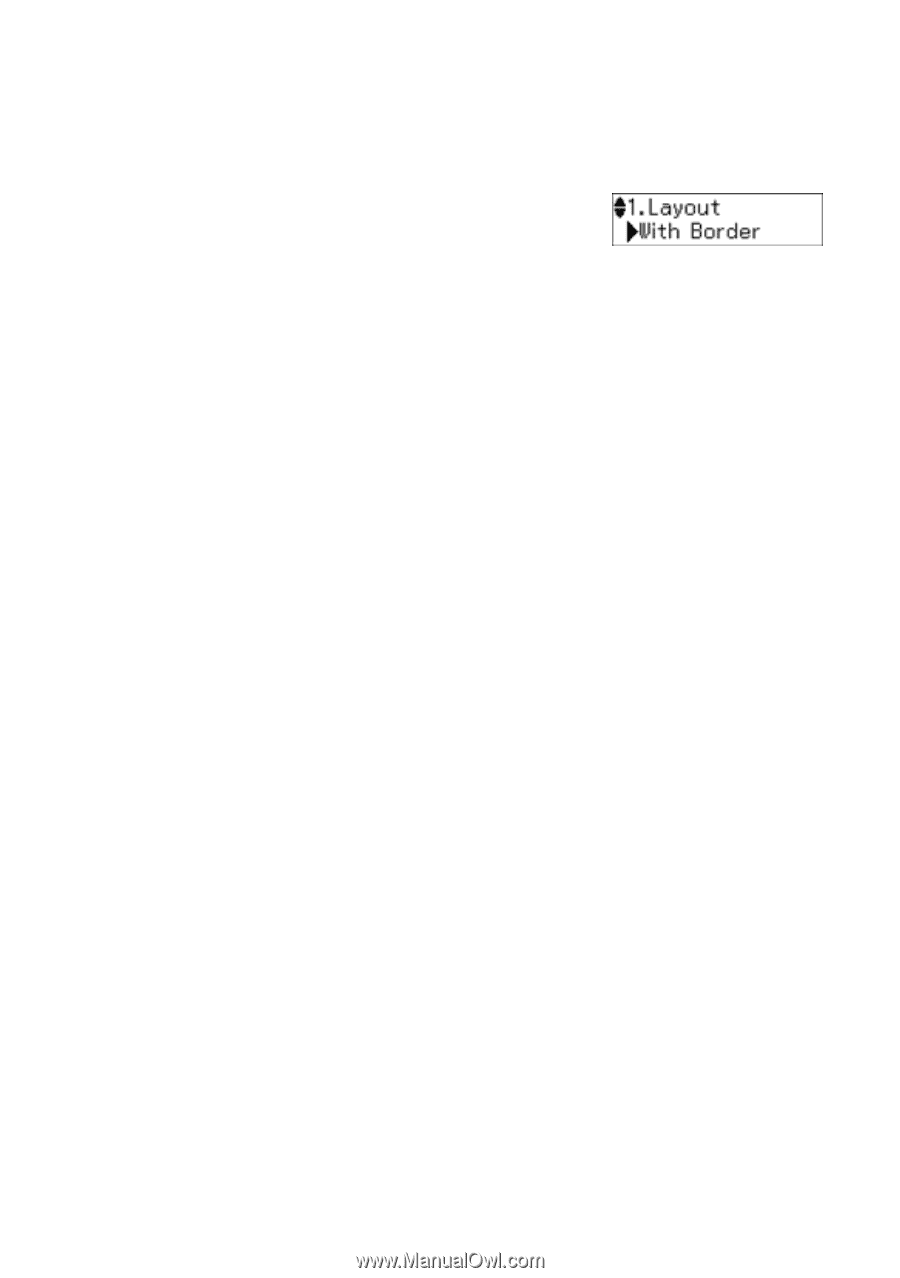
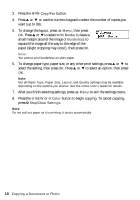
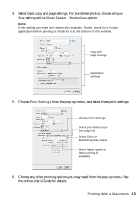
3. Press the r/K Copy/Fax button. 4. Press u or d or use the numeric keypad to select the number of copies you want (up to 99). 5. To change the layout, press x Menu, then press OK. Press u or d to select With Border to leave a small margin around the image or Borderless to expand the image all the way to the edge of the paper (slight cropping may occur), then press OK. Note: You cannot print borderless on plain paper. 6. To change paper type, paper size, or any other print settings, press u or d to select the setting, then press OK. Press u or d to select an option, then press OK. Note: Not all Paper Type, Paper Size, Layout, and Quality settings may be available depending on the options you choose. See the online User's Guide for details. 7. After you finish selecting settings, press x Menu to exit the settings menu. 8. Press the x B&W or x Color button to begin copying. To cancel copying, press y Stop/Clear Settings. Note: Do not pull out paper as it is printing; it ejects automatically. 10 Copying a Document or Photo
-
 1
1 -
2
-
3
-
4
-
 5
5 -
 6
6 -
 7
7 -
 8
8 -
 9
9 -
 10
10 -
 11
11 -
 12
12 -
 13
13 -
 14
14 -
 15
15 -
16
-
17
-
18
-
19
-
20
-
21
-
22
-
23
-
24
-
25
-
26
-
27
-
28
-
29
-
30
-
31
-
32
-
33
-
34
-
35
-
36
-
37
-
38
-
39
-
40
-
41
-
42
-
43
-
44
-
45
-
46
-
47
-
48
-
49
-
50
-
51
-
52
-
53
-
54
-
55
-
56
 |
 |