Gateway E-9525R Gateway E-9525R Server User Guide - Page 22
Installing the bezel
 |
View all Gateway E-9525R manuals
Add to My Manuals
Save this manual to your list of manuals |
Page 22 highlights
CHAPTER 2: Setting Up Your Server 8 Align the mounting screw holes in the server handles with the front mounting nuts, then secure the front in place with two mounting screws (one on each side). Installing the bezel To install the bezel: 1 With the server pulled out from the cabinet, align the holes in the handle with the small holes in the mounting brackets on the front side of the server. Mounting bracket Mounting bracket 2 Attach the handles to the sides of the server with two mounting screws on each side. 16
-
 1
1 -
2
-
3
-
4
-
5
-
6
-
7
-
8
-
9
-
10
-
11
-
12
-
13
-
14
-
15
-
16
-
 17
17 -
 18
18 -
 19
19 -
 20
20 -
 21
21 -
 22
22 -
 23
23 -
 24
24 -
 25
25 -
 26
26 -
 27
27 -
28
-
29
-
30
-
31
-
32
-
33
-
34
-
35
-
36
-
37
-
38
-
39
-
40
-
41
-
42
-
43
-
44
-
45
-
46
-
47
-
48
-
49
-
50
-
51
-
52
-
53
-
54
-
55
-
56
-
57
-
58
-
59
-
60
-
61
-
62
-
63
-
64
-
65
-
66
-
67
-
68
-
69
-
70
-
71
-
72
-
73
-
74
-
75
-
76
-
77
-
78
-
79
-
80
-
81
-
82
-
83
-
84
-
85
-
86
-
87
-
88
-
89
-
90
-
91
-
92
-
93
-
94
-
95
-
96
-
97
-
98
-
99
-
100
-
101
-
102
-
103
-
104
-
105
-
106
-
107
-
108
-
109
-
110
-
111
-
112
-
113
-
114
-
115
-
116
-
117
-
118
-
119
-
120
 |
 |

CHAPTER 2: Setting Up Your Server
16
8
Align the mounting screw holes in the server handles with the front mounting nuts, then
secure the front in place with two mounting screws (one on each side).
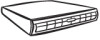
Installing the bezel
To install the bezel:
1
With the server pulled out from the cabinet, align the holes in the handle with the small
holes in the mounting brackets on the front side of the server.
2
Attach the handles to the sides of the server with two mounting screws on each side.
Mounting bracket
Mounting bracket