Gateway E-9525R Gateway E-9525R Server User Guide - Page 58
Pull the backplane from the backplane bracket., bracket, then place it on the locking tabs 1.
 |
View all Gateway E-9525R manuals
Add to My Manuals
Save this manual to your list of manuals |
Page 58 highlights
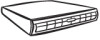
CHAPTER 4: Installing Components 5 Remove the fan duct and system fans by following the instructions in "Replacing system fans" on page 44. 6 Disconnect all cables from the backplane. 7 Pull the backplane bracket and backplane (1) out of the chassis. Caution Pressing or pulling on any components on the backplane could result in damage to the backplane. 8 Press the release tab (2) on the backplane bracket and push the backplane to the left (3). 9 Pull the backplane from the backplane bracket. 10 Holding the new backplane by the edges only, align it with the locking tabs on the backplane bracket, then place it on the locking tabs (1). Caution Make sure you do not pinch, bind, or damage any cables as you install the backplane. 52
-
 1
1 -
2
-
3
-
4
-
5
-
6
-
7
-
8
-
9
-
10
-
11
-
12
-
13
-
14
-
15
-
16
-
17
-
18
-
19
-
20
-
21
-
22
-
23
-
24
-
25
-
26
-
27
-
28
-
29
-
30
-
31
-
32
-
33
-
34
-
35
-
36
-
37
-
38
-
39
-
40
-
41
-
42
-
43
-
44
-
45
-
46
-
47
-
48
-
49
-
50
-
51
-
52
-
 53
53 -
 54
54 -
 55
55 -
 56
56 -
 57
57 -
 58
58 -
 59
59 -
 60
60 -
 61
61 -
 62
62 -
 63
63 -
64
-
65
-
66
-
67
-
68
-
69
-
70
-
71
-
72
-
73
-
74
-
75
-
76
-
77
-
78
-
79
-
80
-
81
-
82
-
83
-
84
-
85
-
86
-
87
-
88
-
89
-
90
-
91
-
92
-
93
-
94
-
95
-
96
-
97
-
98
-
99
-
100
-
101
-
102
-
103
-
104
-
105
-
106
-
107
-
108
-
109
-
110
-
111
-
112
-
113
-
114
-
115
-
116
-
117
-
118
-
119
-
120
 |
 |

CHAPTER 4: Installing Components
52
5
Remove the fan duct and system fans by following the instructions in
“Replacing system
fans” on page 44
.
6
Disconnect all cables from the backplane.
7
Pull the backplane bracket and backplane (1) out of the chassis.
8
Press the release tab (2) on the backplane bracket and push the backplane to the left (3).
9
Pull the backplane from the backplane bracket.
10
Holding the new backplane by the edges only, align it with the locking tabs on the backplane
bracket, then place it on the locking tabs (1).
Caution
Pressing or pulling on any components on the backplane could result in
damage to the backplane.
Caution
Make sure you do not pinch, bind, or damage any cables as you install the
backplane.