HP 5550 User Guide - Page 244
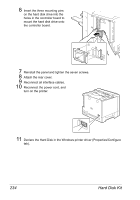
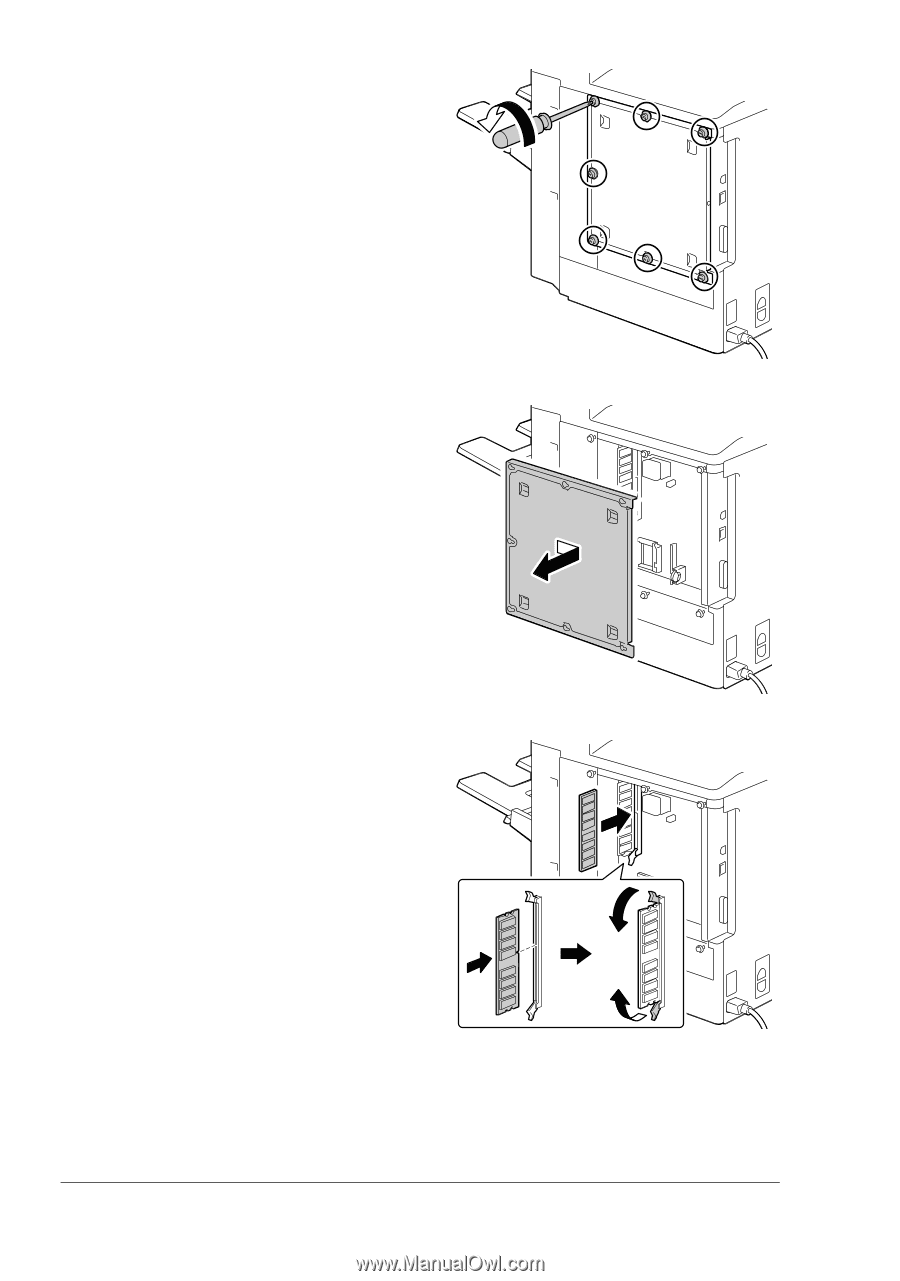
Using a screwdriver, loosen the, Reinstall the panel and tighten the seven screws.
 |
UPC - 808736333603
View all HP 5550 manuals
Add to My Manuals
Save this manual to your list of manuals |
Page 244 highlights
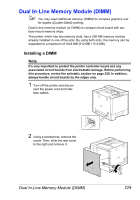
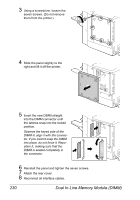
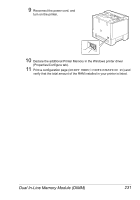
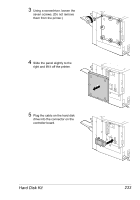
3 Using a screwdriver, loosen the seven screws. (Do not remove them from the printer.) 4 Slide the panel slightly to the right and lift it off the printer. 5 Insert the new DIMM straight into the DIMM connector until the latches snap into the locked position. Observe the keyed side of the DIMM to align it with the connector. If you cannot snap the DIMM into place, do not force it. Reposition it, making sure that the DIMM is seated completely in the connector. 6 Reinstall the panel and tighten the seven screws. 7 Attach the rear cover. 8 Reconnect all interface cables. 230 Dual In-Line Memory Module (DIMM)
-
 1
1 -
2
-
3
-
4
-
5
-
6
-
7
-
8
-
9
-
10
-
11
-
12
-
13
-
14
-
15
-
16
-
17
-
18
-
19
-
20
-
21
-
22
-
23
-
24
-
25
-
26
-
27
-
28
-
29
-
30
-
31
-
32
-
33
-
34
-
35
-
36
-
37
-
38
-
39
-
40
-
41
-
42
-
43
-
44
-
45
-
46
-
47
-
48
-
49
-
50
-
51
-
52
-
53
-
54
-
55
-
56
-
57
-
58
-
59
-
60
-
61
-
62
-
63
-
64
-
65
-
66
-
67
-
68
-
69
-
70
-
71
-
72
-
73
-
74
-
75
-
76
-
77
-
78
-
79
-
80
-
81
-
82
-
83
-
84
-
85
-
86
-
87
-
88
-
89
-
90
-
91
-
92
-
93
-
94
-
95
-
96
-
97
-
98
-
99
-
100
-
101
-
102
-
103
-
104
-
105
-
106
-
107
-
108
-
109
-
110
-
111
-
112
-
113
-
114
-
115
-
116
-
117
-
118
-
119
-
120
-
121
-
122
-
123
-
124
-
125
-
126
-
127
-
128
-
129
-
130
-
131
-
132
-
133
-
134
-
135
-
136
-
137
-
138
-
139
-
140
-
141
-
142
-
143
-
144
-
145
-
146
-
147
-
148
-
149
-
150
-
151
-
152
-
153
-
154
-
155
-
156
-
157
-
158
-
159
-
160
-
161
-
162
-
163
-
164
-
165
-
166
-
167
-
168
-
169
-
170
-
171
-
172
-
173
-
174
-
175
-
176
-
177
-
178
-
179
-
180
-
181
-
182
-
183
-
184
-
185
-
186
-
187
-
188
-
189
-
190
-
191
-
192
-
193
-
194
-
195
-
196
-
197
-
198
-
199
-
200
-
201
-
202
-
203
-
204
-
205
-
206
-
207
-
208
-
209
-
210
-
211
-
212
-
213
-
214
-
215
-
216
-
217
-
218
-
219
-
220
-
221
-
222
-
223
-
224
-
225
-
226
-
227
-
228
-
229
-
230
-
231
-
232
-
233
-
234
-
235
-
236
-
237
-
238
-
 239
239 -
 240
240 -
 241
241 -
 242
242 -
 243
243 -
 244
244 -
 245
245 -
 246
246 -
 247
247 -
 248
248 -
 249
249 -
250
-
251
-
252
-
253
-
254
-
255
-
256
-
257
-
258
-
259
-
260
-
261
-
262
-
263
-
264
-
265
-
266
-
267
-
268
-
269
-
270
-
271
-
272
-
273
-
274
-
275
-
276
-
277
-
278
-
279
-
280
-
281
-
282
-
283
-
284
 |
 |
Dual In-Line Memory Module (DIMM)
230
3
Using a screwdriver, loosen the
seven screws. (Do not remove
them from the printer.)
4
Slide the panel slightly to the
right and lift it off the printer.
5
Insert the new DIMM straight
into the DIMM connector until
the latches snap into the locked
position.
Observe the keyed side of the
DIMM to align it with the connec-
tor. If you cannot snap the DIMM
into place, do not force it. Repo-
sition it, making sure that the
DIMM is seated completely in
the connector.
6
Reinstall the panel and tighten the seven screws.
7
Attach the rear cover.
8
Reconnect all interface cables.