HP 5940 User Guide - (Macintosh) - Page 19
Print photos, Print borderless photos
 |
View all HP 5940 manuals
Add to My Manuals
Save this manual to your list of manuals |
Page 19 highlights
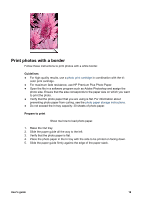
5 Print photos The printer software offers several features that make printing digital photos easier and improve photo quality. Learn how to perform the following tasks: ● Print a borderless photo. ● Print a photo with a border. ● Use HP Real Life technologies to touch up photos. ● Use the photo print cartridge for great colors and virtually grain-free photos. ● Achieve the highest printing resolution with maximum dpi. ● Improve printed colors with the following software options: - Color options - Advanced color management ● Prevent photo paper from curling by following the photo paper storage and handling guidelines. ● Use HP Everyday Photo Paper to save money and ink when printing photos. Print borderless photos Use borderless printing to print to the edges of certain paper types and to print on a range of paper sizes-from 4 x 6 inch photo paper to a 210 x 594 mm (8.5 x 23.4 inch) custom photo size. Guidelines ● For high-quality results, use a photo print cartridge in combination with the tri- color print cartridge. ● Do not print borderless photos in ink-backup mode. Always have two print cartridges installed in the printer. ● Open the file in a software program such as Adobe Photoshop and assign the photo size. Ensure that the size corresponds to the paper size on which you want to print the photo. ● For maximum fade resistance, use HP Premium Plus Photo Paper. ● Verify that the photo paper that you are using is flat. For information about preventing photo paper from curling, see the photo paper storage instructions. ● Do not exceed the In tray capacity: 30 sheets of photo paper. Prepare to print Show me how to load photo paper. 1. Raise the Out tray. 2. Slide the paper guide all the way to the left. 3. Verify that the photo paper is flat. 4. Place the photo paper in the In tray, with the side to be printed on facing down. User's guide 17
-
 1
1 -
2
-
3
-
4
-
5
-
6
-
7
-
8
-
9
-
10
-
11
-
12
-
13
-
 14
14 -
 15
15 -
 16
16 -
 17
17 -
 18
18 -
 19
19 -
 20
20 -
 21
21 -
 22
22 -
 23
23 -
 24
24 -
25
-
26
-
27
-
28
-
29
-
30
-
31
-
32
-
33
-
34
-
35
-
36
-
37
-
38
-
39
-
40
-
41
-
42
-
43
-
44
-
45
-
46
-
47
-
48
-
49
-
50
-
51
-
52
-
53
-
54
-
55
-
56
-
57
-
58
-
59
-
60
-
61
-
62
-
63
-
64
-
65
-
66
-
67
-
68
-
69
-
70
-
71
-
72
-
73
-
74
-
75
-
76
-
77
-
78
-
79
-
80
-
81
-
82
-
83
-
84
-
85
-
86
 |
 |
