HP 5940 User Guide - (Macintosh) - Page 23
Photo print cartridge, Open HP Real Life technologies - download
 |
View all HP 5940 manuals
Add to My Manuals
Save this manual to your list of manuals |
Page 23 highlights
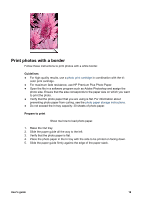
Open HP Real Life technologies Follow these steps to open HP Digital Photography Real Life technologies: 1. Open the Print dialog box. 2. Select the Real Life Digital Photography pane. Use HP Real Life technologies Choose from the following items: ● Summary: View all the current settings at a glance. ● Auto Red-eye Removal: Click On to automatically remove or reduce red-eye in the photograph. ● Adaptive Lighting: Adjust the exposure in dark areas of photos to bring out detail. Click Auto to allow the printer software to automatically balance lightness and darkness. ● Photo Brightening: Automatically enhance colors and contrast for washed-out photos. Click Auto to allow the printer software to intelligently brighten your photo, focusing only on areas that need adjustment. ● SmartFocus: Enhance the image quality and clarity of low resolution images such as those downloaded from the Internet. Click On to allow the printer software to sharpen details in the image automatically. ● Smoothing: Soften an image. Click Auto to allow the printer software to set the level of smoothing for the image automatically. ● Sharpness: Adjust the image sharpness to your preference. Click Auto to allow the printer software to set the level of sharpening for the image automatically. Photo print cartridge The photo print cartridge, when used in conjunction with the tri-color print cartridge, provides virtually grain-free photos. It offers exceptional fade resistance for photos that are printed on HP Premium Plus Photo Paper. The photo print cartridge can be purchased separately if it is not included with your printer. Install the photo print cartridge To install the photo print cartridge, remove the black print cartridge from the printer, and then install the photo print cartridge in the right side of the print cartridge cradle. User's guide 21
-
 1
1 -
2
-
3
-
4
-
5
-
6
-
7
-
8
-
9
-
10
-
11
-
12
-
13
-
14
-
15
-
16
-
17
-
 18
18 -
 19
19 -
 20
20 -
 21
21 -
 22
22 -
 23
23 -
 24
24 -
 25
25 -
 26
26 -
 27
27 -
 28
28 -
29
-
30
-
31
-
32
-
33
-
34
-
35
-
36
-
37
-
38
-
39
-
40
-
41
-
42
-
43
-
44
-
45
-
46
-
47
-
48
-
49
-
50
-
51
-
52
-
53
-
54
-
55
-
56
-
57
-
58
-
59
-
60
-
61
-
62
-
63
-
64
-
65
-
66
-
67
-
68
-
69
-
70
-
71
-
72
-
73
-
74
-
75
-
76
-
77
-
78
-
79
-
80
-
81
-
82
-
83
-
84
-
85
-
86
 |
 |