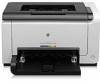
HP LaserJet Pro CP1025 HP LaserJet Pro CP1020 - Software Technical Reference - Page 55
For Windows Server 2003 and Windows XP Professional: Select, Install from Disk
 |
View all HP LaserJet Pro CP1025 manuals
Add to My Manuals
Save this manual to your list of manuals |
Page 55 highlights
To use the product driver only software solution with a direct USB connection, a USB Print port must have already been created by a previous installation of the printing-system software. There are several direct USB printing-system software installation options that establish a USB Print port: ● Complete an installation using the in-box printing-system software CD. ● Download the "Recommended Solution", which provides installation options identical to the printing-system software CD. Once a USB Print port is created by a previous direct USB installation, the product driver installation can be completed using that USB Print port. Use the following instructions to install the product driver only: 1. Click Start, and then do one of the following: For Windows 7: Click Devices and products. -or- For Windows Server 2003 and Windows XP Professional: Select Settings, and then click products and Faxes. -or- For Windows XP Home: Click Control Panel, and then double-click the products and Other Hardware icon. -or- For Windows Vista: Click Computer, click Control Panel, and then click Hardware and Sound. 2. Click Add product, and then click Next. 3. When asked if the product is a local or network product, select Local product attached to this computer, and then click Next. NOTE: Do not select the Automatically detect and install my Plug and Play product option. 4. On the Select a product Port screen, select the USB Print port that was created by a previous USB installation, and then click Next. 5. On the Install product Software screen, click Have Disk.... The Install from Disk dialog box appears. 6. Insert the printing-system software CD into the CD-ROM drive. 7. Click Browse..., and then select the product driver for the product. 8. Click Open. 9. On the Install from Disk dialog box, click OK. 10. Click Next. Complete the installation. When prompted, print a test page to ensure that the product driver is installed correctly. ENWW General Windows installation instructions 41
-
 1
1 -
2
-
3
-
4
-
5
-
6
-
7
-
8
-
9
-
10
-
11
-
12
-
13
-
14
-
15
-
16
-
17
-
18
-
19
-
20
-
21
-
22
-
23
-
24
-
25
-
26
-
27
-
28
-
29
-
30
-
31
-
32
-
33
-
34
-
35
-
36
-
37
-
38
-
39
-
40
-
41
-
42
-
43
-
44
-
45
-
46
-
47
-
48
-
49
-
 50
50 -
 51
51 -
 52
52 -
 53
53 -
 54
54 -
 55
55 -
 56
56 -
 57
57 -
 58
58 -
 59
59 -
 60
60 -
61
-
62
-
63
-
64
-
65
-
66
-
67
-
68
-
69
-
70
-
71
-
72
-
73
-
74
-
75
-
76
-
77
-
78
-
79
-
80
-
81
-
82
-
83
-
84
-
85
-
86
-
87
-
88
-
89
-
90
-
91
-
92
-
93
-
94
-
95
-
96
-
97
-
98
-
99
-
100
-
101
-
102
-
103
-
104
-
105
-
106
-
107
-
108
-
109
-
110
-
111
-
112
-
113
-
114
-
115
-
116
-
117
-
118
-
119
-
120
-
121
-
122
 |
 |