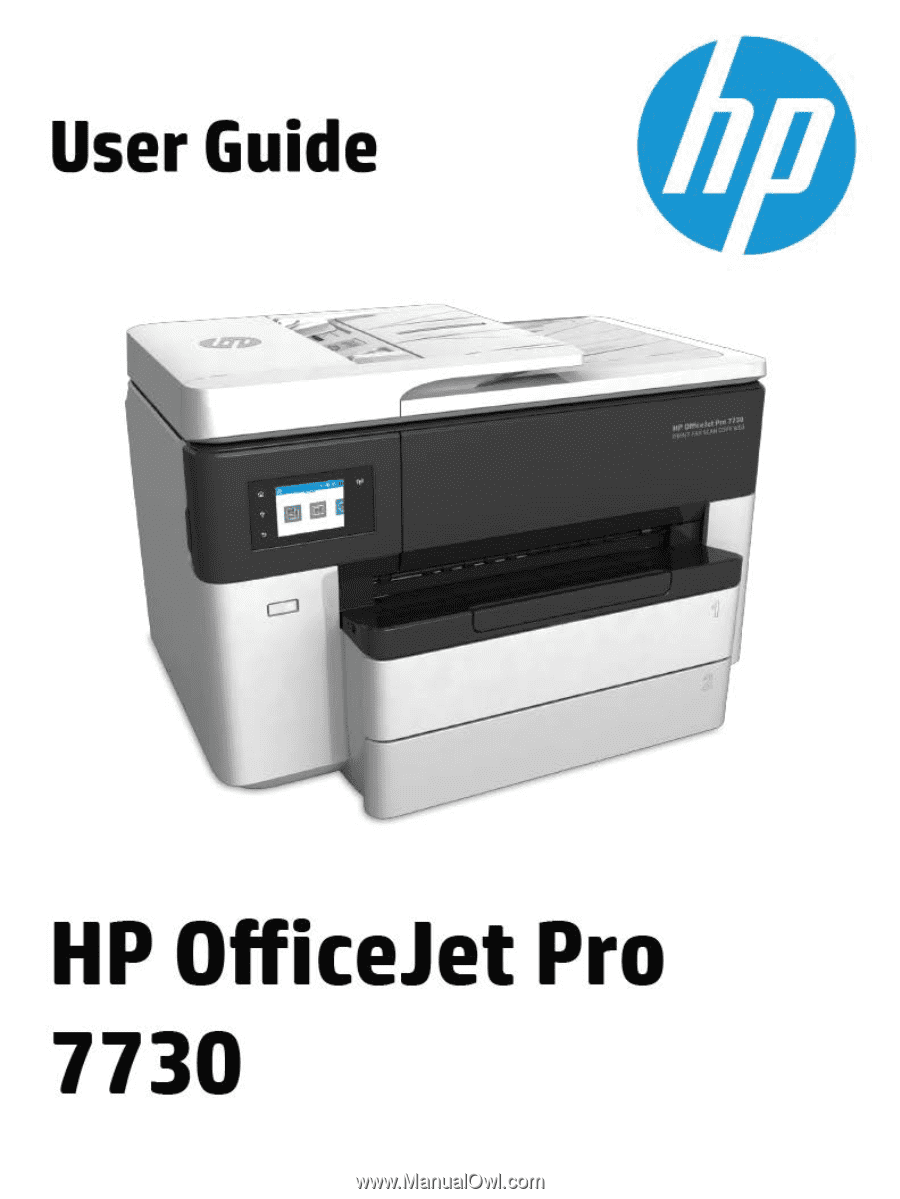
HP OfficeJet Pro 7730 User Guide
HP OfficeJet Pro 7730 Manual
 |
View all HP OfficeJet Pro 7730 manuals
Add to My Manuals
Save this manual to your list of manuals |
HP OfficeJet Pro 7730 manual content summary:
- HP OfficeJet Pro 7730 | User Guide - Page 1
- HP OfficeJet Pro 7730 | User Guide - Page 2
HP OfficeJet Pro 7730 Wide Format All-inOne series User Guide - HP OfficeJet Pro 7730 | User Guide - Page 3
rights reserved. Reproduction, adaptation, or translation of this material is prohibited without prior written permission of HP, except as allowed under copyright laws. The only warranties for HP products and services are set forth in the express warranty statements accompanying such products and - HP OfficeJet Pro 7730 | User Guide - Page 4
. - Install the product in a protected location where no one can step on or trip over the line cord, and the line cord cannot be damaged. - If the product does not operate normally, see Solve a problem. - There are no user-serviceable parts inside. Refer servicing to qualified service personnel. - HP OfficeJet Pro 7730 | User Guide - Page 5
- HP OfficeJet Pro 7730 | User Guide - Page 6
27 Load an original in the document feeder ...27 Update the printer ...28 Open the HP printer software (Windows) ...29 Use the HP Smart app to print, scan, and troubleshoot from an iOS, Android, or Windows 10 device 29 Turn the printer off ...30 3 Print ...31 Print documents ...31 Print brochures - HP OfficeJet Pro 7730 | User Guide - Page 7
a document or photo to email 45 Change account settings 45 Scan using HP Smart ...46 Scan from a Windows 10 device 46 Scan from an Android using printer memory ...55 Send a fax to multiple recipients ...55 Send a fax in Error Correction Mode 56 Receive a fax ...56 Receive a fax manually ...57 - HP OfficeJet Pro 7730 | User Guide - Page 8
70 Case A: Separate fax line (no voice calls received 72 Case B: Set up the printer with DSL 73 Case C: Set up the printer with a PBX phone system or an ISDN line 74 Case D: Fax with a distinctive ring service on the same line 74 Case E: Shared voice/fax line 75 Case F: Shared voice/fax - HP OfficeJet Pro 7730 | User Guide - Page 9
...90 What are Web Services? ...90 Set up Web Services ...90 Use Web Services ...91 HP ePrint ...92 Print apps ...92 Remove Web Services ...93 7 Work with cartridges ...94 Information on cartridges and the printhead ...94 Check the estimated ink levels ...95 Replace the cartridges ...95 Order - HP OfficeJet Pro 7730 | User Guide - Page 10
to do if the fax test failed ...126 Troubleshoot fax problems ...130 Read general instructions in the Help for specific fax problems 130 The display always shows Phone Off Hook 130 The printer is having problems sending and receiving faxes 130 The printer cannot receive faxes, but can send faxes - HP OfficeJet Pro 7730 | User Guide - Page 11
problems using Web Services ...137 Maintain the printer ...138 Clean the scanner glass ...138 Clean the exterior ...139 Clean the document feeder ...139 Maintain the printhead and cartridges 140 Restore original factory defaults and settings 141 HP support HP inkjet India 156 Restriction on hazardous - HP OfficeJet Pro 7730 | User Guide - Page 12
EPEAT ...157 SEPA Ecolabel User Information (China 157 China Energy Label for Printer, Fax and Copier 157 Battery disposal in Taiwan ...158 European Union Battery Directive 158 Index ...159 ENWW xi - HP OfficeJet Pro 7730 | User Guide - Page 13
xii ENWW - HP OfficeJet Pro 7730 | User Guide - Page 14
1 How do I? ● Get started ● Print ● Copy and scan ● Fax ● Web Services ● Work with cartridges ● Network setup ● Printer management tools ● Solve a problem ENWW 1 - HP OfficeJet Pro 7730 | User Guide - Page 15
with mobility impairments, the HP software functions can be executed through keyboard commands. The HP software also supports Windows accessibility options such as StickyKeys, ToggleKeys, FilterKeys, and MouseKeys. The printer doors, buttons, paper trays, and paper-width guides can be operated by - HP OfficeJet Pro 7730 | User Guide - Page 16
HP printer off after 8 hours of inactivity to help reduce energy use. Auto-Off turns the printer off completely, so you must use the Power button to turn on the printer again. If your printer supports following instructions to schedule the day and time for On and Off. 1. From the printer control - HP OfficeJet Pro 7730 | User Guide - Page 17
one of these to ON. 4. Touch the desired option, and follow the onscreen messages to set the day and time to turn the printer off and on. CAUTION: Always turn the printer problems with the cartridges and print quality issues. Never turn off the printer when cartridges are missing. HP recommends - HP OfficeJet Pro 7730 | User Guide - Page 18
paper, try the following: ● Recycle used original HP ink cartridges through HP Planet Partners. For more information, visit www.hp.com/recycle. ● Optimize paper usage by printing on both sides of the paper. ● Change the print quality in the printer driver to a draft setting. The draft setting uses - HP OfficeJet Pro 7730 | User Guide - Page 19
Top and front view 1 Document feeder 2 Document feeder paper-width guides 3 Document feeder tray 4 Scanner lid 5 Scanner glass 6 Cartridge access door 7 Output tray 8 Output tray extension 9 Input tray / Tray 1 10 Input tray / Tray2 11 Power button - HP OfficeJet Pro 7730 | User Guide - Page 20
control panel This section contains the following topics: ● Lift the control panel ● Overview of buttons and lights ● Control panel display icons ● Change printer settings ● Dashboard Lift the control panel You can move the control panel for easier use. ● Use the handle at the bottom left of the - HP OfficeJet Pro 7730 | User Guide - Page 21
side until it is back in place. Overview of buttons and lights The following diagram and related table provide a quick reference to the printer control panel features. Label 1 2 3 4 5 Name and Description Home button: Returns to the home screen from any other screen. Control panel display: Touch - HP OfficeJet Pro 7730 | User Guide - Page 22
Direct, Web Services setup, fax printer email address. For more information, see HP ePrint . Wi-Fi Direct: Displays the status, name, and password for Wi-Fi Direct, and the number of devices connected. You can also change settings and print a guide. Ink: Displays the estimated ink levels. NOTE: Ink - HP OfficeJet Pro 7730 | User Guide - Page 23
settings, print reports, or get help for the printer. TIP: If the printer is connected to a computer, you can also change the printer settings using the printer management tools in the software. For more information about these tools, see Printer management tools. To change settings for a function - HP OfficeJet Pro 7730 | User Guide - Page 24
of these papers might not be available. Photo printing ● HP Advanced Photo Paper This glossy photo paper features an instant-dry for easy handling. Get sharp, crisp images when you use this paper with any inkjet printer. It is available in glossy finish in several sizes, including A4, 8.5 x 11 - HP OfficeJet Pro 7730 | User Guide - Page 25
HP Bright White Inkjet Paper HP Bright White Inkjet HP paper supplies The printer is designed to work well with most types of office paper. Use HP paper for optimum print quality. To order HP papers and other supplies, go to www.hp guidelines. ● Load only one type and one size of paper at a - HP OfficeJet Pro 7730 | User Guide - Page 26
feeder. ● To prevent jams, poor print quality, and other printing problems, avoid loading the following paper in the tray or document feeder: printer will not use a locked tray even when the other tray is empty. NOTE: For better experience, load only one type of paper in a tray. NOTE: Tray 2 supports - HP OfficeJet Pro 7730 | User Guide - Page 27
. For more information, see Open the HP printer software (Windows). 2. Click Set Preferences under Print, Scan & Fax . 3. In the Printing preferences dialog box, click the Printing Shortcuts tab. 4. From the Paper Source drop-down list, select one of the auto selection options. 5. Click OK twice - HP OfficeJet Pro 7730 | User Guide - Page 28
of the tray as far as possible. ● To slide the paper-width guides, press the button on the left paper-width guide and slide the guide at the same time. ● To slide the paper-length guide, press the button on the paper-length guide and slide the guide at the same time. ENWW Load paper 15 - HP OfficeJet Pro 7730 | User Guide - Page 29
marking on the right edge of the tray. NOTE: Tray 2 can only be loaded with plain paper of standard sizes between A4 or Letter and A3 or Tabloid. Do not load paper while the printer is printing. 16 Chapter 2 Get started ENWW - HP OfficeJet Pro 7730 | User Guide - Page 30
paper-width guides and the paper-length guide until they touch the edge of the stack of paper. NOTE: Before inserting the input tray, check the gap in the printer where the input tray was and remove any paper. 5. Close the input tray cover and reinsert the input tray into the printer. ENWW Load - HP OfficeJet Pro 7730 | User Guide - Page 31
the tray as far as possible. ● To slide the paper-width guides, press the button on the left paper-width guide and slide the guide at the same time. ● To slide the paper-length guide, press the button on the paper-length guide and slide the guide at the same time. 18 Chapter 2 Get started ENWW - HP OfficeJet Pro 7730 | User Guide - Page 32
the stack of paper does not exceed the stack height marking on the left edge of the tray. NOTE: Do not load paper while the printer is printing. ENWW Load paper 19 - HP OfficeJet Pro 7730 | User Guide - Page 33
paper-width guides and the paper-length guide until they touch the edge of the stack of paper. NOTE: Before inserting the input tray, check the gap in the printer where the input tray was and remove any paper. 6. Close the input tray cover and reinsert the input tray into the printer. NOTE: When - HP OfficeJet Pro 7730 | User Guide - Page 34
of the tray as far as possible. ● To slide the paper-width guides, press the button on the left paper-width guide and slide the guide at the same time. ● To slide the paper-length guide, press the button on the paper-length guide and slide the guide at the same time. ENWW Load paper 21 - HP OfficeJet Pro 7730 | User Guide - Page 35
the stack of envelope does not exceed the stack height marking on the right edge of the tray. NOTE: Do not load paper while the printer is printing. 22 Chapter 2 Get started ENWW - HP OfficeJet Pro 7730 | User Guide - Page 36
paper-width guides and the paper-length guide until they touch the edge of the stack of paper. NOTE: Before inserting the input tray, check the gap in the printer where the input tray was and remove any paper. 5. Close the input tray cover and reinsert the input tray into the printer. ENWW Load - HP OfficeJet Pro 7730 | User Guide - Page 37
the tray as far as possible. ● To slide the paper-width guides, press the button on the left paper-width guide and slide the guide at the same time. ● To slide the paper-length guide, press the button on the paper-length guide and slide the guide at the same time. 24 Chapter 2 Get started ENWW - HP OfficeJet Pro 7730 | User Guide - Page 38
of card or photo does not exceed the stack height marking on the right edge of the tray. NOTE: Do not load paper while the printer is printing. ENWW Load paper 25 - HP OfficeJet Pro 7730 | User Guide - Page 39
paper-width guides and the paper-length guide until they touch the edge of the stack of paper. NOTE: Before inserting the input tray, check the gap in the printer where the input tray was and remove any paper. 5. Close the input tray cover and reinsert the input tray into the printer. 26 Chapter - HP OfficeJet Pro 7730 | User Guide - Page 40
lid on the printer. To load an original on the scanner glass 1. Lift the scanner lid. 2. Load your original print-side down and align it with the marking on the rear left corner of the glass. TIP: For more help on loading an original, refer to the engraved guides along the edge - HP OfficeJet Pro 7730 | User Guide - Page 41
damage to your photos. Use only paper that is supported by the document feeder. NOTE: Some features, such guides inward until they stop at the left and right edges of the paper. Update the printer By default, if the printer is connected to a network and Web Services has been enabled, the printer - HP OfficeJet Pro 7730 | User Guide - Page 42
, and troubleshoot from an iOS, Android, or Windows 10 device HP Smart (formerly known as HP All-in-One Printer Remote) helps you to set up, scan, print, share, and manage your HP printer. You can share documents and images through email, text messages, and popular cloud and social media services - HP OfficeJet Pro 7730 | User Guide - Page 43
network as your device. Then HP Smart will automatically detect the printer. Get more information about the HP Smart app For basic instructions on how to print, scan, and troubleshoot using HP Smart, see Print using the HP Smart app, Scan using HP Smart and Get help from the HP Smart app . For more - HP OfficeJet Pro 7730 | User Guide - Page 44
, or use special features. TIP: This printer includes HP ePrint , a free service from HP that allows you to print documents on your HP ePrint-enabled printer anytime, from any location, without any additional software or printer drivers. For more information, see HP ePrint . TIP: You can use this - HP OfficeJet Pro 7730 | User Guide - Page 45
, or Preferences . NOTE: To set print settings for all print jobs, make the changes in the HP software. For more information on the HP software, see Printer management tools. 5. Select the appropriate options on the Printing Shortcut tab. 6. If you want to change other print settings, click the - HP OfficeJet Pro 7730 | User Guide - Page 46
, or Preferences. NOTE: To set print settings for all print jobs, make the changes in the HP software. For more information on the HP software, see Printer management tools. 5. Select the appropriate options on the Printing Shortcut tab. 6. If you want to change other print settings, click the - HP OfficeJet Pro 7730 | User Guide - Page 47
( www.hp.com/go/mobileprinting ). (At this time, this website might not be available in all languages.) To print a photo from the computer (Windows) 1. Load paper in the input tray. For more information, see Load paper. 2. From your software, select Print. 3. Make sure your printer is selected - HP OfficeJet Pro 7730 | User Guide - Page 48
and then click Print. Print on special and custom-size paper If your application supports custom-size paper, set the size in the application before printing the document. If not, set the size in the printer driver. You might need to reformat existing documents to print them correctly on custom-size - HP OfficeJet Pro 7730 | User Guide - Page 49
printer you want to use is selected in the Format For pop-up menu. ● From the File menu in your software application, click Print, and then make sure the printer print jobs, make the changes in the HP software. For more information on the HP software, see Printer management tools. 5. On the Layout - HP OfficeJet Pro 7730 | User Guide - Page 50
on the HP software, see Printer management tools. 5. On the Printing Shortcut tab, select the Two-sided (Duplex) Printing shortcut. 6. If you want to change other print settings, click the other tabs. For more printing tips, see Tips for successful printing. NOTE: The printer supports automatic two - HP OfficeJet Pro 7730 | User Guide - Page 51
input tray. For more information, see Load paper. 2. Open HP Smart. For more information, see Use the HP Smart app to print, scan, and troubleshoot from an iOS, Android, or Windows 10 device. 3. On the HP Smart Home screen, make sure your printer is selected. TIP: If you want to select a different - HP OfficeJet Pro 7730 | User Guide - Page 52
or later are supported by the HP Print Service Plugin. Devices running Android 4.3 or earlier can print using the HP ePrint app, available in the Google Play Store. ● Windows Mobile: Tap Print from the Device menu. No setup is required since the software is preinstalled. NOTE: If your printer is not - HP OfficeJet Pro 7730 | User Guide - Page 53
one page guide do not bend the paper in the tray. Printer settings tips (Windows) Following are the printer settings tips for successful printing: ● To change default print settings, click Print, Scan & Fax , and then click Set Preferences in the HP printer software. To open the HP printer software - HP OfficeJet Pro 7730 | User Guide - Page 54
ink levels are low or when high quality prints are not needed. - Normal: Suitable for most print jobs. - Best: Better dpi than Normal. - Print in Max DPI: Highest dpi setting available for print quality. - HP Manually: Manually flip the pages after one or in reverse order. Printer settings tips (OS - HP OfficeJet Pro 7730 | User Guide - Page 55
, you can scan to a format that can be searched and edited. When scanning a borderless original, use the scanner glass and not the document feeder. NOTE: Some scan functions are only available after you have installed the HP printer software. TIP: If you have problems scanning documents, see Scan - HP OfficeJet Pro 7730 | User Guide - Page 56
cannot be disabled. If you are using network connection, follow these instructions if the feature has been disabled, and you wish to enable it again. 1. Open the HP printer software. For more information, see Open the HP printer software (Windows). 2. Click Print, Scan & Fax , and then click Scan - HP OfficeJet Pro 7730 | User Guide - Page 57
to review and modify detailed settings. For more information, see Change scan settings (Windows). If Show Viewer After Scan is selected, you can make adjustments to the scanned image in the preview screen. To scan an original from HP printer software (OS X and macOS) 1. Open HP Easy Scan. HP Easy - HP OfficeJet Pro 7730 | User Guide - Page 58
HP printer software (Windows). 3. In the printer software, click Scan a Document or Photo . 4. Select the type of scan you want and then click Scan . Choose Email as PDF or Email as JPEG to open your email software with the scanned file as an attachment. NOTE: The initial screen allows you to review - HP OfficeJet Pro 7730 | User Guide - Page 59
, see Use the HP Smart app to print, scan, and troubleshoot from an iOS, Android, or Windows 10 device. 3. Select Scan, and then select Scanner. 4. Click or tap the Settings icon to modify the basic settings. NOTE: Be sure to select the correct input source if your printer supports scan from both - HP OfficeJet Pro 7730 | User Guide - Page 60
or photo on your device. 1. Open HP Smart. For more information, see Use the HP Smart app to print, scan, and troubleshoot from an iOS, Android, or Windows icon. NOTE: Be sure to select the correct input source if your printer supports scan from both the document feeder and scanner glass. 2. When you - HP OfficeJet Pro 7730 | User Guide - Page 61
printer software. For more information, see Scanning documents as editable text. Scanning documents as editable text When scanning documents, you can use the HP software to scan documents into a format that you can search, copy, paste, and edit. This allows you to edit letters, newspaper clippings - HP OfficeJet Pro 7730 | User Guide - Page 62
. For more information, see Open the HP printer software (Windows). 3. In the printer software, click Scan a Document or Photo . 4. Select Save as Editable Text (OCR) and click Scan . NOTE: The initial screen allows you to review and modify basic settings. Click the More link at the top right - HP OfficeJet Pro 7730 | User Guide - Page 63
format, rather than JPEG. 1. Load your original print-side down on the scanner glass or print-side up in the document feeder. 2. Open the HP printer software. For more information, see Open the HP printer software (Windows). 3. In the printer software Scan dialog box to review and modify detailed - HP OfficeJet Pro 7730 | User Guide - Page 64
the HP printer software. For more information, see Open the HP printer software (Windows). 3. In the printer software, settings pane to review the settings in that section. You can review and change most pane. 6. When you have finished changing settings, do one of the following: ● Click Scan . You are - HP OfficeJet Pro 7730 | User Guide - Page 65
verify the fax is set up correctly by running the fax setup test from the printer control panel. ● Send a fax ● Receive a fax ● Set up phone book contacts ● Change fax settings ● Fax and digital phone services ● Fax on Voice over Internet Protocol ● Use reports ● Additional fax setup Send a fax You - HP OfficeJet Pro 7730 | User Guide - Page 66
can fax a document directly from your computer without printing it first. To use this feature, make sure you have installed the HP printer software on your computer, the printer is connected to a working telephone line, and the fax function is set up and functioning correctly. To send a standard fax - HP OfficeJet Pro 7730 | User Guide - Page 67
: If you are using a calling card and do not enter your PIN fast enough, the printer might start sending fax tones too soon and cause your PIN not to be recognized by the calling card service. If this is the case, create a phone book contact to store the PIN for your calling - HP OfficeJet Pro 7730 | User Guide - Page 68
keypad. Or touch ( Phone Book ), and then touch Local Phone Book or Call History to select a number or group to dial. 6. Touch Send Fax . The printer scans the originals into memory and sends the fax when the receiving fax machine is available. Send a fax to multiple recipients You can send a fax - HP OfficeJet Pro 7730 | User Guide - Page 69
the fax on two pages. NOTE: If you are copying a document when a fax arrives, the fax is stored in the printer memory until the copying finishes. ● Receive a fax manually ● Set up backup fax ● Reprint received faxes from memory ● Forward faxes to another number ● Set automatic reduction for incoming - HP OfficeJet Pro 7730 | User Guide - Page 70
can pick up the handset to talk or listen for fax tones. You can receive faxes manually from a phone that is directly connected to the printer (on the 2-EXT port). To receive a fax manually 1. Make sure the printer is turned on and you have paper loaded in the main tray. 2. Remove any originals from - HP OfficeJet Pro 7730 | User Guide - Page 71
forwarded in black and white, regardless of how they were originally sent. HP recommends that you verify the number you are forwarding to is a working time. 7. Fax forwarding is activated. Touch OK to confirm. If the printer loses power when fax forwarding is set up, it saves the fax forwarding setting - HP OfficeJet Pro 7730 | User Guide - Page 72
service through your phone provider, you can block specific fax numbers so the printer feature is not supported in all countries/regions. If it is not supported in your country/ 6. Do one of the following: ● To select a fax number to block from the call history list, touch ● Manually enter a - HP OfficeJet Pro 7730 | User Guide - Page 73
control panel, you can also use tools available on your computer, such as the HP printer software and the printer EWS. For more information, see Printer management tools. ● Create and edit a phone book contact ● Create and edit a group phone book contact ● Delete phone book contacts Create and - HP OfficeJet Pro 7730 | User Guide - Page 74
up group phone book contacts NOTE: Before you can create a group phone book contact, you must have already created at least one phone book contact. 1. From the printer control panel display, touch Fax . 2. Touch Phone Book , then touch and select ( Group ) to switch to the group phone book. 3. Touch - HP OfficeJet Pro 7730 | User Guide - Page 75
fax settings After completing the steps in the Getting Started Guide that came with the printer, use the following steps to change the initial settings or send. HP recommends that you set up the fax header by using the HP printer software. You can also set up the fax header from the printer control - HP OfficeJet Pro 7730 | User Guide - Page 76
manually. You must be available to respond in person to the incoming fax call or else the printer does not receive faxes. To set the answer mode 1. From the printer on one phone line. When you subscribe to this service, each number is assigned a different ring pattern. You can set up the printer to - HP OfficeJet Pro 7730 | User Guide - Page 77
, see Set the answer mode (Auto answer). 2. From the printer control panel display, touch Fax . 3. Touch Setup , and then select Preferences . 4. Touch Distinctive Ring . 5. Touch one ring pattern and then follow the on-screen instruction. NOTE: If you are using a PBX phone system that has - HP OfficeJet Pro 7730 | User Guide - Page 78
can set the fax speed used to communicate between your printer and other fax machines when sending and receiving faxes. If you use one of the following, setting the fax speed to a slower speed might be required: ● An Internet phone service ● A PBX (private branch exchange) system ● Fax on Voice over - HP OfficeJet Pro 7730 | User Guide - Page 79
, contact your Internet faxing services support department or your local service provider for further assistance. Use reports You can set up the printer to print error reports and confirmation reports automatically for each fax you send and receive. You can also manually print system reports as - HP OfficeJet Pro 7730 | User Guide - Page 80
the control panel after each fax is sent or received. To enable fax confirmation 1. From the printer control panel display, touch Fax . 2. Touch Setup . 3. Touch Reports and touch Fax Confirmation . 4. Touch to select one of the following options. On (Fax Send) On (Fax Receive) On (Fax Send and Fax - HP OfficeJet Pro 7730 | User Guide - Page 81
Touch Reports and touch Fax Error Reports. 4. Touch to select one of the following. On (Fax Send) On (Fax Receive the fax log also deletes all faxes stored in memory. To clear the fax log 1. From the printer control panel display, touch Fax . 2. Touch Setup , and then touch Tools. 3. Touch Clear Fax - HP OfficeJet Pro 7730 | User Guide - Page 82
all the steps in the Getting Started Guide, use the instructions in this section to complete your fax setup. Keep your Getting Started Guide for later use. In this section, you learn how to set up the printer so that faxing works successfully with equipment and services you might already have on the - HP OfficeJet Pro 7730 | User Guide - Page 83
on the back of the printer. NOTE: If you have a parallel-type phone system, HP recommends you connect a 2-wire Russia Spain USA Brazil China India Japan Malaysia Poland Saudi what types of equipment and services (if any) share the same phone line with the printer. This is important because you - HP OfficeJet Pro 7730 | User Guide - Page 84
at the same number you use for fax calls on the printer. 3. From the following table, select the combination of equipment and services applicable to your home or office setting. Then look up the recommended fax setup. Step-by-step instructions are included for each case in the sections that follow - HP OfficeJet Pro 7730 | User Guide - Page 85
line DSL PBX Distinctive Voice Computer dial- Answering ring service calls up modem machine Voice mail service Recommended fax setup Case C: Set up the printer with a PBX phone system or an ISDN line Case D: Fax with a distinctive ring service on the same line Case E: Shared voice/fax line - HP OfficeJet Pro 7730 | User Guide - Page 86
tones to the sending fax machine and receives the fax. Case B: Set up the printer with DSL If you have a DSL service through your telephone company, and do not connect any equipment to the printer, use the instructions in this section to connect a DSL filter between the telephone wall jack and the - HP OfficeJet Pro 7730 | User Guide - Page 87
problems setting up the printer with optional equipment, contact your local service provider or vendor for further assistance. Case C: Set up the printer or receive faxes with the printer. Refer to the documentation that came with your PBX phone system for instructions on how to turn off the - HP OfficeJet Pro 7730 | User Guide - Page 88
the printer. You might need to connect the phone cord to your country/region adapter. To set up the printer with a distinctive ring service 1. Connect one end fax. If you encounter problems setting up the printer with optional equipment, contact your local service provider or vendor for further - HP OfficeJet Pro 7730 | User Guide - Page 89
. If you pick up the phone before the printer answers the call and hear fax tones from a sending fax machine, you need to answer the fax call manually. If you encounter problems setting up the printer with optional equipment, contact your local service provider or vendor for further assistance. 76 - HP OfficeJet Pro 7730 | User Guide - Page 90
in person to incoming fax calls, or the printer cannot receive faxes. You must initiate the manual fax before voicemail picks up the line. If you encounter problems setting up the printer with optional equipment, contact your local service provider or vendor for further assistance. Case G: Fax - HP OfficeJet Pro 7730 | User Guide - Page 91
one end of the phone cord to your telephone wall jack, then connect the other end to the port labeled 1-LINE on the back of the printer. NOTE: You might need to connect the phone cord to your country/region adapter. 4. If your modem software is set to receive faxes to your computer - HP OfficeJet Pro 7730 | User Guide - Page 92
If you encounter problems setting up the printer with optional equipment, contact your local service provider or vendor for further assistance. Set up the printer with a computer DSL/ADSL modem If you have a DSL line and use that phone line to send faxes, follow these instructions to set up your fax - HP OfficeJet Pro 7730 | User Guide - Page 93
emitting fax reception tones to the sending fax machine and receives the fax. If you encounter problems setting up the printer with optional equipment, contact your local service provider or vendor for further assistance. Case H: Shared voice/fax line with computer modem There are two different - HP OfficeJet Pro 7730 | User Guide - Page 94
directions to set up your fax. If you encounter problems setting up the printer with optional equipment, contact your local service provider or vendor for further assistance. Shared voice/fax with computer DSL/ADSL modem Use these instructions if your computer has a DSL/ADSL modem ENWW Additional - HP OfficeJet Pro 7730 | User Guide - Page 95
on the back. Figure 5-10 Example of a parallel splitter To set up the printer with a computer DSL/ADSL modem 1. Obtain a DSL filter from your DSL phone number with DSL service need to be connected to additional DSL filters to avoid noise when making voice calls. 2. Connect one end of the phone - HP OfficeJet Pro 7730 | User Guide - Page 96
the fax. If you encounter problems setting up the printer with optional equipment, contact your local service provider or vendor for further printer, fax tones from a sending fax machine might be recorded on your answering machine, and you might not receive faxes with the printer. 3. Connect one end - HP OfficeJet Pro 7730 | User Guide - Page 97
to Answer setting on the printer to the maximum number of rings supported by your printer. (The maximum number of problems setting up the printer with optional equipment, contact your local service to see if it has one or two phone ports. NOTE: If your computer has only one phone port, you need to - HP OfficeJet Pro 7730 | User Guide - Page 98
on the back of the computer (the computer dial-up modem). 4. Connect one end of the phone cord to your telephone wall jack, then connect the answering machine and telephone to the printer. You can use standard phone cords for these connections. 6. If your modem software is set to receive faxes to - HP OfficeJet Pro 7730 | User Guide - Page 99
of rings. 9. Change the Rings to Answer setting on the printer to the maximum number of rings supported by the product. (The maximum number of rings varies by country message. If you encounter problems setting up the printer with optional equipment, contact your local service provider or vendor for - HP OfficeJet Pro 7730 | User Guide - Page 100
8. Change your Rings to Answer setting on the printer to the maximum number of rings supported by the printer. NOTE: The maximum number of rings varies by instructions to set up your fax. If you encounter problems setting up the printer with optional equipment, contact your local service provider - HP OfficeJet Pro 7730 | User Guide - Page 101
the telephone wall jack and plug it into the port labeled 2EXT on the back of the printer. 3. Connect a phone to the "OUT" port on the back of your computer dial-up modem. 4. Connect one end of the phone cord to your telephone wall jack, then connect the other end to the - HP OfficeJet Pro 7730 | User Guide - Page 102
setting in your modem software, the printer cannot receive faxes. 6. review the report for information on how to fix the problem and rerun the test. To test fax setup via the printer control panel 1. Set up the printer for faxing according to your particular home or office setup instructions - HP OfficeJet Pro 7730 | User Guide - Page 103
. HP ePrint ● HP ePrint is a free service from HP that allows you to print to your HP ePrint-enabled printer anytime, from any location. It's as simple as sending an email to the email address assigned to your printer when you enable Web Services on the printer. No special drivers or software are - HP OfficeJet Pro 7730 | User Guide - Page 104
prints an information page. Follow the instructions on the information page to finish the setup. To set up Web Services using the HP printer software (Windows) 1. Open the HP printer software. For more information, see Open the HP printer software (Windows). 2. In the window that appears, double - HP OfficeJet Pro 7730 | User Guide - Page 105
contains the printer code and instructions on how to customize the email address. To turn off HP ePrint 1. From the printer control panel, touch or swipe down the tab at the top of the screen to open the Dashboard, touch ( HP ePrint ), and then touch (Web Services Settings). 2. Touch HP ePrint , and - HP OfficeJet Pro 7730 | User Guide - Page 106
Use the following instructions to remove Web Services. To remove Web Services using the printer control panel 1. From the top of the screen, touch or swipe down the tab to open the Dashboard, touch ( HP ePrint ), and then touch (Web Services Settings). 2. Touch Remove Web Services. To remove Web - HP OfficeJet Pro 7730 | User Guide - Page 107
tips help maintain HP cartridges and ensure consistent print quality. ● The instructions in this guide are for problems. ● If you are transporting the printer, do the following to prevent ink leaking from the printer or other damage from occurring to the printer: - Make sure you turn off the printer - HP OfficeJet Pro 7730 | User Guide - Page 108
(either genuine HP or compatible) to continue printing. Related topics ● Check the estimated ink levels Check the estimated ink levels You can check the estimated ink levels from the printer software or from the printer control panel. To check the estimated ink levels from the printer control panel - HP OfficeJet Pro 7730 | User Guide - Page 109
the cartridge access door. Order cartridges To order cartridges, go to www.hp.com . (At this time, some portions of the HP website are available in English only.) Ordering cartridges online is not supported in all countries/regions. However, many countries have information on ordering by telephone - HP OfficeJet Pro 7730 | User Guide - Page 110
information, you can render the chip inoperable. However, after you render the memory chip inoperable, the cartridge cannot be used in an HP printer. If you are concerned about providing this anonymous information, you can make this information inaccessible by turning off the memory chip's ability - HP OfficeJet Pro 7730 | User Guide - Page 111
is covered as long as the HP ink is not depleted and the end of warranty date has not been reached. The end of warranty date, in YYYY/MM format, may be found on the cartridge as indicated: For a copy of the HP Limited Warranty Statement for the printer, see the printed documentation that came - HP OfficeJet Pro 7730 | User Guide - Page 112
or off the wireless capability of the printer NOTE: If you encounter problems connecting the printer, see Network and connection issues. TIP: For more information about setting up and using the printer wirelessly, visit the HP Wireless Printing Center ( www.hp.com/go/wirelessprinting ). Before you - HP OfficeJet Pro 7730 | User Guide - Page 113
. iOS/Android: On the home screen, tap the Plus icon and then tap Add Printer. Follow the onscreen instructions to add a printer to your network. Change the connection type After you have installed the HP printer software and connected the printer to your computer or to a network, you can use the - HP OfficeJet Pro 7730 | User Guide - Page 114
the list at Before you begin. 1. Open the HP printer software. For more information, see Open the HP printer software (Windows). 2. Click Tools. 3. Click Device Setup & Software. 4. Select Convert a USB connected printer to wireless. Follow the onscreen instructions. To change from a USB or Ethernet - HP OfficeJet Pro 7730 | User Guide - Page 115
connection Print the wireless test report for information about the printer wireless connection. The wireless test report provides information about the printer status, hardware (MAC) address, and IP address. If there is a problem with the wireless connection or if a wireless connection attempt - HP OfficeJet Pro 7730 | User Guide - Page 116
To print network settings Do one of the following: ● From the printer control panel, touch or swipe down the or the default gateway), you can change them manually. TIP: Before setting a manual IP address, it is recommended to first connect the printer to the network using Automatic mode. This allows - HP OfficeJet Pro 7730 | User Guide - Page 117
a computer, make sure you have installed the HP printer software. If you have not installed the HP printer software on the computer, connect to Wi-Fi Direct first and then install the printer software. Select Wireless when prompted by the printer software for a connection type. - If you are using - HP OfficeJet Pro 7730 | User Guide - Page 118
shown such as DIRECT-**-HP OfficeJet Pro 7730 (where ** are the unique characters to identify your printer), and then follow the onscreen instructions on the printer and your mobile device. 5. Print your document. To print from a wireless-capable mobile device that does not support Wi-Fi Direct Make - HP OfficeJet Pro 7730 | User Guide - Page 119
Click the Wi-Fi icon and choose the Wi-Fi Direct name, such as DIRECT-**-HP OfficeJet Pro 7730 (where ** are the unique characters to identify your printer). Enter the Wi-Fi Direct password when prompted. 4. Add the printer. a. Open System Preferences . b. Depending on your operating system, click - HP OfficeJet Pro 7730 | User Guide - Page 120
printer software. For more information, see Open the HP printer software (Windows). 2. Click Print, Scan & Fax . 3. Click Maintain Your Printer. HP Utility (OS X and macOS) HP Utility contains tools to configure print settings, calibrate the printer, order supplies online, and find website support - HP OfficeJet Pro 7730 | User Guide - Page 121
on the computer until you clear them manually. You can configure your browser to your printer, if you disable cookies, you also disable one or more HP OfficeJet Pro 7730 (where ** are the unique characters to identify your printer). 5. Enter the Wi-Fi Direct password when prompted. 6. In a supported - HP OfficeJet Pro 7730 | User Guide - Page 122
Configuration Page. ● Make sure the printer IP address is valid. The printer IP address should have the similar format as the router IP address. For HP online support website at www.support.hp.com . This website provides information and utilities that can help you correct many common printer problems - HP OfficeJet Pro 7730 | User Guide - Page 123
Understand printer reports ● Solve problems using Web Services ● Maintain the printer ● Restore original factory defaults and settings ● HP support Jams and paper-feed issues What do you want to do? Clear a paper jam Solve paper jam issues. Use an HP online troubleshooting wizard Instructions for - HP OfficeJet Pro 7730 | User Guide - Page 124
Read general instructions in the Help for clearing paper jams Paper jams can occur in several locations inside the printer. CAUTION: To prevent possible damage to the printhead, clear paper jams as soon as possible. To clear a paper jam from Tray 1 1. Pull Tray 1 out of the printer completely. 2. - HP OfficeJet Pro 7730 | User Guide - Page 125
the printer. To clear a paper jam from the front of the printer NOTE: Do not turn off the printer when there is a paper jam in the front of the printer. 1. the far right of the printer and remove the jammed paper. If necessary, move the carriage to the far left of the printer, and remove any jammed - HP OfficeJet Pro 7730 | User Guide - Page 126
3. Close the cartridge access door. To clear a paper jam from the rear of the printer 1. Turn to the rear of the printer. 2. Press the two tabs on the rear access door and open the door. 3. Remove any jammed paper. 4. Press the two buttons on the paper path - HP OfficeJet Pro 7730 | User Guide - Page 127
6. Insert the paper path cover back into the printer. 7. Close the rear access door. To clear a paper jam from the document feeder 1. Lift the cover of the document feeder. 2. Pull any jammed paper out of the rollers. 114 Chapter 10 Solve a problem ENWW - HP OfficeJet Pro 7730 | User Guide - Page 128
scanner lid to check, if there is jammed paper, remove it. Clear a print carriage jam Resolve a print carriage jam Use an HP online troubleshooting wizard. If something is blocking the print carriage or it does not move easily, get step-by-step instructions. ENWW Jams and paper-feed issues 115 - HP OfficeJet Pro 7730 | User Guide - Page 129
NOTE: The HP online troubleshooting wizards may not be available in all languages. Read general instructions in the Help for to check the opening in the printer where the tray was, and reach into the gap to remove any paper. Solve paper-feed problems What kind of problem are you having? ● Paper - HP OfficeJet Pro 7730 | User Guide - Page 130
problems with print jobs not printing. The HP Print and Scan Doctor is a utility that will try to diagnose and fix the issue automatically. NOTE: This utility is only available for Windows operating system. Use an HP online troubleshooting wizard. Get step-by-step instructions if the printer - HP OfficeJet Pro 7730 | User Guide - Page 131
messages from the printer display and resolve them by following the onscreen instructions. 2. If your computer is connected to the printer with a USB the printer is set as the default printer. To verify that the printer is set as the default printer a. Depending on your operating system, do one of - HP OfficeJet Pro 7730 | User Guide - Page 132
. d. Try using your printer again. 5. Restart the print spooler. To restart the print spooler a. Depending on your operating system, do one of the following: Windows 10 i. From the Windows Start menu, select Windows Administrative Tools from the app list, and then select Services. ii. Right-click - HP OfficeJet Pro 7730 | User Guide - Page 133
, and click Restart to restart the service. b. Make sure the correct printer is set as the default printer. The default printer has a check mark in a black or green circle next to it. c. If the wrong printer is set as the default printer, right-click the correct printer and select Set as Default - HP OfficeJet Pro 7730 | User Guide - Page 134
cable. 3. Verify that the product is not paused or offline. To verify that the product is not paused or offline a. In System Preferences, click Printers & Scanners . b. Click the Open Print Queue button. c. Click a print job to select it. Use the following buttons to manage the print job: ● Delete - HP OfficeJet Pro 7730 | User Guide - Page 135
the Device Services tab. The printer prints an alignment sheet. 5. Print a diagnostics page if the cartridges are not low on ink. To print a diagnostics page from the printer software a. Load Letter, A4, or Legal unused plain white paper into the input tray. b. Open the HP printer software. For more - HP OfficeJet Pro 7730 | User Guide - Page 136
the printer software, click Print, Scan, & Fax and then click Maintain Your Printer to access the Printer Toolbox. d. Click Clean Printheads on the Device Services tab. Follow the onscreen instructions. 7. If cleaning the printhead does not solve the problem, contact HP support. Go to www.support.hp - HP OfficeJet Pro 7730 | User Guide - Page 137
aligning the printhead. If print quality problems persist after cleaning and aligning, contact HP support. f. Click All Settings to return to the Information and Support pane. To improve print quality from the printer display 1. Make sure you are using original HP cartridges. 2. Make sure you have - HP OfficeJet Pro 7730 | User Guide - Page 138
If prompted, select your country/region, and then click All HP Contacts for information on calling for technical support. Copy issues Troubleshoot copy problems Use an HP online troubleshooting wizard. Get step-by-step instructions if the printer does not create a copy, or if your printouts are low - HP OfficeJet Pro 7730 | User Guide - Page 139
, continue reviewing the troubleshooting information in this section. ● Try to send or receive a test fax. If you can send or receive a fax successfully, there might not be a problem. ● If you are running the test from the Fax Setup Wizard (Windows) or HP Utility (OS X), make sure the printer is not - HP OfficeJet Pro 7730 | User Guide - Page 140
printer is ready for faxing. If the Fax Hardware Test continues to fail and you experience problems faxing, contact HP support. Go to www.support.hp splitter and connecting the printer directly to the telephone wall jack. Plug the phone cord into the correct port 1. Connect one end of the phone cord - HP OfficeJet Pro 7730 | User Guide - Page 141
to the port labelled 1-LINE on the back of the printer. ● Check the connection between the telephone wall jack and the printer to make sure the phone cord is secure. ● If you are using a phone splitter, this can cause faxing problems. (A splitter is a two-cord connector that plugs into a telephone - HP OfficeJet Pro 7730 | User Guide - Page 142
them back one at a time and rerunning the test each time, until you identify which piece of equipment is causing the problem. - If the Fax Line Condition Test fails without the other equipment, connect the printer to a working phone line and continue reviewing the troubleshooting information in - HP OfficeJet Pro 7730 | User Guide - Page 143
phone line. Troubleshoot fax problems Troubleshoot fax problems Use an HP online troubleshooting wizard. Resolve problems sending or receiving a fax or faxing to your computer. NOTE: The HP online troubleshooting wizards may not be available in all languages. Read general instructions in the Help - HP OfficeJet Pro 7730 | User Guide - Page 144
(ECM) off and try faxing again. If the problem persists, contact your telephone company. ● If you are using a digital subscriber line (DSL) service, make sure that you have a DSL filter connected or you cannot fax successfully. ● Make sure the printer is not connected to a telephone wall jack that - HP OfficeJet Pro 7730 | User Guide - Page 145
contact your DSL provider for support. ● If you are using a phone splitter, this can cause faxing problems. (A splitter is a two manually; otherwise, the printer cannot receive the fax. ● If you have a voice mail service at the same phone number you use for fax calls, you must receive faxes manually - HP OfficeJet Pro 7730 | User Guide - Page 146
back one at a time and receiving a fax each time, until you identify which equipment is causing the problem. ● If you have a special ring pattern for your fax phone number (using a distinctive ring service through your telephone company), make sure that the Distinctive Ring feature on the printer is - HP OfficeJet Pro 7730 | User Guide - Page 147
Use an HP online troubleshooting wizard Troubleshoot your Wi-Fi Direct problem or learn how to configure Wi-Fi Direct. NOTE: The HP online troubleshooting wizards may not be available in all languages. Read general instructions in the Help for Wi-Fi Direct troubleshooting 1. Check the printer to - HP OfficeJet Pro 7730 | User Guide - Page 148
. If you know that antivirus or firewall software is preventing your computer from connecting to the printer, use the HP online firewall troubleshooter to help solve the problem. ● HP Print and Scan Doctor Run the HP Print and Scan Doctor to troubleshoot the issue automatically. The utility will try - HP OfficeJet Pro 7730 | User Guide - Page 149
app The HP Smart app provides alerts for printer issues (jams and other problems), links to help content, and options to contact support for additional assistance. Understand printer reports You can print the following reports to help troubleshoot problems with the printer. ● Printer status report - HP OfficeJet Pro 7730 | User Guide - Page 150
. You can use the network configuration page to help troubleshoot network connectivity problems. If you need to call HP, it is often useful to print this page before calling. Print quality report Print quality problems can have many causes-software settings, a poor image file, or the printing system - HP OfficeJet Pro 7730 | User Guide - Page 151
HP ePrint requirements. For more information, visit HP Services. For more information, see Set up Web Services. TIP: For additional help on setting up and using Web Services, visit HP Connected (this site might not be available in all countries/regions). Maintain the printer printer, turn the printer - HP OfficeJet Pro 7730 | User Guide - Page 152
pick up plain paper, you can clean the rollers and separator pad. To clean the rollers or separator pad WARNING! Before cleaning the printer, turn the printer off by pressing the power cord from the electrical socket. 1. Remove all originals from the document feeder tray. (the Power button) and - HP OfficeJet Pro 7730 | User Guide - Page 153
stage lasts about two minutes, uses one sheet of paper, and uses an increasing amount of ink. After each stage, review the quality of the printed page. problems persist after cleaning and aligning, contact HP support. For more information, see HP support. ● Align the printhead when the printer - HP OfficeJet Pro 7730 | User Guide - Page 154
Maintenance , select the desired option, and then follow the onscreen instructions. NOTE: You can also do the same from the HP printer software or embedded web server (EWS). To access the software or EWS, see Open the HP printer software (Windows) or Open the embedded web server. Restore original - HP OfficeJet Pro 7730 | User Guide - Page 155
the printer support website at www.support.hp.com. HP online support provides a variety of options for help with your printer: Drivers & downloads: Download software drivers and updates, as well as product manuals and documentation that came in the box with your printer. HP support forums: Visit HP - HP OfficeJet Pro 7730 | User Guide - Page 156
on the printer, such as HP OfficeJet Pro XXXX) ● Product number (located near the cartridge access area) ● Serial number (located on the back or bottom of the printer) Register printer By taking just a few quick minutes to register, you can enjoy quicker service, more efficient support, and product - HP OfficeJet Pro 7730 | User Guide - Page 157
see the Product Data Sheet at www.support.hp.com . System requirements ● For information about software and system requirements or future operating system releases and support, visit the HP online support website at www.support.hp.com . Environmental specifications ● Operating temperature: 5° to 40 - HP OfficeJet Pro 7730 | User Guide - Page 158
capacity ● Plain paper sheets (60 to 90 g/m2 [16 to 24 lb]): Up to 35 Paper size and weights For the list of supported paper sizes, see the HP printer software. ● Plain paper: 60 to 105 g/m2 (16 to 28 lb) ● Envelopes: 75 to 90 g/m2 (20 to 24 lb) ● Cards: Up to 200 - HP OfficeJet Pro 7730 | User Guide - Page 159
● Fax to PC specifications: - Supported file types: Uncompressed TIFF - Supported fax types: black-and-white faxes Cartridge yield ● Visit www.hp.com/go/learnaboutsupplies for more information on estimated cartridge yields. Regulatory notices The printer meets product requirements from regulatory - HP OfficeJet Pro 7730 | User Guide - Page 160
number should not be confused with the marketing name (HP OfficeJet Pro 7730 Wide Format All-in-One series, etc.) or product numbers (Y0S19A, etc.). full Declaration of Conformity can be found at the following website: www.hp.eu/certificates (Search with the product model name or its Regulatory - HP OfficeJet Pro 7730 | User Guide - Page 161
- CAUTION: IEEE 802.11x wireless LAN with 5.15-5.35 GHz frequency band is restricted for indoor use only for all countries reflected in the matrix. Using this WLAN application outdoor might lead to interference issues with existing radio services. 148 Appendix A Technical information ENWW - HP OfficeJet Pro 7730 | User Guide - Page 162
Declaration of conformity ENWW Regulatory notices 149 - HP OfficeJet Pro 7730 | User Guide - Page 163
Visual display workplaces statement for Germany GS-Erklärung (Deutschland) 150 Appendix A Technical information ENWW - HP OfficeJet Pro 7730 | User Guide - Page 164
Telefonstecker, der im Lieferumfang des HP All-in-One enthalten ist, an die Wandsteckdose (TAE 6) Code N an. Dieses HP-Fax kann als einzelnes Ger normal operation is minimized. This product and any attached external antenna, if supported, shall be placed in such a manner to minimize the potential for - HP OfficeJet Pro 7730 | User Guide - Page 165
Paper ● Plastics ● Safety data sheets ● Recycling program ● HP inkjet supplies recycling program ● Power consumption ● Disposal of waste equipment (India) ● Restriction on hazardous substances statement (Turkey) ● EPEAT ● SEPA Ecolabel User Information (China) ● China Energy Label for Printer, Fax - HP OfficeJet Pro 7730 | User Guide - Page 166
hp.com/recycle HP inkjet supplies recycling program HP is committed to protecting the environment. The HP Inkjet Supplies Recycling Program is available in many countries/regions, and lets you recycle used print cartridges and ink disposal service, or go to http://www.hp.com/recycle. ENWW Environmental - HP OfficeJet Pro 7730 | User Guide - Page 167
Chemical substances HP is committed to providing our customers with information about the chemical substances in our products as the European Parliament and the Council). A chemical information report for this product can be found at: www.hp.com/go/ reach. 154 Appendix A Technical information ENWW - HP OfficeJet Pro 7730 | User Guide - Page 168
that the restricted substance corresponds to the exemption. www.support.hp.com To access the latest user guides or manuals for your product, go to www.support.hp.com. Select Find your product, and then follow the onscreen instructions. ENWW Environmental product stewardship program 155 - HP OfficeJet Pro 7730 | User Guide - Page 169
This product, as well as its related consumables and spares, complies with the reduction in hazardous substances provisions of the "India E-waste Rule 2016." It does not contain lead, mercury, hexavalent chromium, polybrominated biphenyls or polybrominated diphenyl ethers in concentrations exceeding - HP OfficeJet Pro 7730 | User Guide - Page 170
registered products go to www.hp.com/hpinfo/globalcitizenship/environment/pdf/ epeat_printers.pdf. SEPA Ecolabel User Information (China) 63.0 dB(A China Energy Label for Printer, Fax and Copier GB 21521 1 3 1 2 GB 21521 W W W ENWW Environmental product - HP OfficeJet Pro 7730 | User Guide - Page 171
used to maintain data integrity of real time clock or product settings and is designed to last the life of the product. Any attempt to service or replace this battery should be performed by a qualified - HP OfficeJet Pro 7730 | User Guide - Page 172
door, locating 6 Cartridges 7 cartridges 96 check ink levels 95 locating 6 replace 95 tips 94 specifications 145 correct port test, fax 127 customer support warranty 143 D diagnostic page 137 dial tone 74 document feeder clean 139 feeding problems, troubleshoot 139 load originals 28 double-sided - HP OfficeJet Pro 7730 | User Guide - Page 173
68 manual receive troubleshoot 130, 132 redial options 64 reduction troubleshoot 89 troubleshoot 126 HP Utility (OS X) opening 107 humidity specifications 144 I ink cartridges part numbers 96 ink level icons 9 ink levels, check 95 Internet Protocol fax, using 66 IP address checking for printer troubleshoot - HP OfficeJet Pro 7730 | User Guide - Page 174
troubleshoot 135 Print brochures print 32 print quality clean page smear 140 print quality report 137 printer control panel locating 6 network settings 102 send faxes 53 printer software (Windows) about 107 opening 29, 107 printer 58 manually 57 rings to answer 63 troubleshoot 130, 132 recycle ink - HP OfficeJet Pro 7730 | User Guide - Page 175
9 skew, troubleshoot print 117 software OCR 48 Webscan paper-width guides illustration 6 troubleshoot feeding 116 troubleshoot answering HP Smart 136 multiple pages are picked 117 network configuration page 137 paper not picked up from tray 116 paper-feed problems 116 power 135 print 135 printer - HP OfficeJet Pro 7730 | User Guide - Page 176
-
 1
1 -
 2
2 -
 3
3 -
 4
4 -
 5
5 -
 6
6 -
 7
7 -
8
-
9
-
10
-
11
-
12
-
13
-
14
-
15
-
16
-
17
-
18
-
19
-
20
-
21
-
22
-
23
-
24
-
25
-
26
-
27
-
28
-
29
-
30
-
31
-
32
-
33
-
34
-
35
-
36
-
37
-
38
-
39
-
40
-
41
-
42
-
43
-
44
-
45
-
46
-
47
-
48
-
49
-
50
-
51
-
52
-
53
-
54
-
55
-
56
-
57
-
58
-
59
-
60
-
61
-
62
-
63
-
64
-
65
-
66
-
67
-
68
-
69
-
70
-
71
-
72
-
73
-
74
-
75
-
76
-
77
-
78
-
79
-
80
-
81
-
82
-
83
-
84
-
85
-
86
-
87
-
88
-
89
-
90
-
91
-
92
-
93
-
94
-
95
-
96
-
97
-
98
-
99
-
100
-
101
-
102
-
103
-
104
-
105
-
106
-
107
-
108
-
109
-
110
-
111
-
112
-
113
-
114
-
115
-
116
-
117
-
118
-
119
-
120
-
121
-
122
-
123
-
124
-
125
-
126
-
127
-
128
-
129
-
130
-
131
-
132
-
133
-
134
-
135
-
136
-
137
-
138
-
139
-
140
-
141
-
142
-
143
-
144
-
145
-
146
-
147
-
148
-
149
-
150
-
151
-
152
-
153
-
154
-
155
-
156
-
157
-
158
-
159
-
160
-
161
-
162
-
163
-
164
-
165
-
166
-
167
-
168
-
169
-
170
-
171
-
172
-
173
-
174
-
175
-
176
 |
 |