HP Photosmart E217 User's Manual - Page 63
Print Setup, Playback, Images: ALL, selected is shown. Otherwise
 |
View all HP Photosmart E217 manuals
Add to My Manuals
Save this manual to your list of manuals |
Page 63 highlights
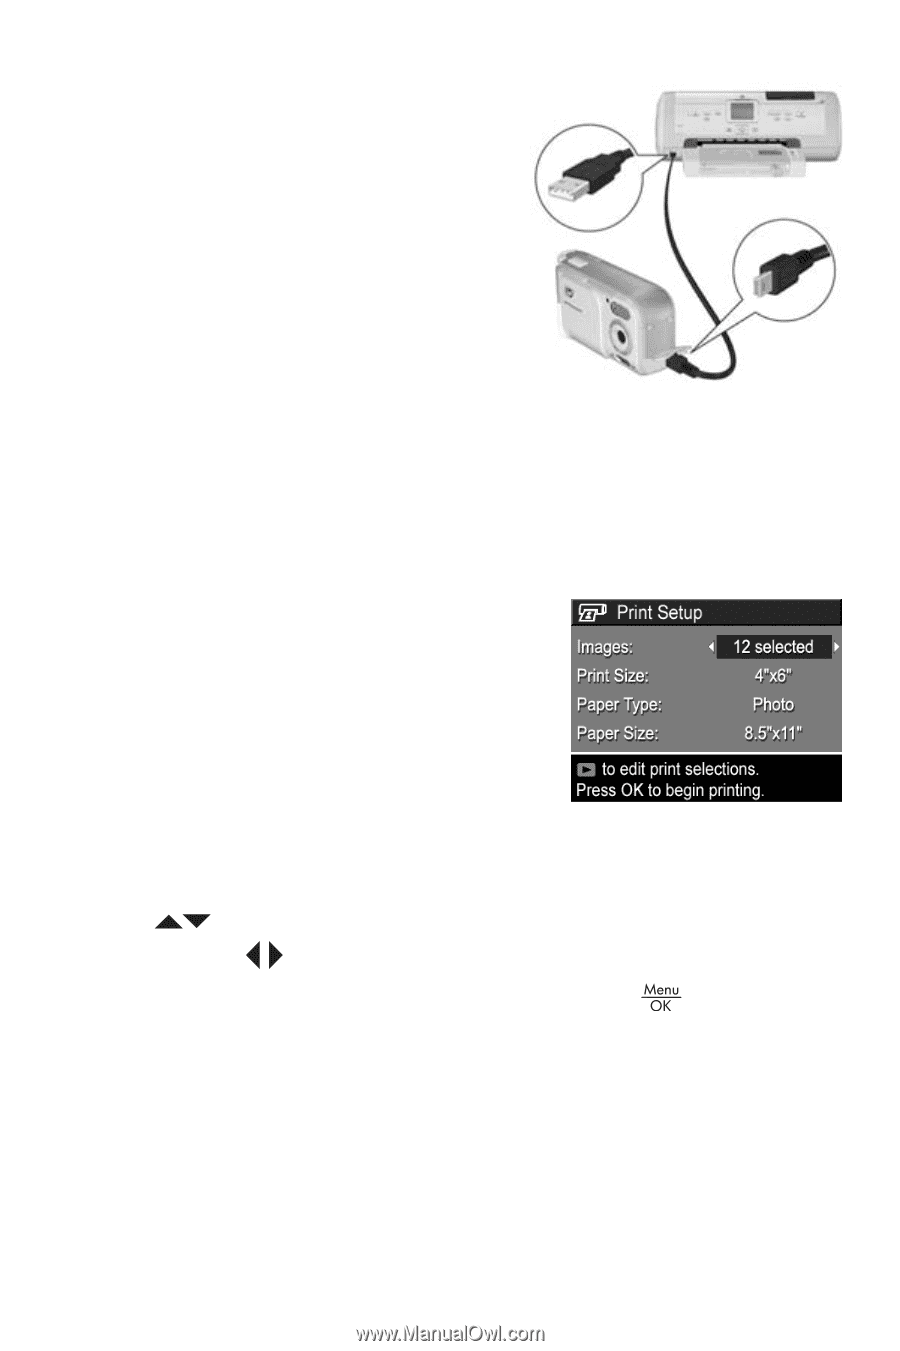
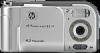
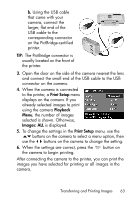
b. Using the USB cable that came with your camera, connect the larger, flat end of the USB cable to the corresponding connector on the PictBridge-certified printer. TIP: The PictBridge connector is usually located on the front of the printer. 3. Open the door on the side of the camera nearest the lens and connect the small end of the USB cable to the USB connector on the camera. 4. When the camera is connected to the printer, a Print Setup menu displays on the camera. If you already selected images to print using the camera Playback Menu, the number of images selected is shown. Otherwise, Images: ALL is displayed. 5. To change the settings in the Print Setup menu, use the buttons on the camera to select a menu option, then use the buttons on the camera to change the setting. 6. When the settings are correct, press the the camera to begin printing. button on After connecting the camera to the printer, you can print the images you have selected for printing or all images in the camera. Transferring and Printing Images 63
-
 1
1 -
2
-
3
-
4
-
5
-
6
-
7
-
8
-
9
-
10
-
11
-
12
-
13
-
14
-
15
-
16
-
17
-
18
-
19
-
20
-
21
-
22
-
23
-
24
-
25
-
26
-
27
-
28
-
29
-
30
-
31
-
32
-
33
-
34
-
35
-
36
-
37
-
38
-
39
-
40
-
41
-
42
-
43
-
44
-
45
-
46
-
47
-
48
-
49
-
50
-
51
-
52
-
53
-
54
-
55
-
56
-
57
-
 58
58 -
 59
59 -
 60
60 -
 61
61 -
 62
62 -
 63
63 -
 64
64 -
 65
65 -
 66
66 -
 67
67 -
 68
68 -
69
-
70
-
71
-
72
-
73
-
74
-
75
-
76
-
77
-
78
-
79
-
80
-
81
-
82
-
83
-
84
-
85
-
86
-
87
-
88
-
89
-
90
-
91
-
92
-
93
-
94
-
95
-
96
-
97
-
98
-
99
-
100
-
101
-
102
-
103
-
104
-
105
-
106
-
107
-
108
-
109
-
110
-
111
-
112
-
113
-
114
-
115
-
116
-
117
-
118
-
119
-
120
-
121
-
122
-
123
-
124
-
125
-
126
-
127
-
128
-
129
-
130
-
131
-
132
-
133
-
134
-
135
-
136
-
137
-
138
 |
 |