HP Rp3000 Service Reference Guide: HP rp3000 Point of Sale - Page 65
Connecting Data and Power Cables to the Powered Serial Port Expansion Card - point of sale computers
 |
UPC - 884420494096
View all HP Rp3000 manuals
Add to My Manuals
Save this manual to your list of manuals |
Page 65 highlights
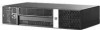
d. To install the Powered Serial Port Expansion Card, align the bracket on the card with the open slot on the rear of the chassis and press the card straight into the expansion socket (1). Replace the screw that secures the card to the chassis (2). NOTE: When installing an expansion card, press firmly on the card so that the whole connector seats properly in the expansion card slot. Figure 6-32 Installing the Powered Serial Port Expansion Card e. Connect the data cable to the riser card (1) and the expansion card (2). Connect the power cable to the expansion card (3). Figure 6-33 Connecting Data and Power Cables to the Powered Serial Port Expansion Card 5. Replace the computer cover. 6. If the serial ports are configured in powered mode, connect the powered Point of Sale device. HP offers two preconfigured serial port jumper configurations by selecting one of the following two AV#'s when you order the platform. Powered Serial Ports - Removal and Installation 57
-
 1
1 -
2
-
3
-
4
-
5
-
6
-
7
-
8
-
9
-
10
-
11
-
12
-
13
-
14
-
15
-
16
-
17
-
18
-
19
-
20
-
21
-
22
-
23
-
24
-
25
-
26
-
27
-
28
-
29
-
30
-
31
-
32
-
33
-
34
-
35
-
36
-
37
-
38
-
39
-
40
-
41
-
42
-
43
-
44
-
45
-
46
-
47
-
48
-
49
-
50
-
51
-
52
-
53
-
54
-
55
-
56
-
57
-
58
-
59
-
 60
60 -
 61
61 -
 62
62 -
 63
63 -
 64
64 -
 65
65 -
 66
66 -
 67
67 -
 68
68 -
 69
69 -
 70
70 -
71
-
72
-
73
-
74
-
75
-
76
-
77
-
78
-
79
-
80
-
81
-
82
-
83
-
84
-
85
-
86
-
87
-
88
-
89
-
90
-
91
-
92
-
93
-
94
-
95
-
96
-
97
-
98
-
99
-
100
-
101
-
102
-
103
-
104
-
105
-
106
-
107
-
108
-
109
-
110
-
111
-
112
-
113
-
114
-
115
-
116
-
117
-
118
-
119
-
120
-
121
-
122
-
123
-
124
-
125
-
126
-
127
-
128
-
129
-
130
-
131
-
132
-
133
-
134
 |
 |
