HP StorageWorks 2/16V HP StorageWorks Fabric OS 5.3.x administrator guide (569 - Page 158
Creating an admin domain, How to create an Admin Domain, create, apply
 |
View all HP StorageWorks 2/16V manuals
Add to My Manuals
Save this manual to your list of manuals |
Page 158 highlights
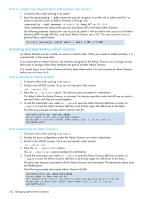
Creating an admin domain To create an Admin Domain, you must specify an Admin Domain name or number or both. • If you create an Admin Domain using only a number, the Admin Domain name is automatically assigned to be "ADn", where n is the number you specified. For example, if you specify AD number = 4, then AD name is set to "AD4". • If you create an Admin Domain using only a name, the Admin Domain number is automatically assigned and is the lowest available AD number, except if you specify a name in the format "ADn", in which case the Admin Domain number is assigned to be n. For example, if you specify AD name = "blueAD" and the lowest available AD number is 5, then AD name is "blueAD" and AD number is 5. If you specify AD name = "AD15" and the lowest available AD number is 6, then AD name is "AD15" and AD number is 15. Because the specified name is in the format "ADn", the AD number is assigned to be n and not the lowest available AD number. When you create an Admin Domain, you must specify at least one member (switch, switch port, or device). You cannot create an empty Admin Domain. For more information about these member types, see "Admin domain member types" on page 154. You create Admin Domains in the transaction buffer using the ad --create command. You can either save the newly created Admin Domain to a defined configuration (using ad --save) or make it the effective Admin Domain configuration directly (using ad --apply). The following procedures describe the steps for creating Admin Domains and include examples. How to create an Admin Domain 1. Log in as the physical fabric administrator to an AD-aware switch in the fabric. 2. Set the default zone mode to No Access, if you have not already done so. See How to set the default zone mode, page 159 for instructions. 3. Switch to the AD255 context, if you are not already in that context: ad --select 255 4. Enter the ad --create command using the -d option to specify device and switch port members and the -s option to specify switch members: ad --create ad_id -d "dev_list" -s "switch_list" where ad_id is the Admin Domain name or number, dev_list is a list of device WWNs or domain,port members, and switch_list is a list of switch WWNs or domain IDs. 5. To end the transaction now, enter ad --save to save the Admin Domain definition or enter ad --apply to save the Admin Domain definition and directly apply the definitions to the fabric. The following example creates Admin Domain AD1, consisting of two switches, which are designated by domain ID and switch WWN. sw5:AD255:admin> ad --create AD1 -s "97; 10:00:00:60:69:80:59:13" The following example creates Admin Domain "blue_ad," consisting of two switch ports (designated by domain,port), one device (designated by device WWN), and two switches (designated by domain ID and switch WWN). sw5:AD255:admin> ad --create blue_ad -d "100,5; 1,3; 21:00:00:e0:8b:05:4d:05; -s "97; 10:00:00:60:69:80:59:13" 160 Managing administrative domains
-
 1
1 -
2
-
3
-
4
-
5
-
6
-
7
-
8
-
9
-
10
-
11
-
12
-
13
-
14
-
15
-
16
-
17
-
18
-
19
-
20
-
21
-
22
-
23
-
24
-
25
-
26
-
27
-
28
-
29
-
30
-
31
-
32
-
33
-
34
-
35
-
36
-
37
-
38
-
39
-
40
-
41
-
42
-
43
-
44
-
45
-
46
-
47
-
48
-
49
-
50
-
51
-
52
-
53
-
54
-
55
-
56
-
57
-
58
-
59
-
60
-
61
-
62
-
63
-
64
-
65
-
66
-
67
-
68
-
69
-
70
-
71
-
72
-
73
-
74
-
75
-
76
-
77
-
78
-
79
-
80
-
81
-
82
-
83
-
84
-
85
-
86
-
87
-
88
-
89
-
90
-
91
-
92
-
93
-
94
-
95
-
96
-
97
-
98
-
99
-
100
-
101
-
102
-
103
-
104
-
105
-
106
-
107
-
108
-
109
-
110
-
111
-
112
-
113
-
114
-
115
-
116
-
117
-
118
-
119
-
120
-
121
-
122
-
123
-
124
-
125
-
126
-
127
-
128
-
129
-
130
-
131
-
132
-
133
-
134
-
135
-
136
-
137
-
138
-
139
-
140
-
141
-
142
-
143
-
144
-
145
-
146
-
147
-
148
-
149
-
150
-
151
-
152
-
 153
153 -
 154
154 -
 155
155 -
 156
156 -
 157
157 -
 158
158 -
 159
159 -
 160
160 -
 161
161 -
 162
162 -
 163
163 -
164
-
165
-
166
-
167
-
168
-
169
-
170
-
171
-
172
-
173
-
174
-
175
-
176
-
177
-
178
-
179
-
180
-
181
-
182
-
183
-
184
-
185
-
186
-
187
-
188
-
189
-
190
-
191
-
192
-
193
-
194
-
195
-
196
-
197
-
198
-
199
-
200
-
201
-
202
-
203
-
204
-
205
-
206
-
207
-
208
-
209
-
210
-
211
-
212
-
213
-
214
-
215
-
216
-
217
-
218
-
219
-
220
-
221
-
222
-
223
-
224
-
225
-
226
-
227
-
228
-
229
-
230
-
231
-
232
-
233
-
234
-
235
-
236
-
237
-
238
-
239
-
240
-
241
-
242
-
243
-
244
-
245
-
246
-
247
-
248
-
249
-
250
-
251
-
252
-
253
-
254
-
255
-
256
-
257
-
258
-
259
-
260
-
261
-
262
-
263
-
264
-
265
-
266
-
267
-
268
-
269
-
270
-
271
-
272
-
273
-
274
-
275
-
276
-
277
-
278
-
279
-
280
-
281
-
282
-
283
-
284
-
285
-
286
-
287
-
288
-
289
-
290
-
291
-
292
-
293
-
294
-
295
-
296
-
297
-
298
-
299
-
300
-
301
-
302
-
303
-
304
-
305
-
306
-
307
-
308
-
309
-
310
-
311
-
312
-
313
-
314
-
315
-
316
-
317
-
318
-
319
-
320
-
321
-
322
-
323
-
324
-
325
-
326
-
327
-
328
-
329
-
330
-
331
-
332
-
333
-
334
-
335
-
336
-
337
-
338
-
339
-
340
-
341
-
342
-
343
-
344
-
345
-
346
-
347
-
348
-
349
-
350
-
351
-
352
-
353
-
354
-
355
-
356
-
357
-
358
-
359
-
360
-
361
-
362
-
363
-
364
-
365
-
366
-
367
-
368
-
369
-
370
-
371
-
372
-
373
-
374
-
375
-
376
-
377
-
378
-
379
-
380
-
381
-
382
-
383
-
384
-
385
-
386
-
387
-
388
-
389
-
390
-
391
-
392
-
393
-
394
-
395
-
396
-
397
-
398
-
399
-
400
-
401
-
402
-
403
-
404
-
405
-
406
-
407
-
408
-
409
-
410
-
411
-
412
-
413
-
414
-
415
-
416
-
417
-
418
-
419
-
420
-
421
-
422
-
423
-
424
-
425
-
426
-
427
-
428
-
429
-
430
-
431
-
432
-
433
-
434
-
435
-
436
-
437
-
438
-
439
-
440
-
441
-
442
-
443
-
444
-
445
-
446
-
447
-
448
-
449
-
450
-
451
-
452
-
453
-
454
-
455
-
456
-
457
-
458
-
459
-
460
-
461
-
462
-
463
-
464
-
465
 |
 |
